Welcome to Shinami!
This guide is for you if you just made a Shinami account. It shows you key steps to take to set up your account. It doesn’t cover anything about your integration.Here’s how to
invite a team member, change your contact email and workspace name
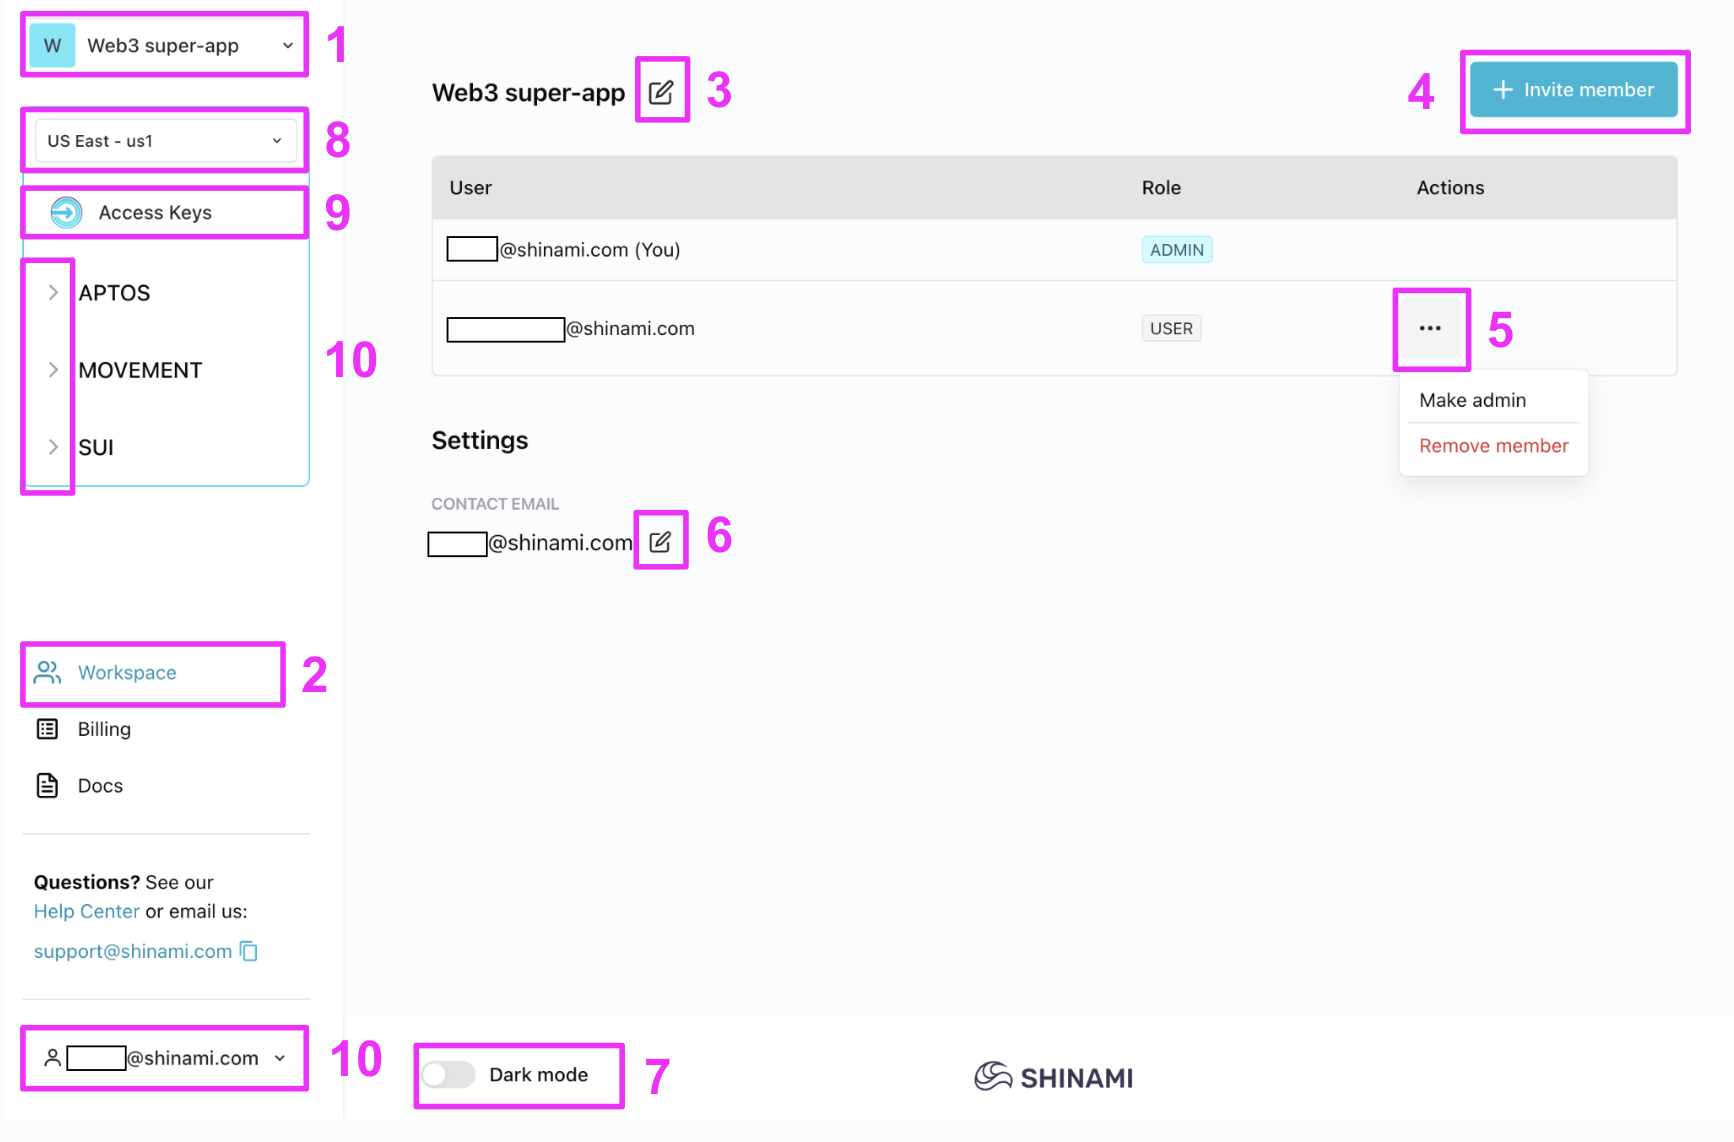
Maybe you like working alone. That’s cool. Skip to the next section. If you prefer working on a team (like me) you’ll want to visit the Workspace page of your dashboard (shown below).Note: Only admins can invite others. When you create an account, you’re an admin.
- If you were invited to multiple workspaces, you’ll switch between them here. Lucky you. So popular.
- The workspace button takes you to… you guessed it.
- Set the workspace to your company, app, or pet’s name - something the person you invite will recognize.
- Invite someone. By default, they’re a regular user and you’re an admin with the power of a god!!!*
- If you mistyped the invited email address, or suddenly decide that you actually do want to work alone, you can remove the invite. If the person you invited says they didn’t get it, you can resend (make sure to ask them to check their spam folder just in case).
- This is the email address we send important things like billing emails and occasional emails about key product changes that affect your workspace. By default it’s the email address that created the workspace. That’s a lot of pressure for one person! If this is better as another email, like
[email protected]or[email protected], go ahead and update it now. Currently, we don’t send a verification email to the new address, so make sure to double-check the value you enter! - Jedi. Sith. Choose a side.
- We operate our services out of multiple geographic regions (e.g.
US East - us1). Not all services are currently offered in each region, but we plan to expand our offerings over time. API keys - and the API Insights we show you with your request volumes, errors, and latency - are specific to a given region. So, if you use more than one region, you’ll need to use this toggle to see your API keys and activity in each. The thin blue box around the products and the Access Keys page shows what belongs to the region you’ve selected. To learn more about regions, see our regions FAQ. - Once you’ve selected a region, click to visit the Access Keys and make your first API key! Learn how in our Authentication and API Keys guide.
- You can expand and collapse the arrows to see the products available for that region. Remember: not all chains and products are offered in each region today.
- Obviously you’ll never want to log out of our product, so you can ignore this one.
understand billing
To read about what you get for free and what you have to pay for, see your dashboard’s Billing page. It has a tab for each blockchain and then a subtab for each product we offer for that blockchain. If you need a Node Service - and, don’t we all - this is where you learn about our different plans. By default, your account has a free plan for Aptos and Sui. If you need more QPS or requests, you can sign up for a different plan or email us at[email protected] to discuss an enterprise plan.
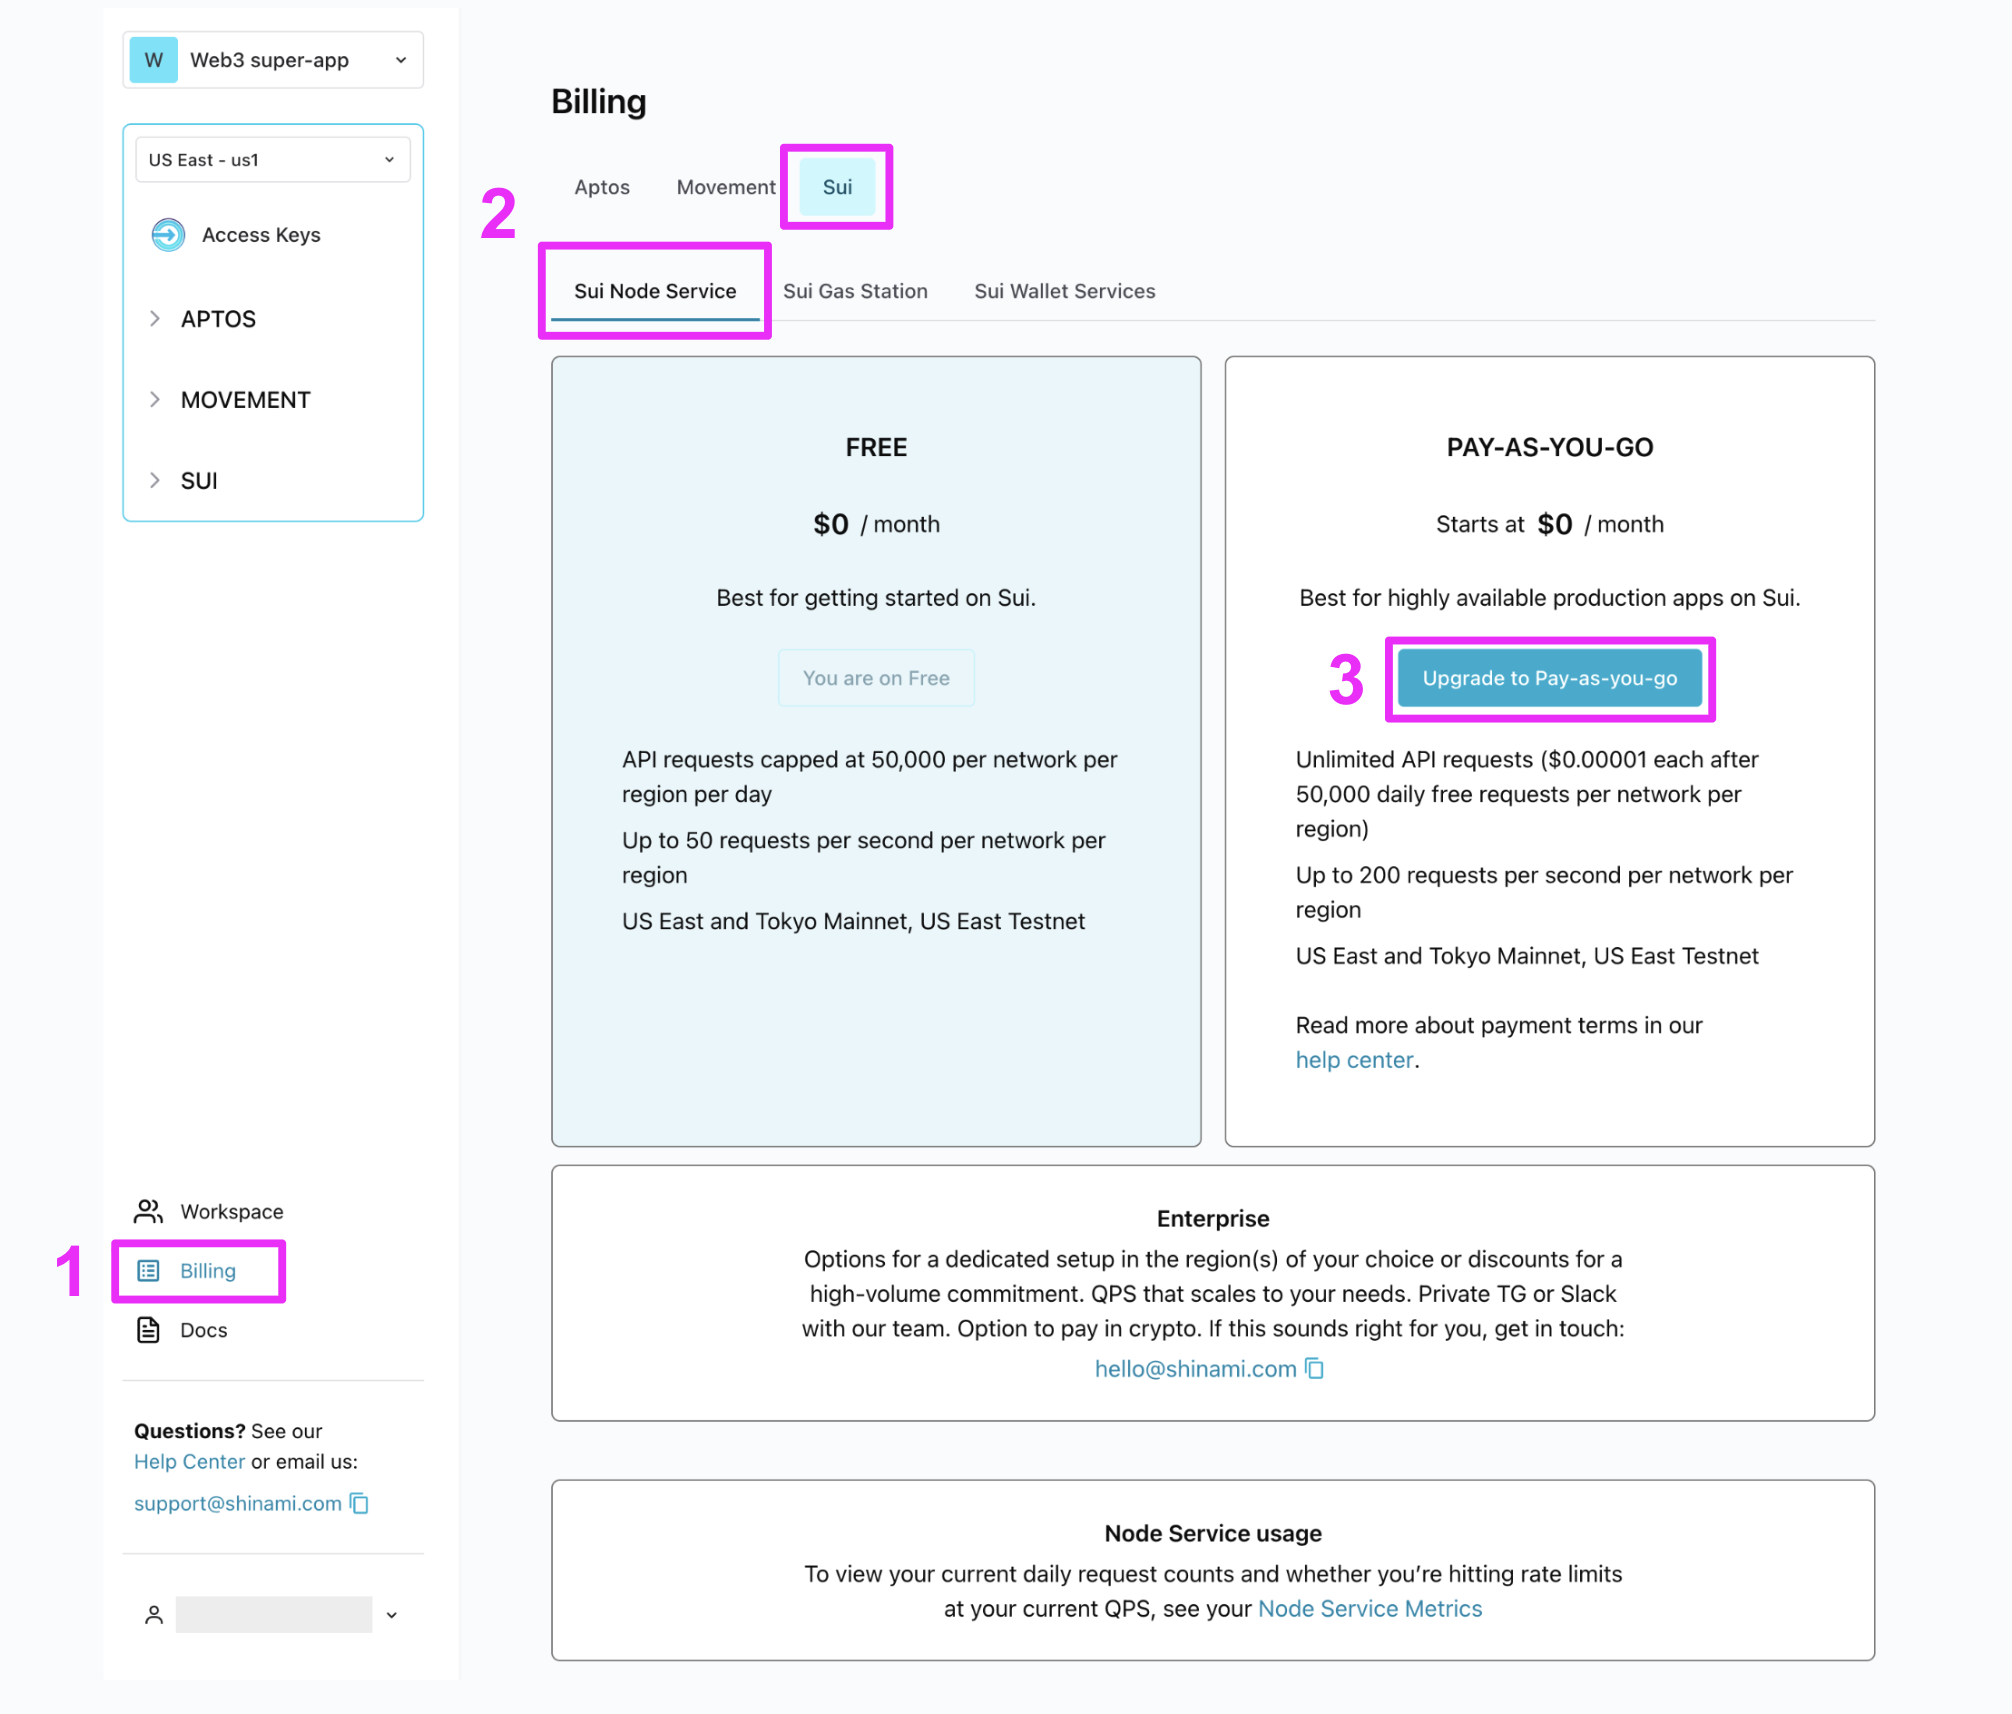
- Click here to get to the Billing page. The Billing page is global (not tied to a specific region). So, information you find here affects all of your product usage across all regions.
- Choose the tab of the service you want to learn about.
- You can upgrade your Sui Node plan here if you need more requests than the free plan offers. If you’re using Aptos, reach out to us if the free plan doesn’t meet your needs.
get help with questions & issues.
You need it. I’m kidding. But only kind of: we all need help sometimes. Here are some key resources you’ll want to keep in mind:- Help Center for commons questions about using your dashboard and using each product.
- You can always reach out to us.