Frontend signing + backend sponsorship
How to integrate Shinami Gas Station transaction sponsorship with signing from a connected browser wallet.
Overview
This guide is meant to help you integrate connected browser wallet signing with Shinami Gas Station transaction sponsorship. We show an integration flow diagram with links to associated sample code.
Shinami's Gas Station only supports integration with your app's backend (no CORS support) for security reasons. This limits exposure of your Gas Station access keys. If these keys are leaked, bad actors have the ability to sponsor transactions from your fund until it has been drained or you disable the key in your Shinami dashboard.
If you have not already set up a Shinami Gas Station Fund and Access Key, and sent a successful sponsorship request, see our Gas Station tutorial for guidance.
Finally, after you review the images and code below, if you get stuck on something and have a question feel free to reach out to us.
Examples
Sample app overview
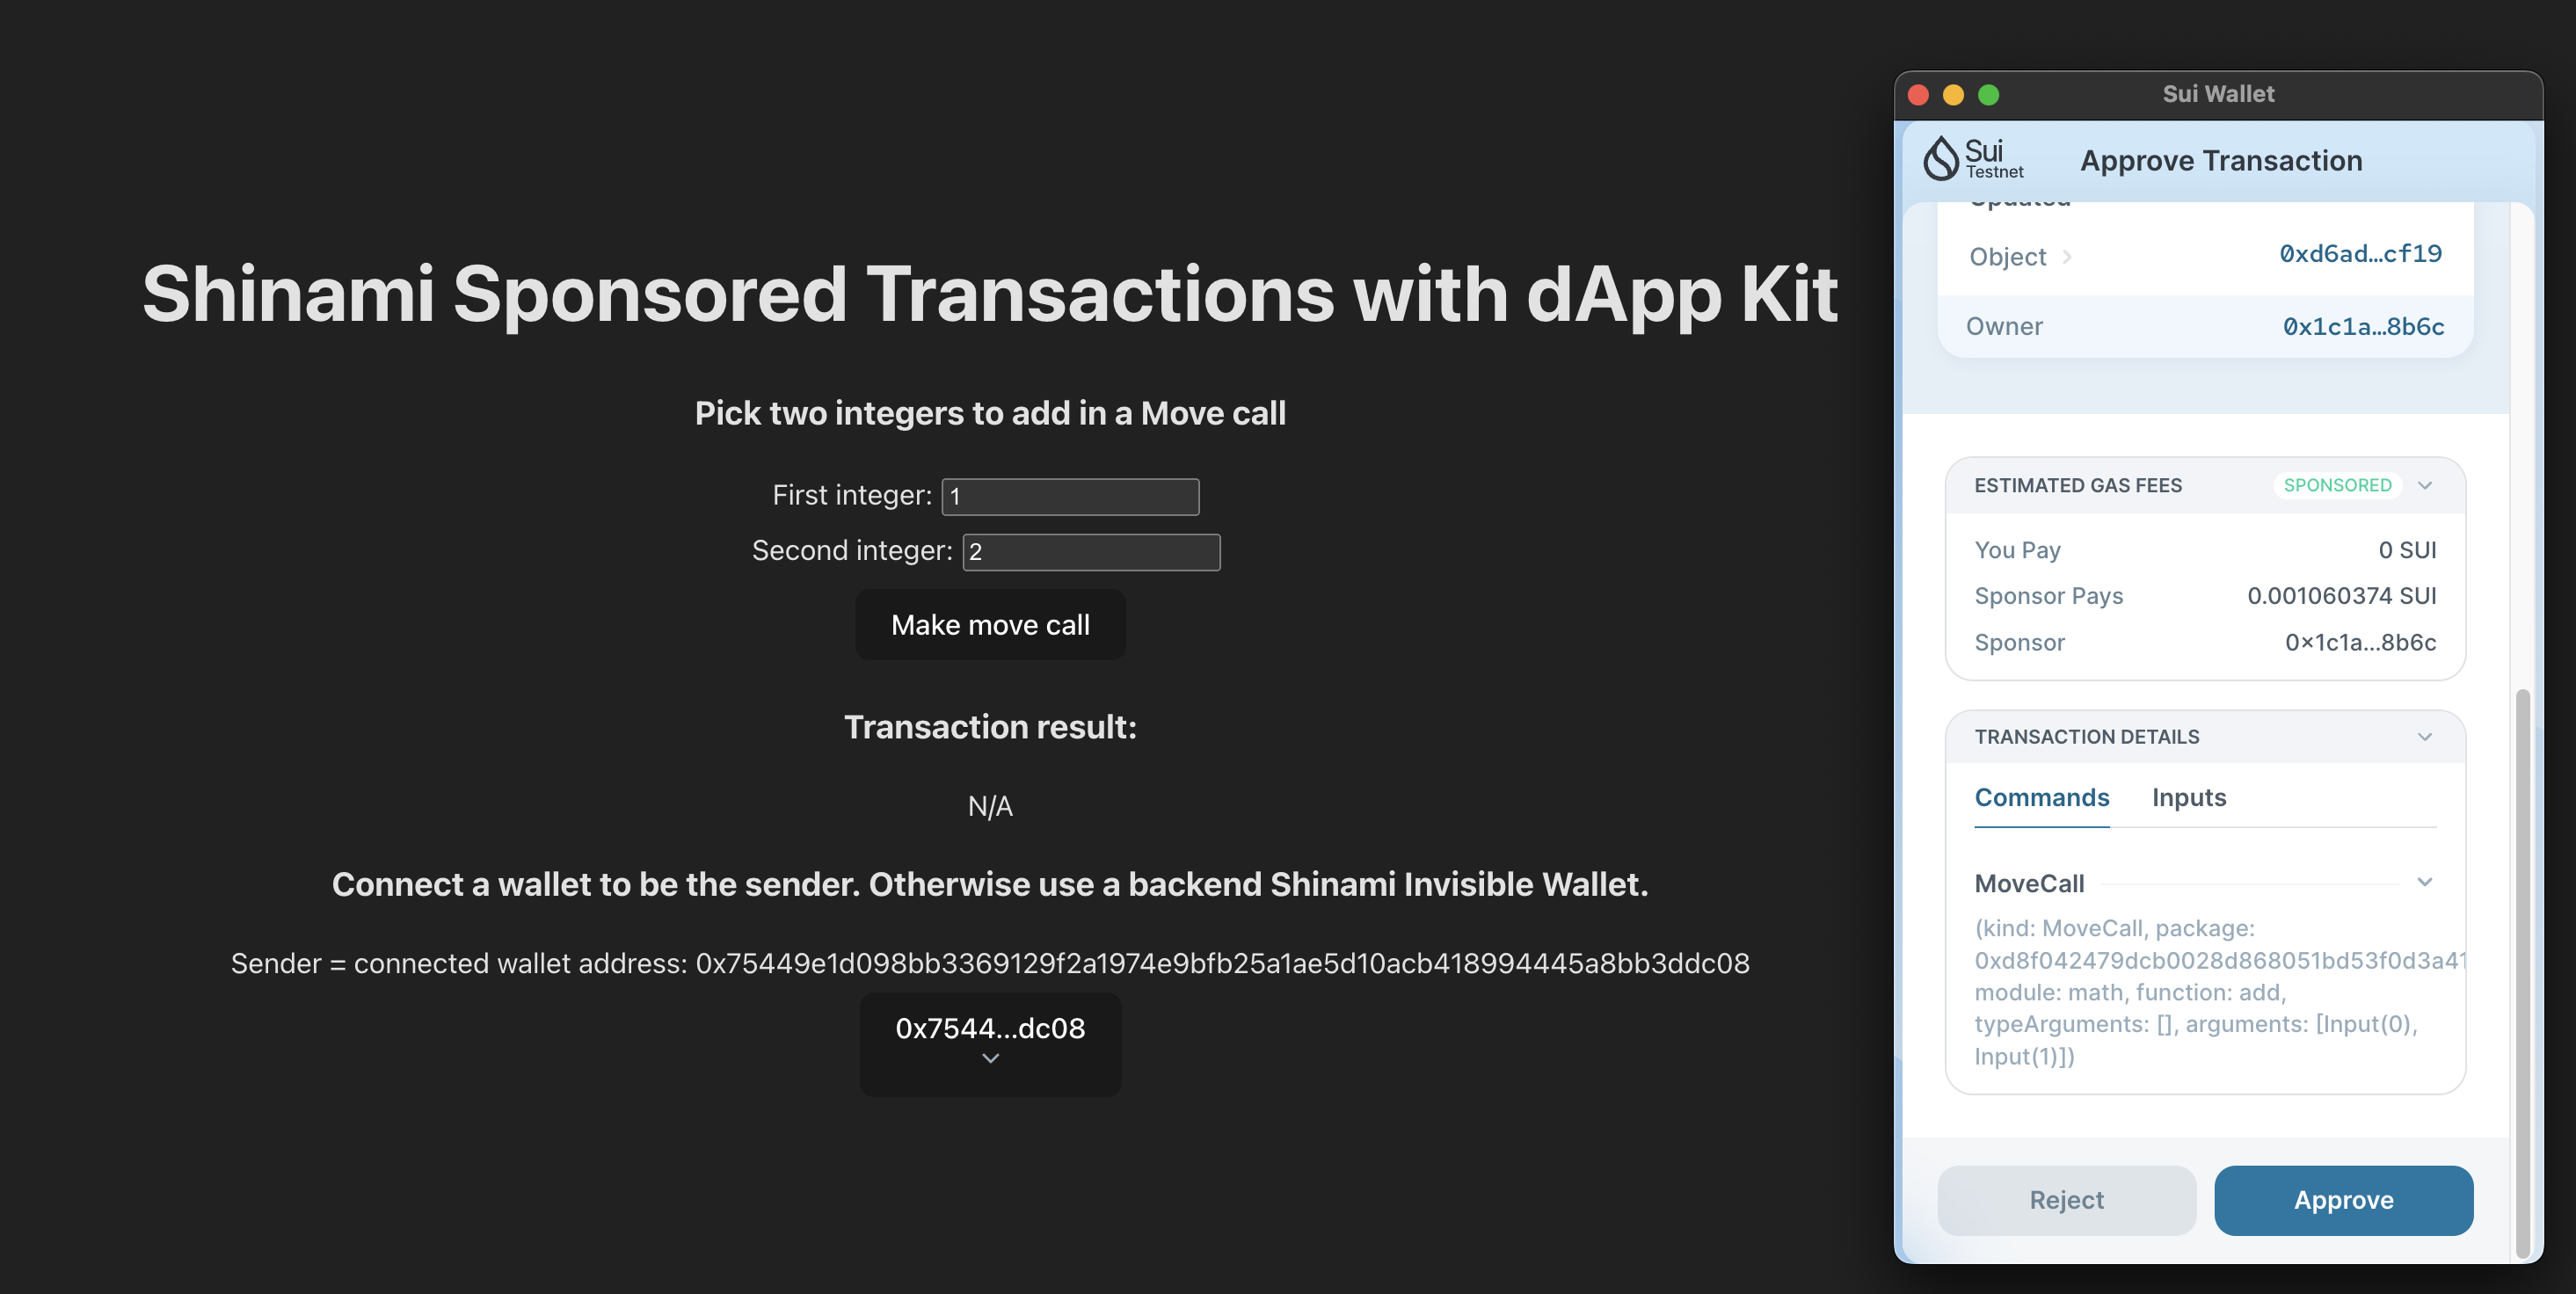
We've created a sample app with a React frontend that uses Sui dApp kit and a backend using the Shinami TypeScript SDK. It integrates with Sui Wallet and a few other connected browser wallets out of the box. We've included it in our shinamicorp/shinami-examples repo . It's not meant as a starter template for a production app (as an example its API endpoints have no authentication mechanism). Instead, it's meant to show you a very simple working example so you can understand the core concepts involved. It includes a README.md file to help you get it up and running quickly if you want to see a working example. Otherwise, you can just follow the diagram and associated links to the code below.
Build and sponsor on the BE, sign and submit on the FE
Image
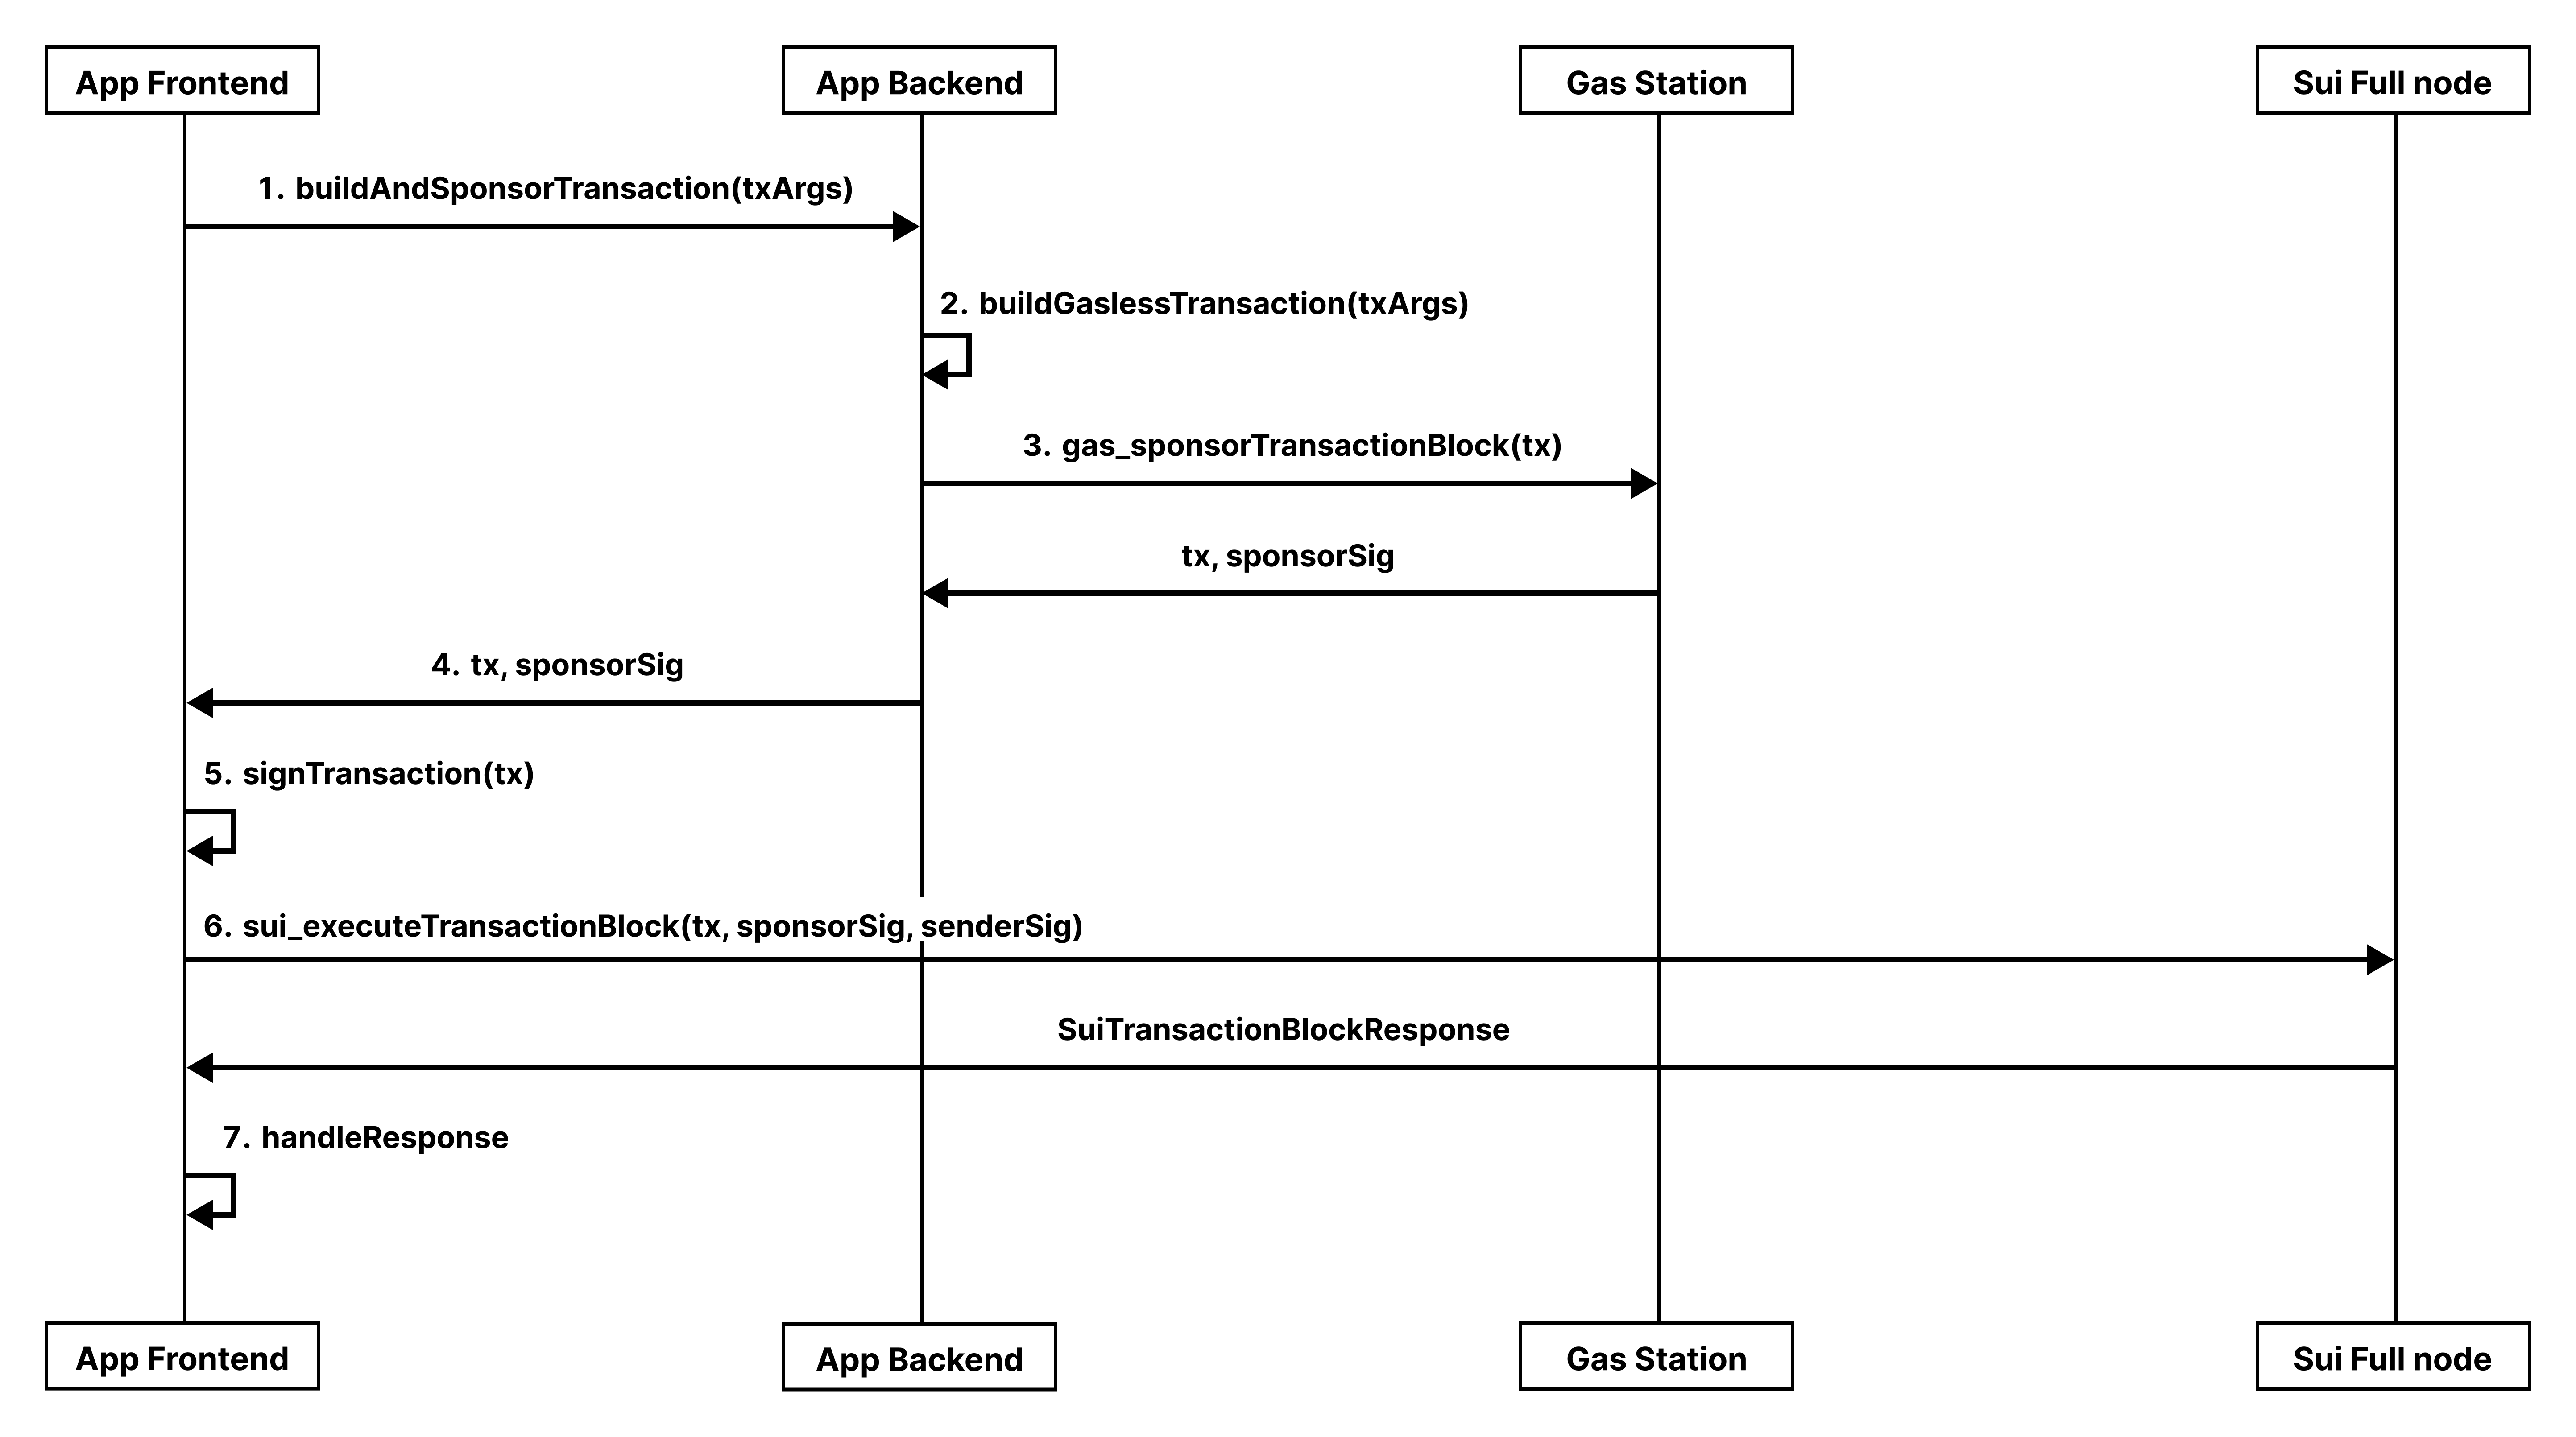
Summary of steps
The links in the steps below take you to the relevant code locations in our sample React + TypeScript app on GitHub. The key functions in the sample app are connectedWalletTxBEBuildFESubmit on the frontend and /buildSponsoredtx on the backend.
- Frontend: Send a request to your app's backend to build and sponsor a transaction. Include any data from the FE needed to build the transaction. In our case, that's the sender's address and the two integers the user submitted in the form on the page (sample code).
- Backend: Build a gasless Move call transaction with the numbers the user provided (sample code). Because we are using the Shinami TypeScript SDK, this produces a
GaslessTransaction, which is just an interface that contains all the required and optional values ourgas_sponsorTransactionBlockendpoint accepts. - Backend: Set the sender's address (provided by the frontend) and get the transaction sponsored via a
gas_sponsorTransactionBlockrequest to Shinami's Gas Station (sample code). - Backend: Handle the response and, if successful, return the sponsored transaction and the sponsor's signature to to the frontend for the sender to sign (sample code).
- Frontend: Obtain the sender's signature over the transaction (sample code).
- Frontend: Submit the transaction and both signatures to the chain with a
sui_executeTransactionBlockrequest (sample code). - Frontend: Handle the response as needed. In our sample app, we poll a Sui Full node until it has a record of the transaction and then print the user's math result that was included in the transaction (sample code).
Build and sponsor on the BE, sign on the FE, submit on the BE
Image
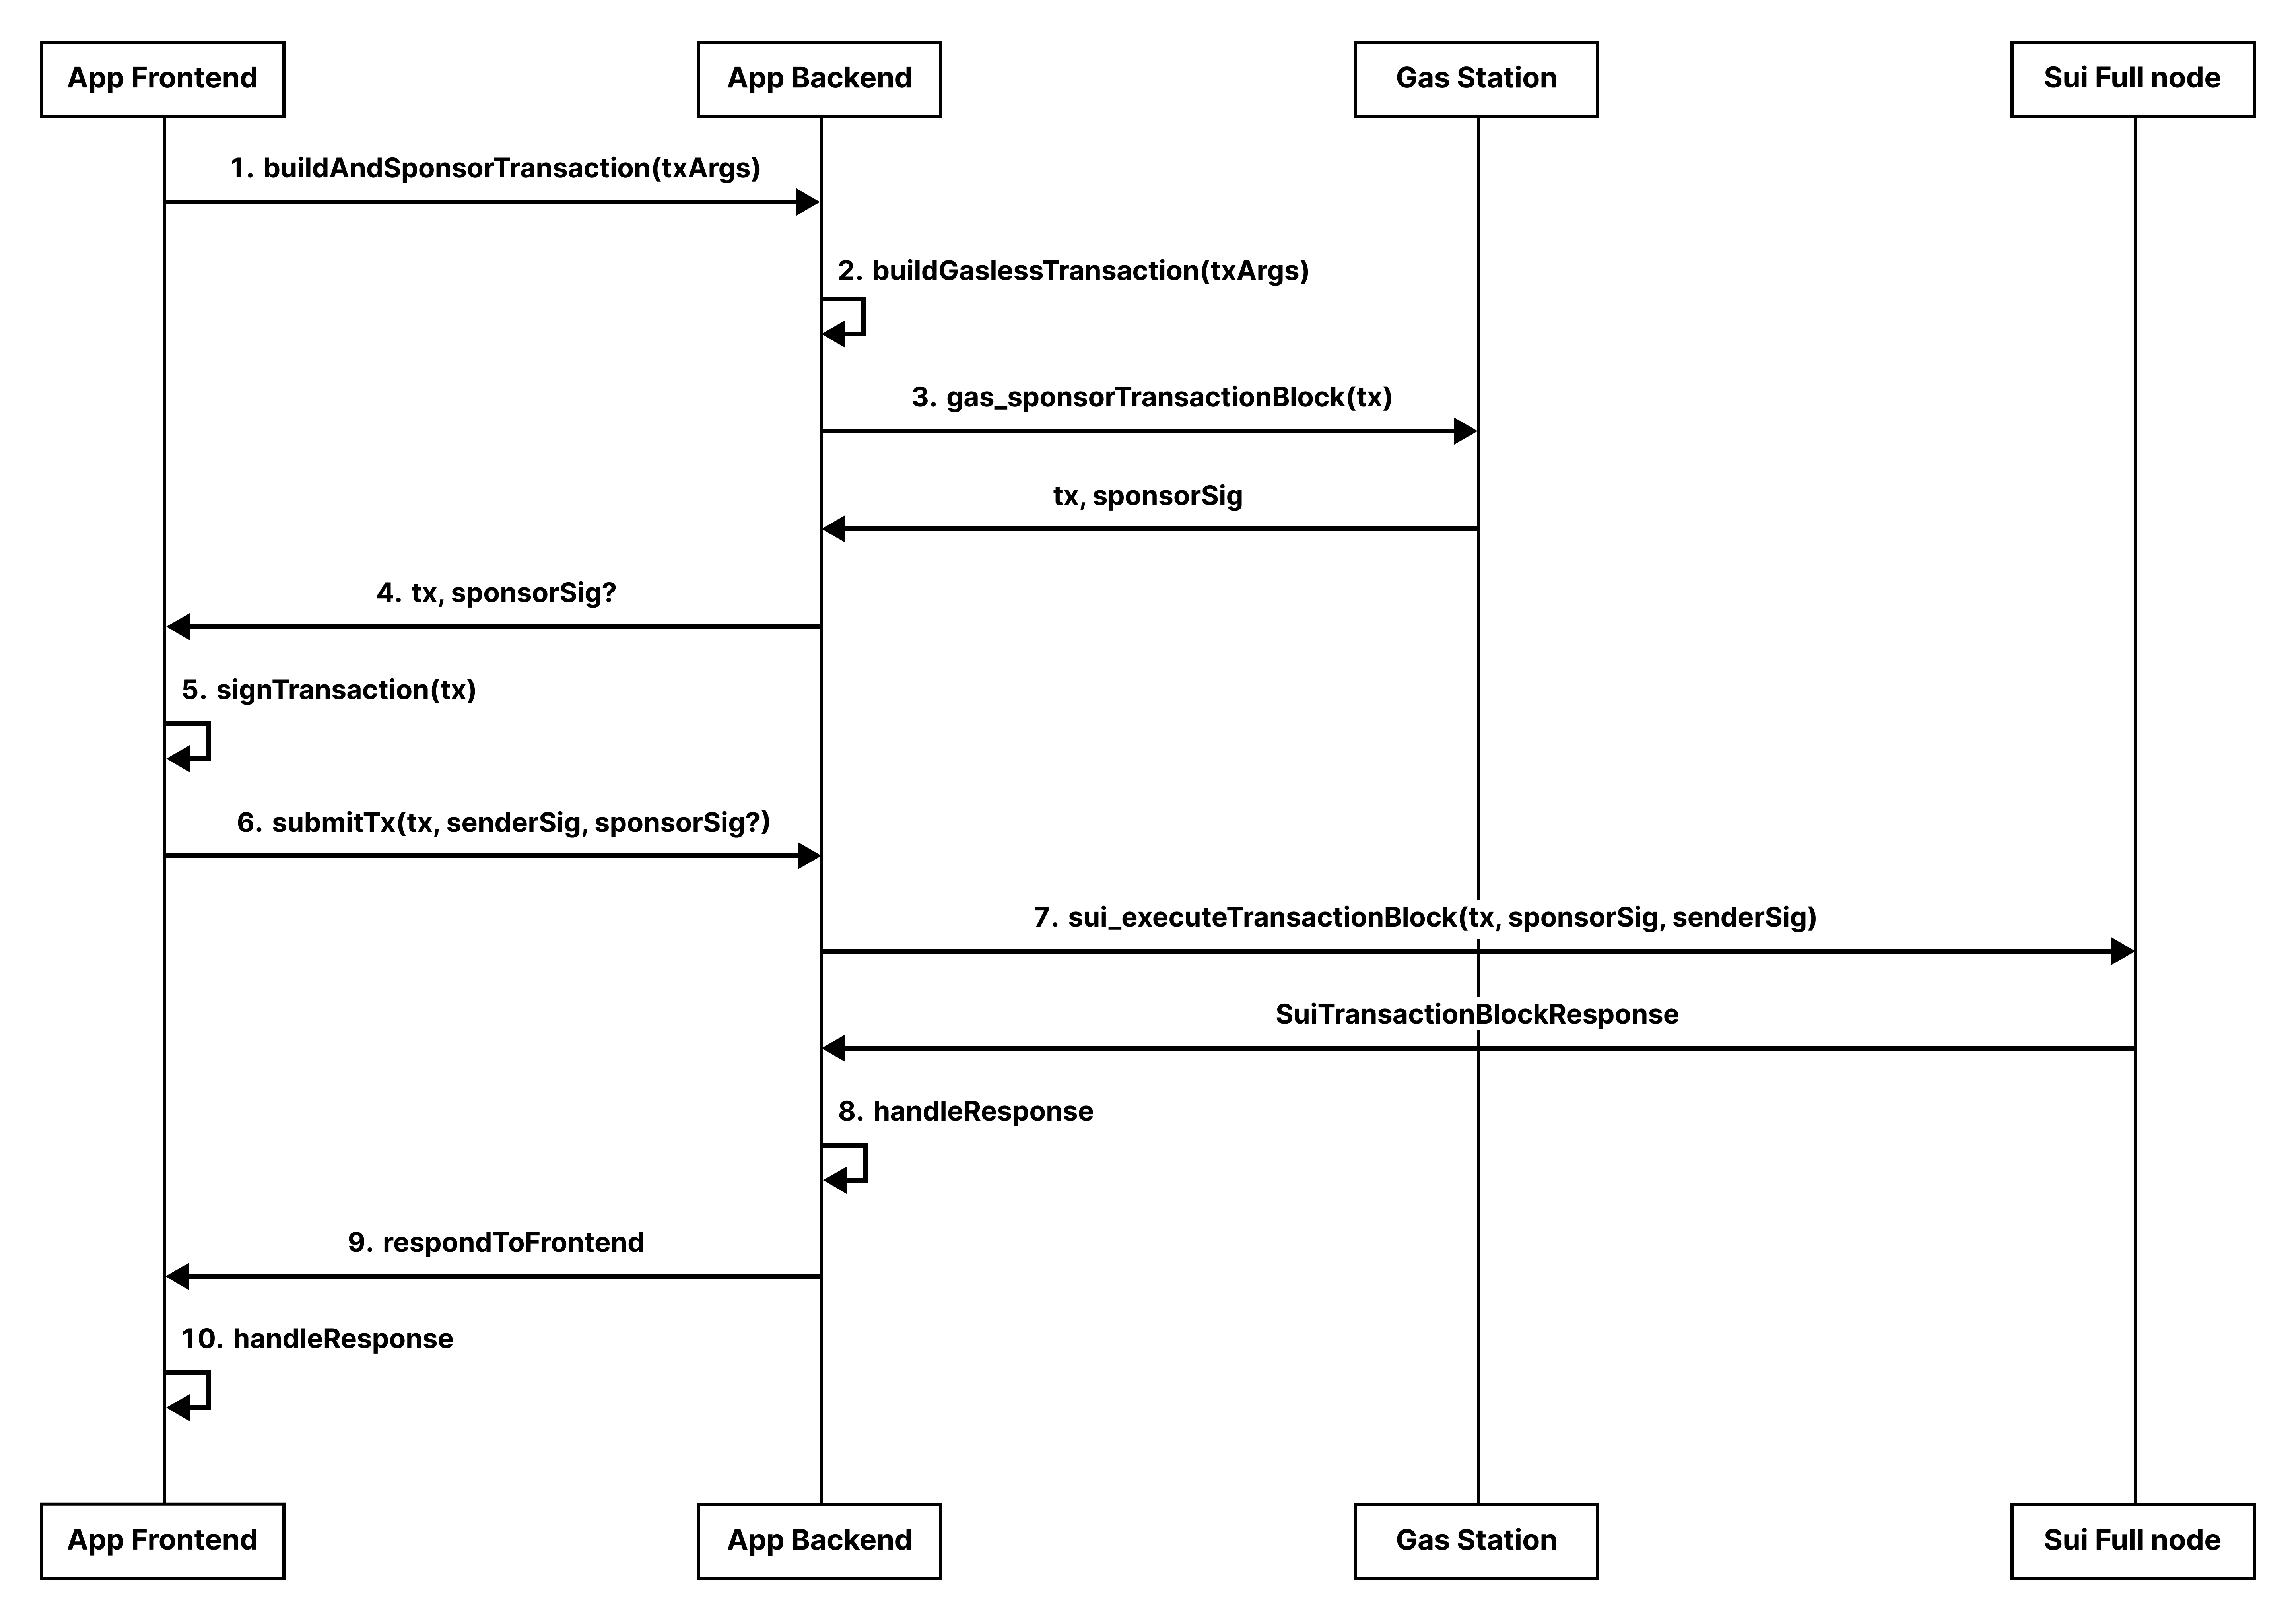
Summary of steps
The links in the steps below take you to the relevant code locations in our sample React + TypeScript app on GitHub. The key functions in the sample app are connectedWalletTx on the frontend and /buildSponsoredtx and /executeSponsoredTx on the backend.
- Frontend: Send a request to your app's backend to build and sponsor a transaction. Include any data from the FE needed to build the transaction. In our case, that's the sender's address and the two integers the user submitted in the form on the page (sample code).
- Backend: Build a gasless Move call transaction with the numbers the user provided. (sample code). Because we are using the Shinami TypeScript SDK, this produces a
GaslessTransaction, which is just an interface that contains all the required and optional values ourgas_sponsorTransactionBlockendpoint accepts. - Backend: Set the sender's address (provided by the frontend) and get the transaction sponsored via a
gas_sponsorTransactionBlockrequest to Shinami's Gas Station (sample code). - Backend: Handle the response and, if successful, return the sponsored transaction to the frontend for the sender to sign (sample code). You technically do not need to send the sponsor signature to the FE in step 4 because we are executing the transaction on the backend, but it's easy to pass it back and forth.
- Frontend: Obtain the sender's signature over the transaction (sample code).
- Frontend: Make a request to the backend to submit the transaction to the chain. Include the transaction and sponsor signature, along with the newly-acquired sender signature (sample code).
- Backend: Submit the transaction and both signatures to the chain with a
sui_executeTransactionBlockrequest (sample code). - Backend: Handle the response as needed.
- Backend: Response to the frontend. In our sample app, we send back the
SuiTransactionBlockResponsefrom the Full node (sample code). - Frontend: Handle the response as needed. In our sample app, we poll a Sui Full node until it has a record of the transaction and then print the user's math result that was included in the transaction (sample code).
Appendix
Signing with an embedded zkLogin wallet tied to your app
This follows a very similar flow to the example above. The key difference is that the frontend signs with the user's ephemeral KeyPair and the backend assembles the zk signature using the emphemeral signature and the zkProof. For an image of this flow, see the README of our Next.js zkLogin SDK.
Updated 4 months ago