Authentication, Rate Limits, and Error Handling
Authentication
Our service URL ishttps://api.us1.shinami.com/aptos/graphql/v1. You authenticate via an access key passed in a header ("X-Api-Key: ACCESS_KEY" or "Authorization: Bearer ACCESS_KEY"). These steps are done automatically by our TypeScript SDK. Region URLs - us1 above - only work with API keys created in the same region. So, to use this API, you’ll make Node Service API keys in our US East - us1 region. For more information, including how to set up API access keys, see our Authentication and API Keys guide.
Rate Limits
When you surpass the CUPS (Compute Units Per Second) limit for a key, we return a HTTP 429. We recommend implementing retries with a backoff to handle any rate limits errors that arise. You can also adjust the rate limits of your keys to better balance your CUPS allotment across your keys. For more on CUPS and monitoring your CU usage, see the Aptos Node Service FAQ in our Help Center.Error Handling
See our Error Reference guide.How to Send a Request
When sending a request to our Node Service, make sure to do the following things (the first two are done automatically by our TypeScript SDK).1
Set the base URL to
https://api.us1.shinami.com/aptos/graphql/v12
Send your access key in one of these two headers:
"Authorization: Bearer YOUR_ACCESS_KEY""X-Api-Key: YOUR_ACCESS_KEY"
3
Use an access key from the same region as the URL you’re using. Region URLs -
us1 above - only work with API keys created in the same region. So, to use this API, you’ll make Node Service API keys in our US East - us1 region.4
Use an access key tied to the network you want to interact with. When you create an API access key in your Shinami dashboard, you give it rights to exactly one network. We route to Mainnet or Testnet based on the API access key you send in the request.
Sample Request
Example Request Template The TypeScript example uses the Shinami Clients SDK, which you can install with:YOUR_ACCESS_KEY with the actual API key value:
Another sample request
For another example that also shows you how to use the error metrics in your Shinami dashboard and our error guide, see our Guide to sending and debugging a Node Service request.Available tables and fields
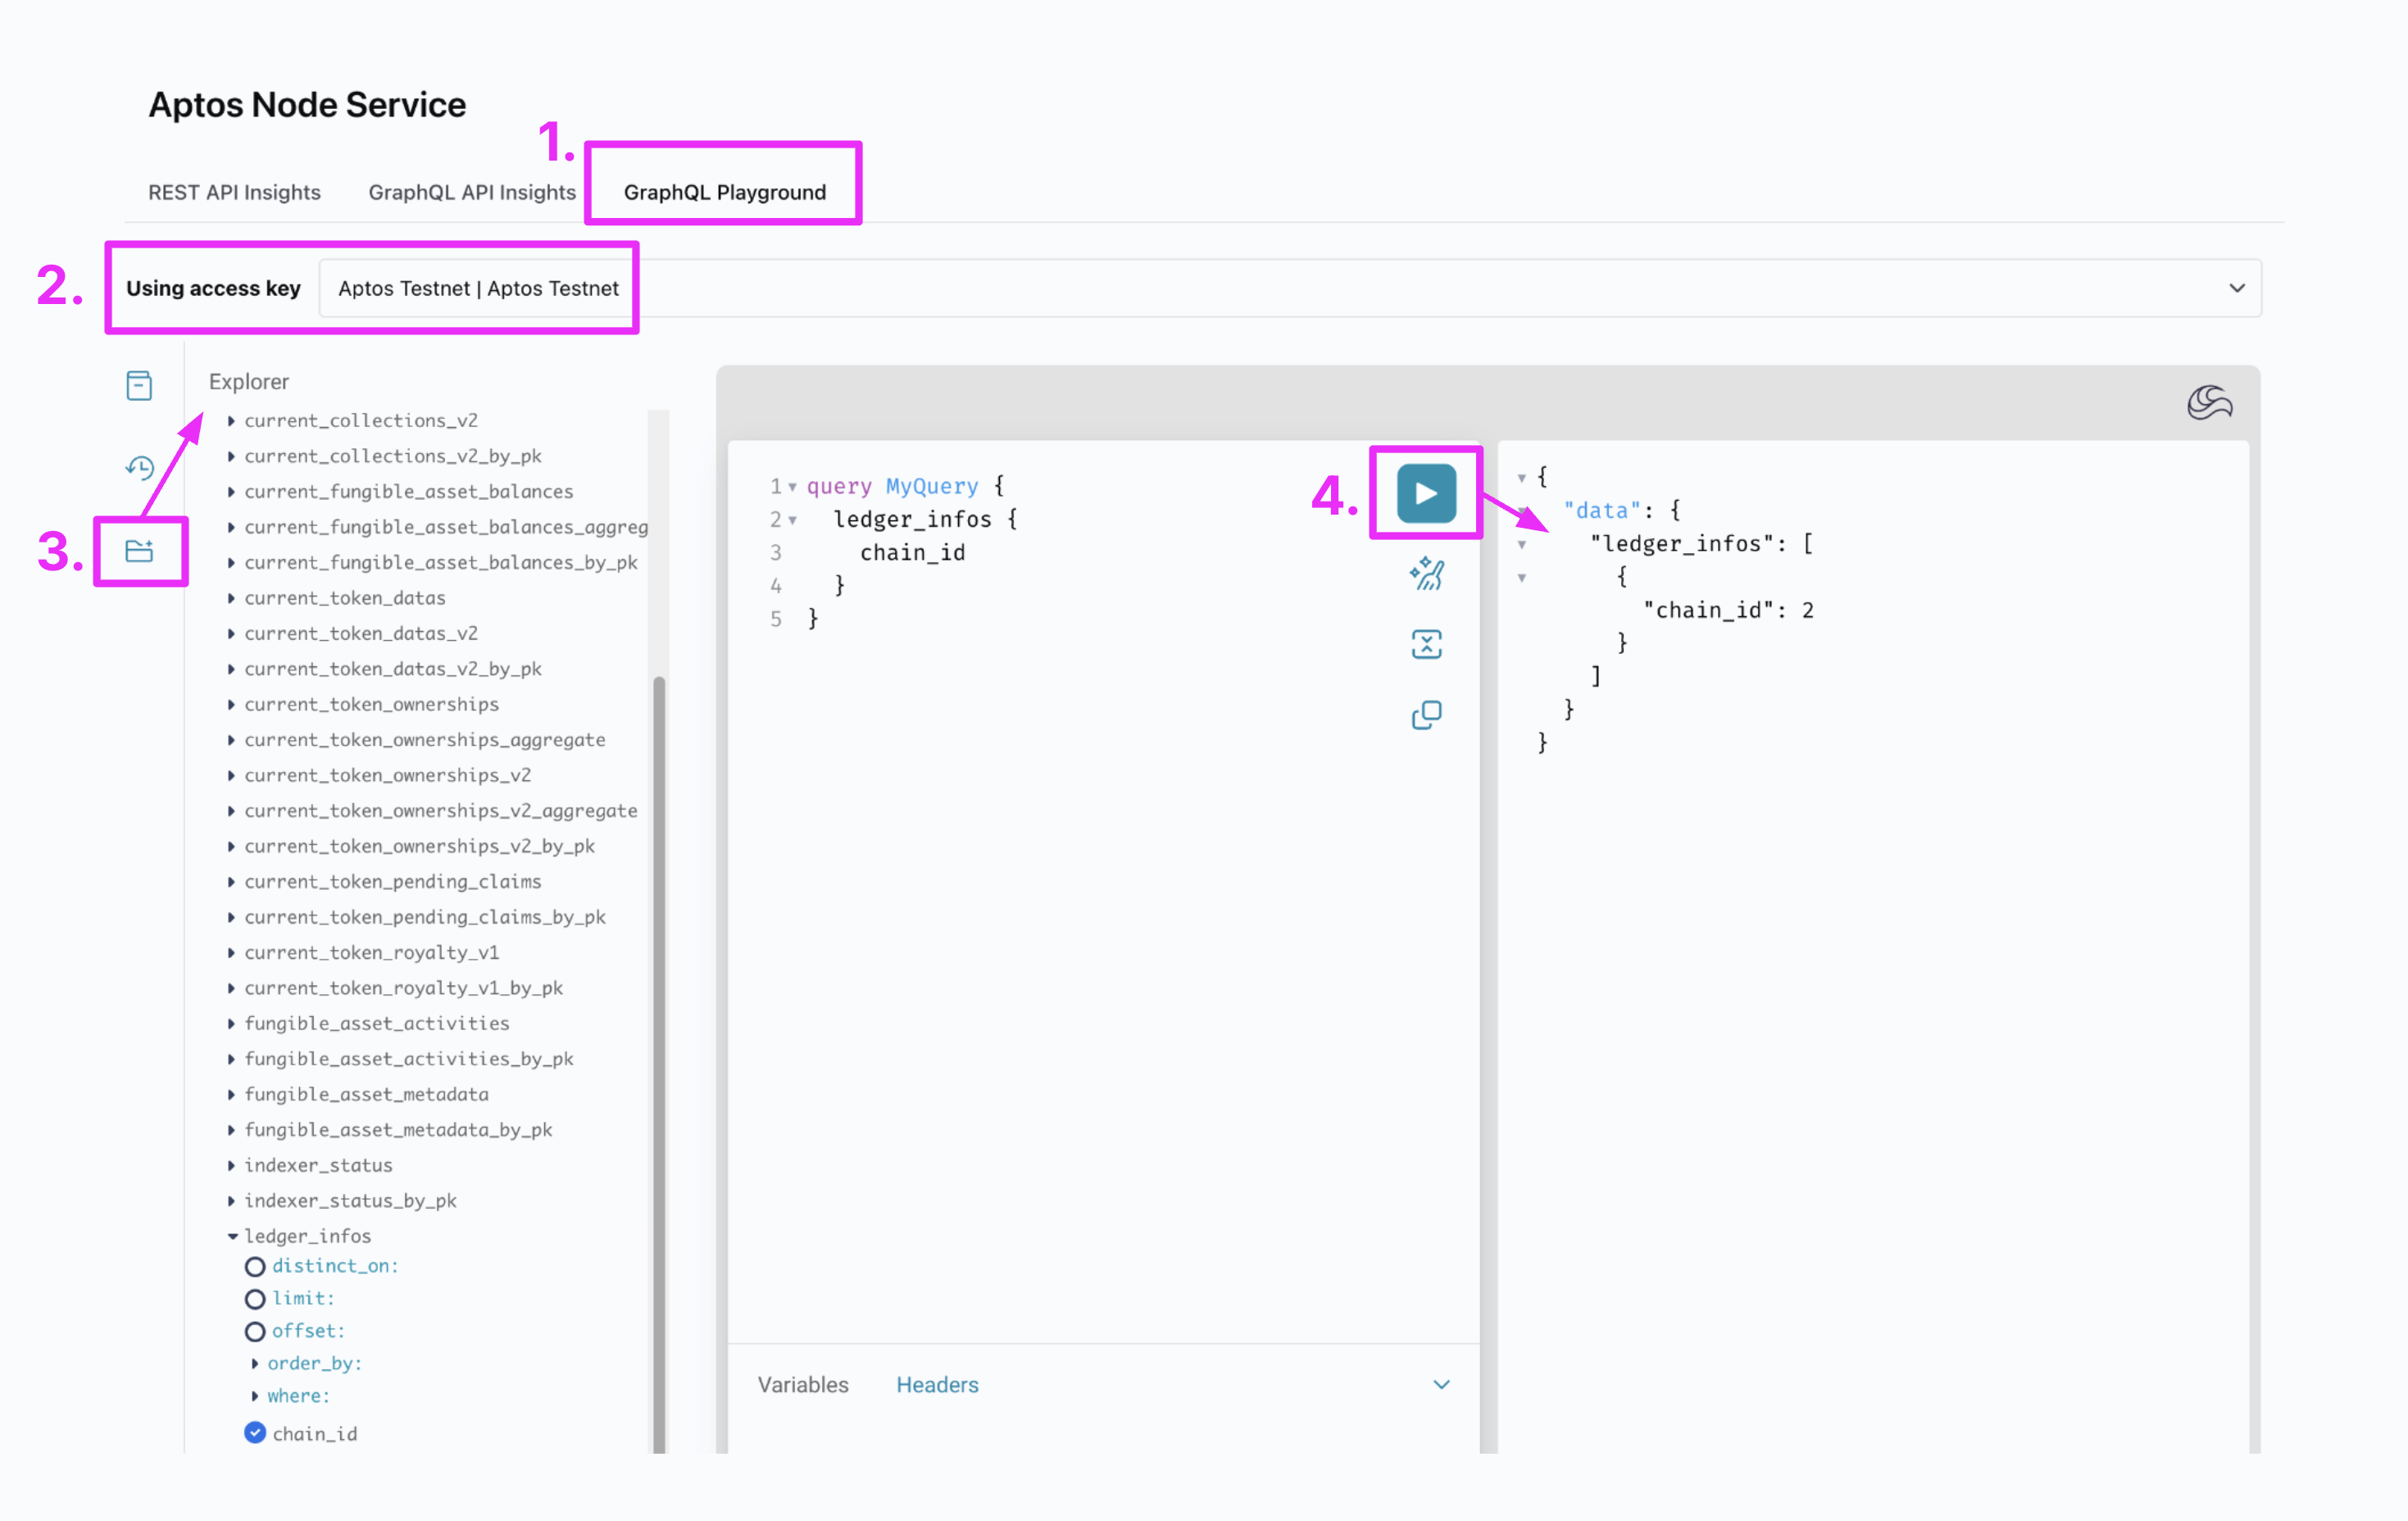
We have an in-dashboard playground to show the tables and fields we support and help you build sample queries!1
Visit the Aptos Node Service page of your dashboard and select the “GraphQL Playground” tab.
2
Choose the API key you want to use with the tool. If you don’t have one, you’ll need to make one first. Since you’re using your API key, any queries you run here will show up in your API insights (and will count against your CU and CUPS limits).
3
Select the folder icon to show the explorer and see your query options
4
Use the explorer and the query composition tab to build queries and then run them to see the result.