What’s in this doc
This guide provides a high-level overview of Shinami’s Gas Station and the benefits it provides to your application. It shows you an image of the entire sponsorship flow, from setting up a fund in your Shinami web dashboard all the way through executing a sponsored transaction. Finally, it summarizes our developer resources for getting started with Gas Station.Gas Station overview
What are gas fees?
A gas fee is the fee charged for writing data to the Aptos blockchain. Writing data is called executing a transaction. Gas fees pay the teams that run the hardware that processes transactions and stores any new data written to the chain. This hardware is called a validator node, as it validates whether or not a transaction is allowed to happen. While gas fees for Aptos are very small - averaging well under 0.001 APT per transaction this year as shown in the “Network Fees (APT)” graph here - they must be paid. Further, they must be paid in APT.Why sponsor transactions?
In short: To create a low-friction user experience and increase user conversion, retention, and engagement. In full: Typically, the wallet that’s executing the transaction (the sender) pays the gas fees for a transaction. This means the wallet must have APT in it. For web2 native users, this adds too much friction: completing KYC checks to purchase APT from an exchange, downloading and setting up a wallet app, transferring APT to their wallet, and then connecting their wallet to your app. You won’t convert many Web2 users this way. Instead, you can use Shinami’s Gas Station to sponsor their transactions and use embedded or Keyless wallets they don’t need to manage. This allows for a great UX, improving sign-up conversion and user retention. Even apps that target Web3-natives, who are used to managing a self-custody wallet, can have a lot of friction from gas fees. For example, when DeFi users who trade non-APT tokens have no APT but need to buy some just to pay a tiny gas fee. This annoyance could lead to fewer actions you want to promote, like deposits and swaps. Sponsoring these actions can increase both your MAU and your revenue per user.What is a gas station?
A gas station is a service that sponsors your user’s transactions. It does two main things:- Sponsor the gas fees of an individual transaction. It must create this sponsorship on-demand and quickly.
- Efficiently and performantly manage the use of your APT sponsorship fund at scale, through high QPS spikes.
End-to-end flow
sponsor -> sign -> submit
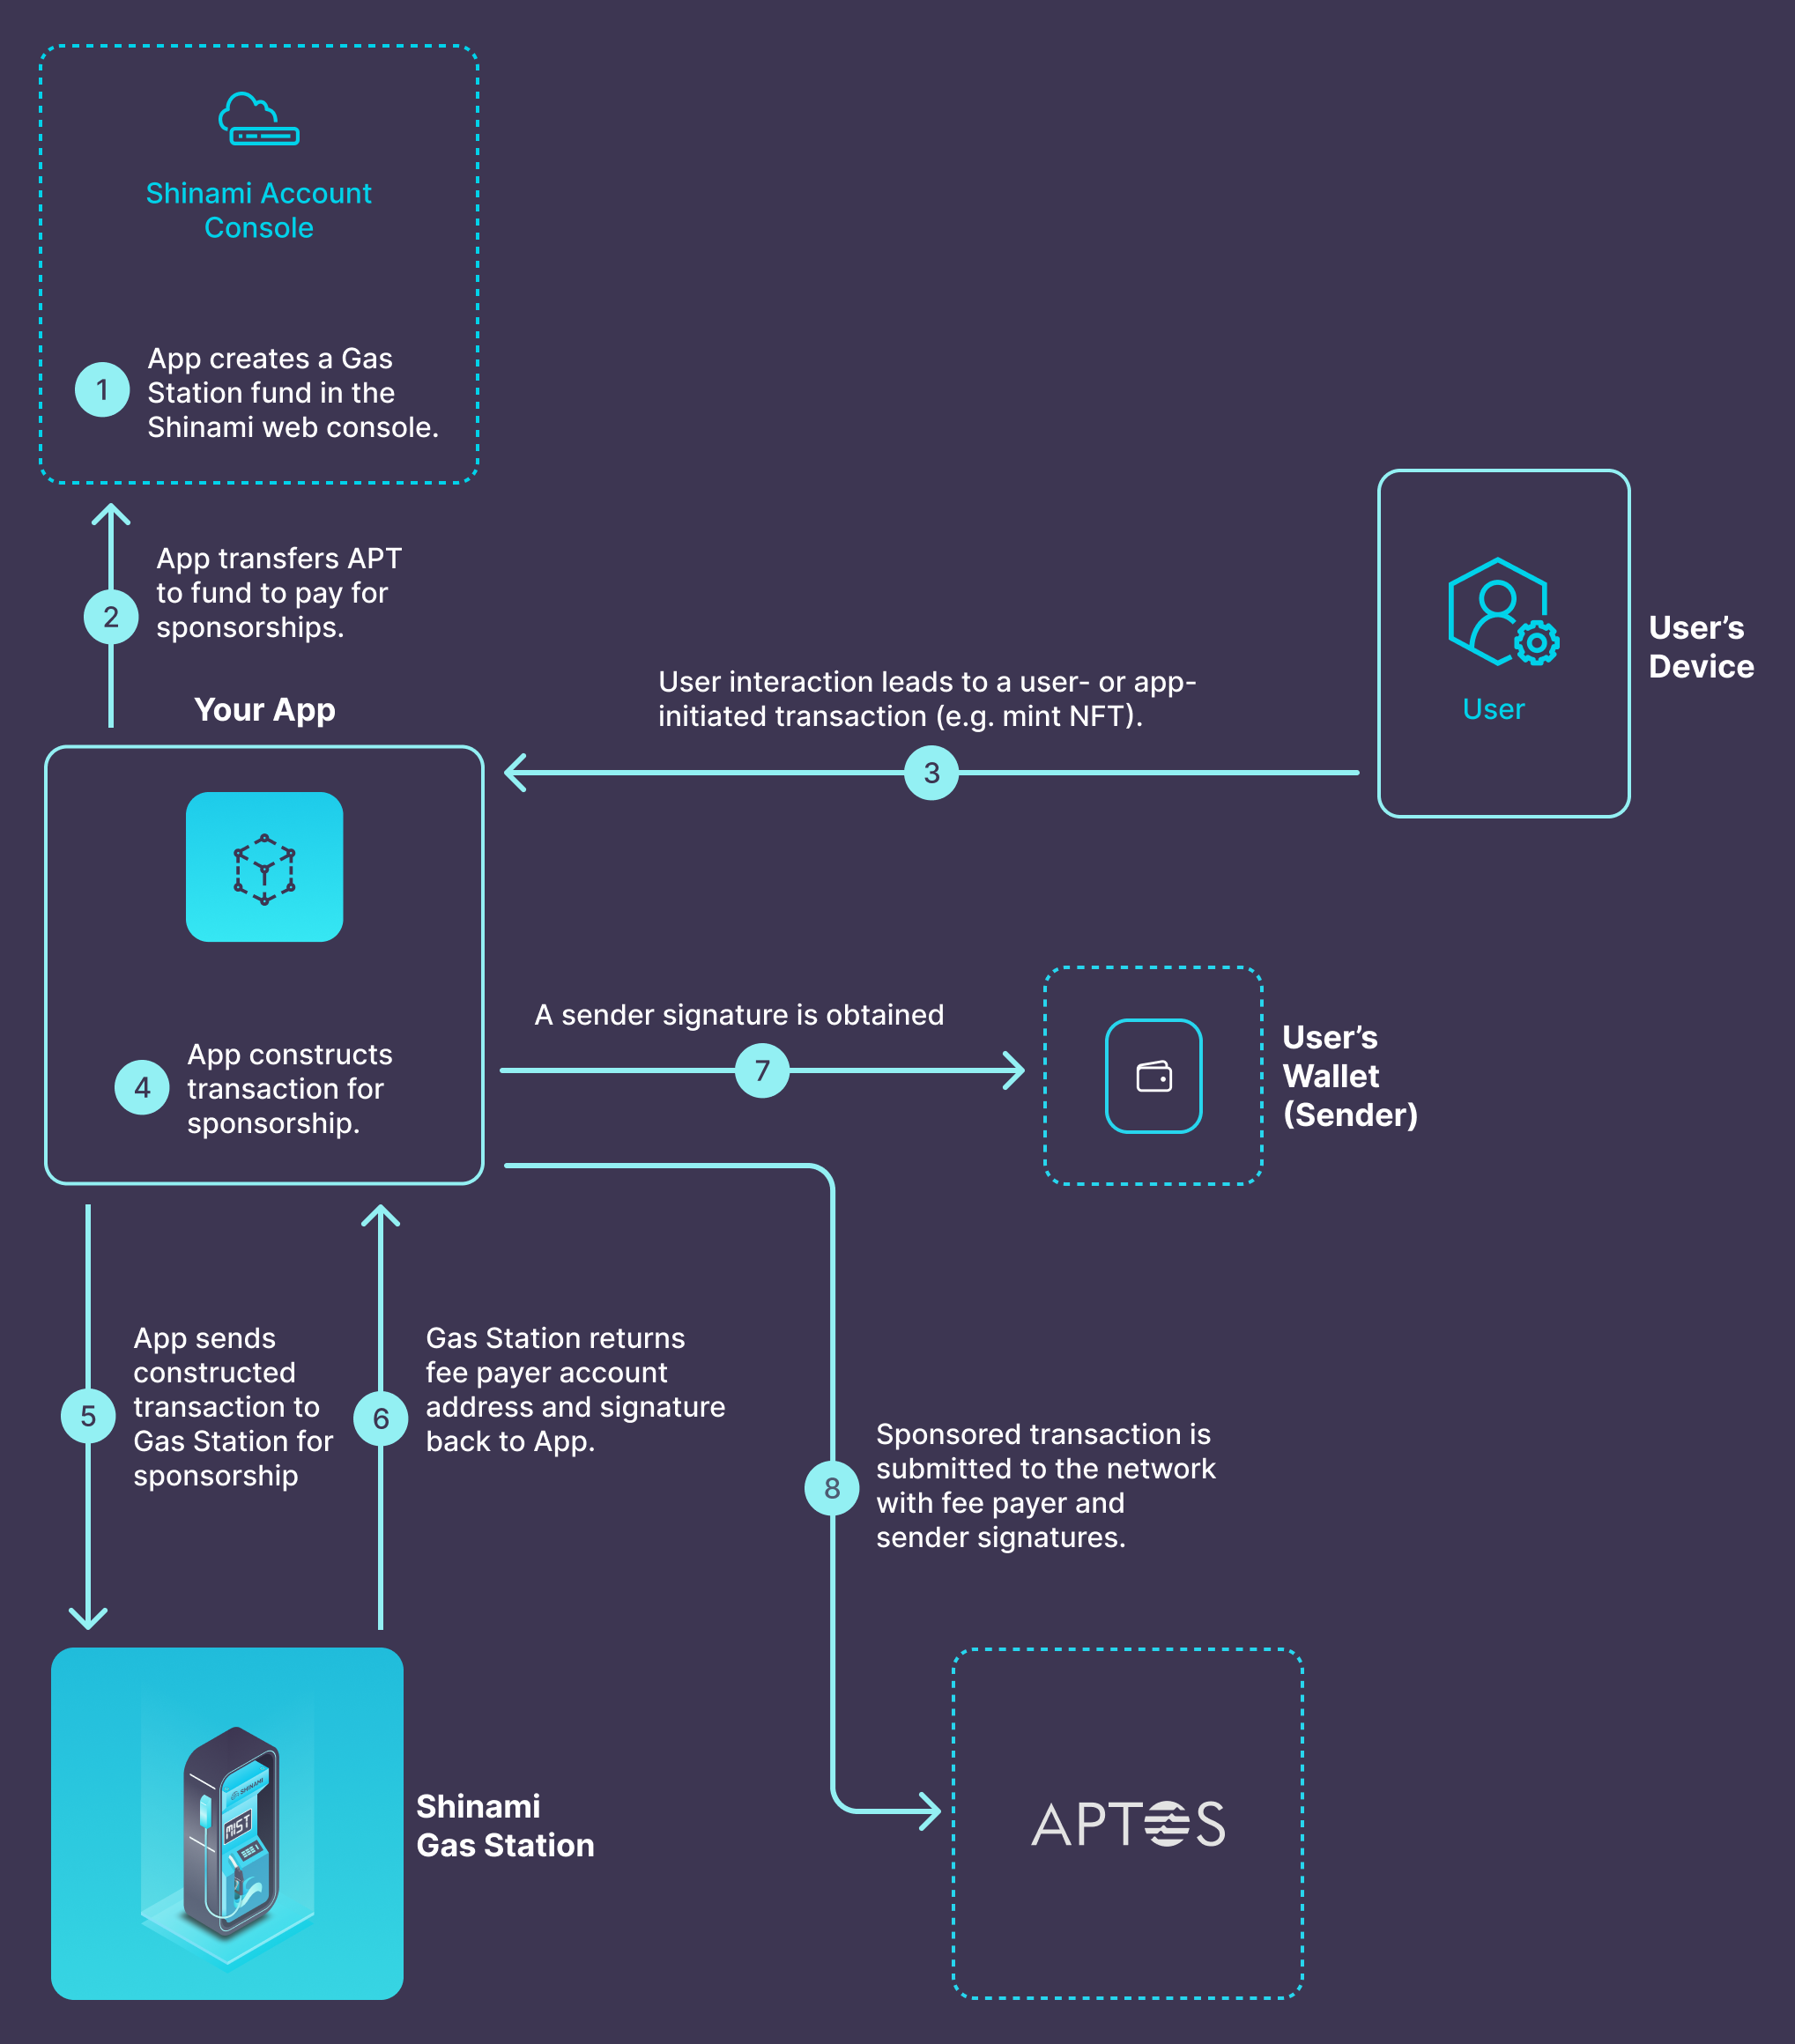
App sends APT to the fund to pay for upcoming sponsorships. (you’ll top off the fund every so often as needed).
An end user interaction with the app initiates a transaction. For example the user requests to mint an NFT or the app mints the user a free NFT for accomplishing a task.
App constructs a mint NFT transaction without fee payer information. The transaction expiration must be set to 1 hour or less.
App sends the raw transaction to Shinami’s Gas Station for sponsorship, along with any secondary signer addresses via a
gas_sponsorTransaction request.Shinami Gas Station sponsors the transaction from the app’s fund and returns the fee payer account address and signature.
sign -> sponsor & submit
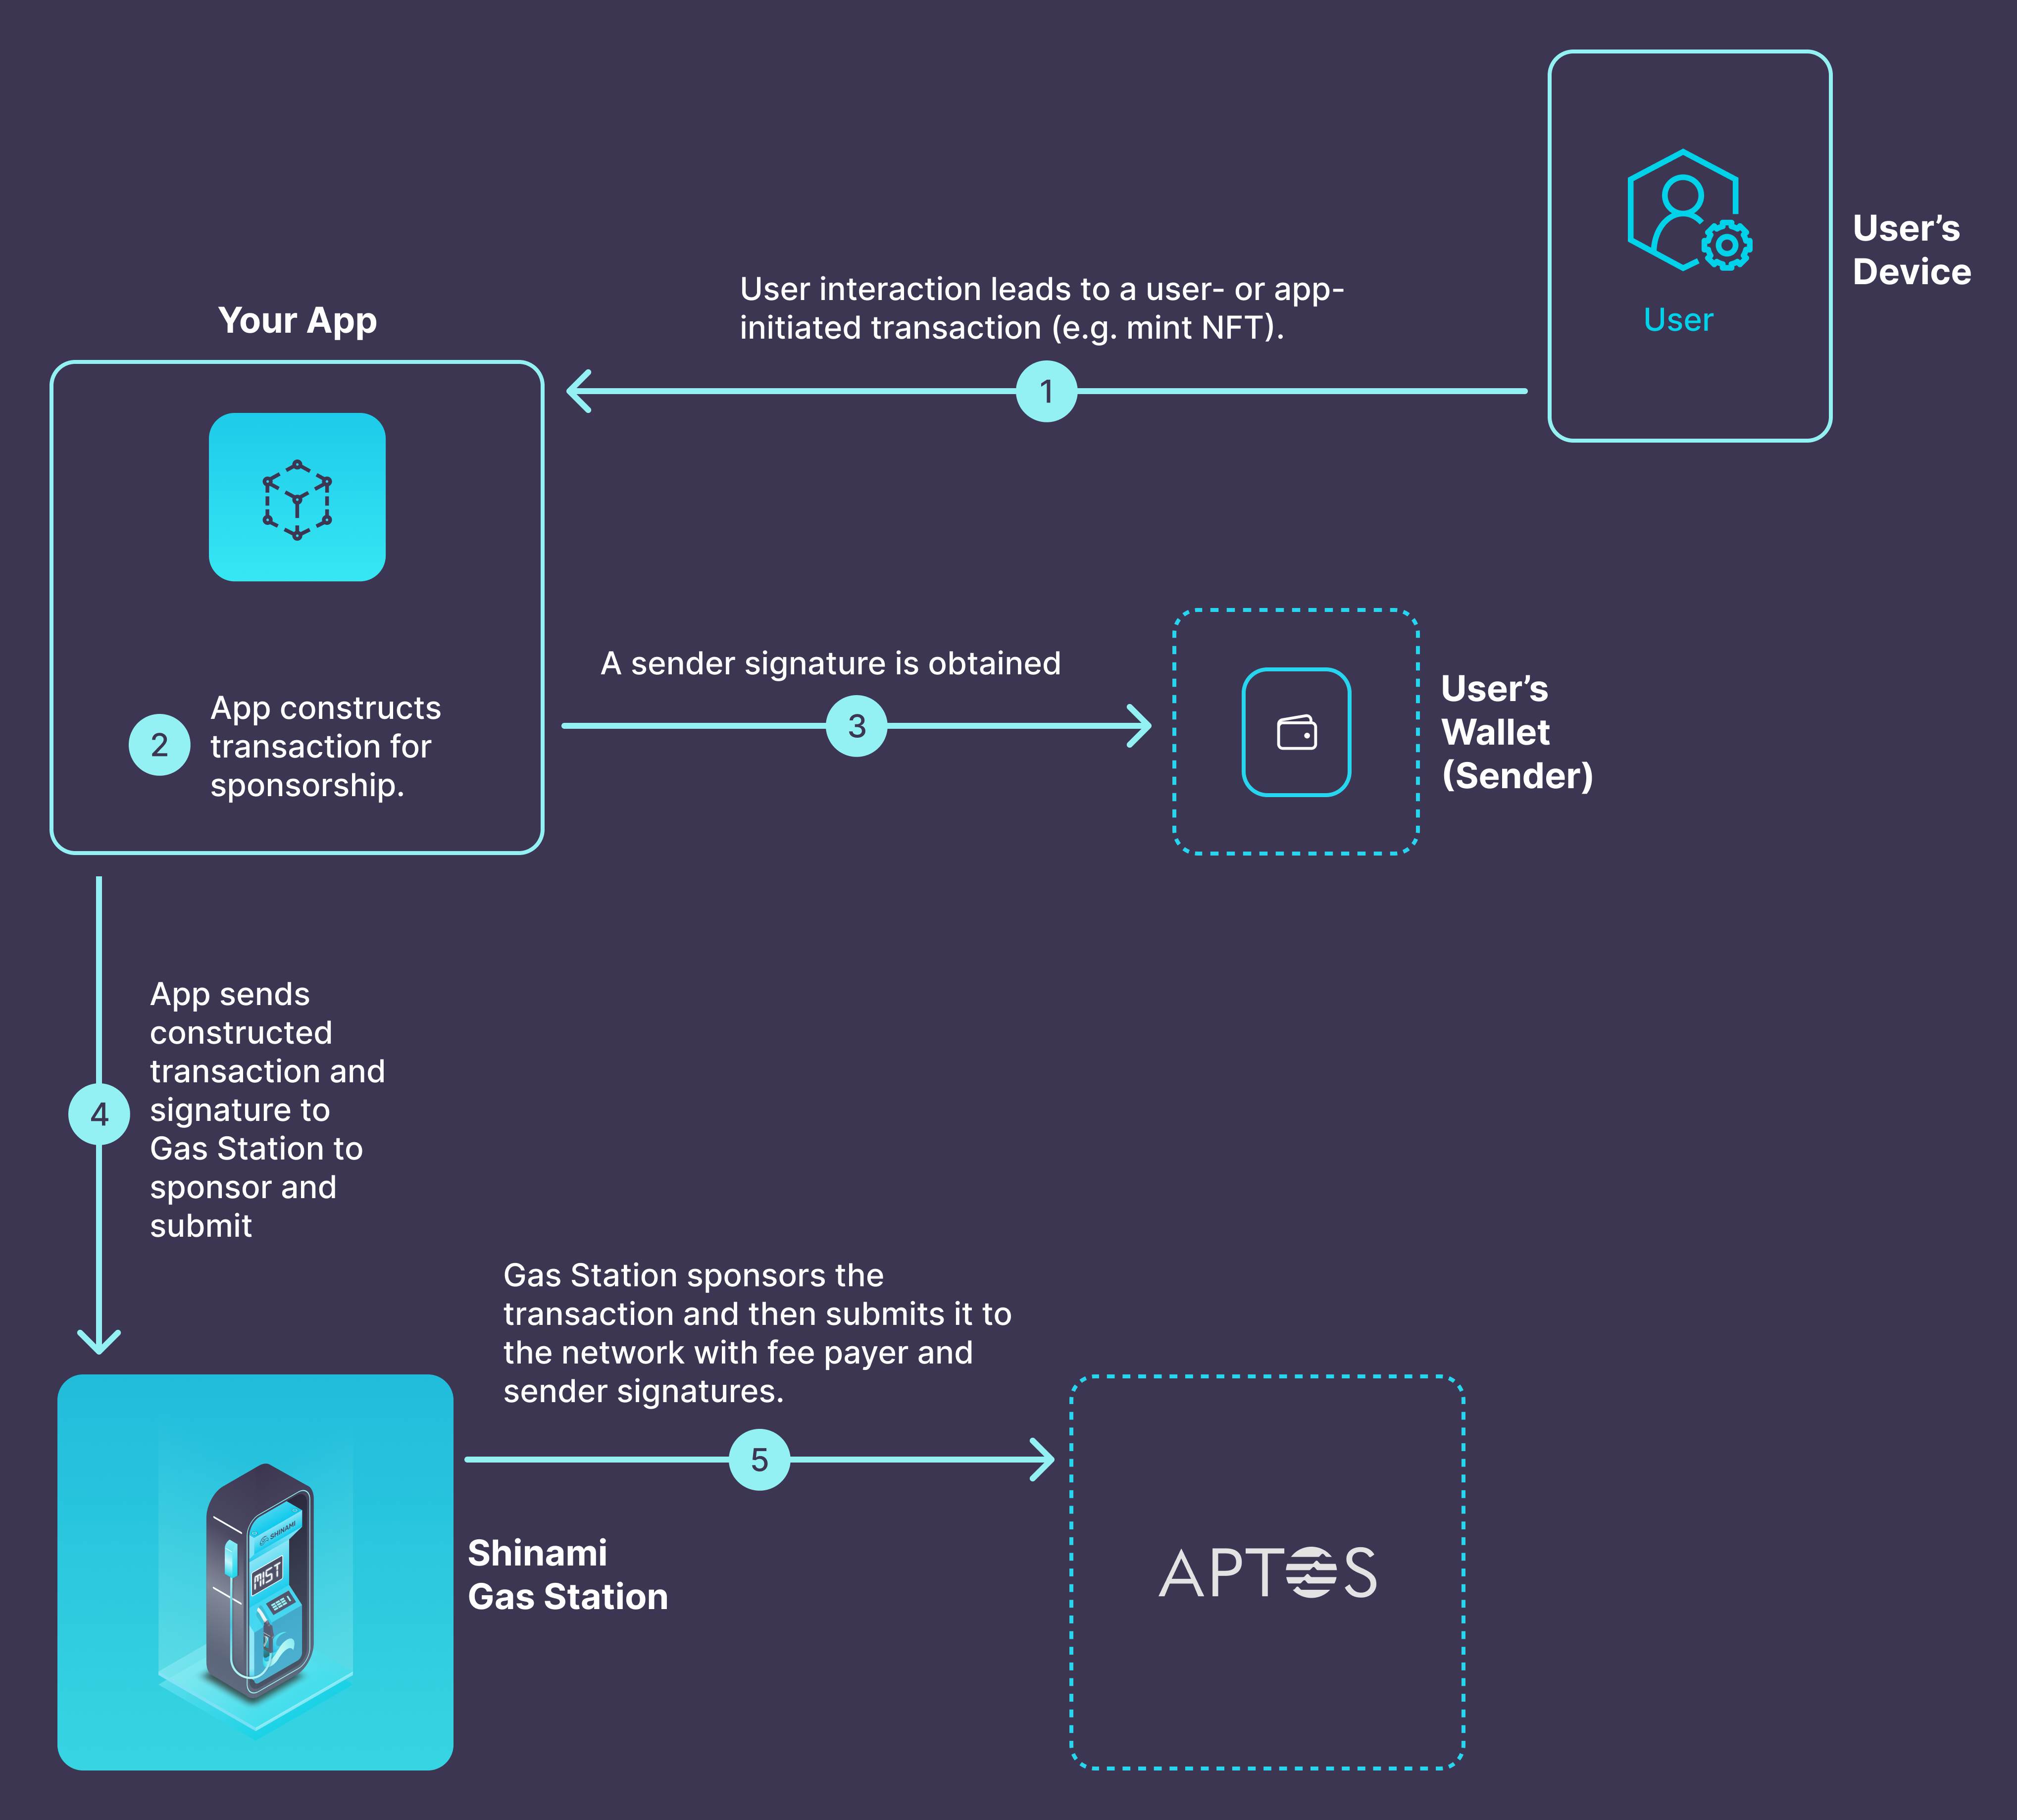
An end user interaction with the app initiates a transaction. For example the user requests to mint an NFT or the app mints the user a free NFT for accomplishing a task.
App constructs a mint NFT transaction without fee payer information. The transaction expiration must be set to 1 hour or less.
App gets the sender signature (and any secondary signer signatures required). App sends the raw transaction to Shinami’s Gas Station, along with any secondary signer addresses, and asks it to sponsor AND submit the transaction via a
gas_sponsorAndSubmitSignedTransaction request.Creating and using a Gas Station fund
See the Aptos Gas Station FAQ page of our Help Center for information on how to set up a Gas Station fund and how to sponsor transactions using the fund.Developer resources
See our:- Gas Station API for available endpoints and guidance.
- Gas Station TypeScript Tutorial for full code examples of building, sponsoring, and submitting a transaction from your backend only.
- Frontend Signing with Backend Sponsorship Tutorial for diagrams and code examples showing how to integrate Gas Station transaction sponsorship with signing from a connected browser wallet (including Aptos Connect) or a single-app Keyless wallet.