> ## Documentation Index
> Fetch the complete documentation index at: https://docs.shinami.com/llms.txt
> Use this file to discover all available pages before exploring further.
# zkLogin Game Demo (Next.js)
> Practice using zkLogin, sponsored transactions, and dynamic NFTs in a demo app
 ## Overview
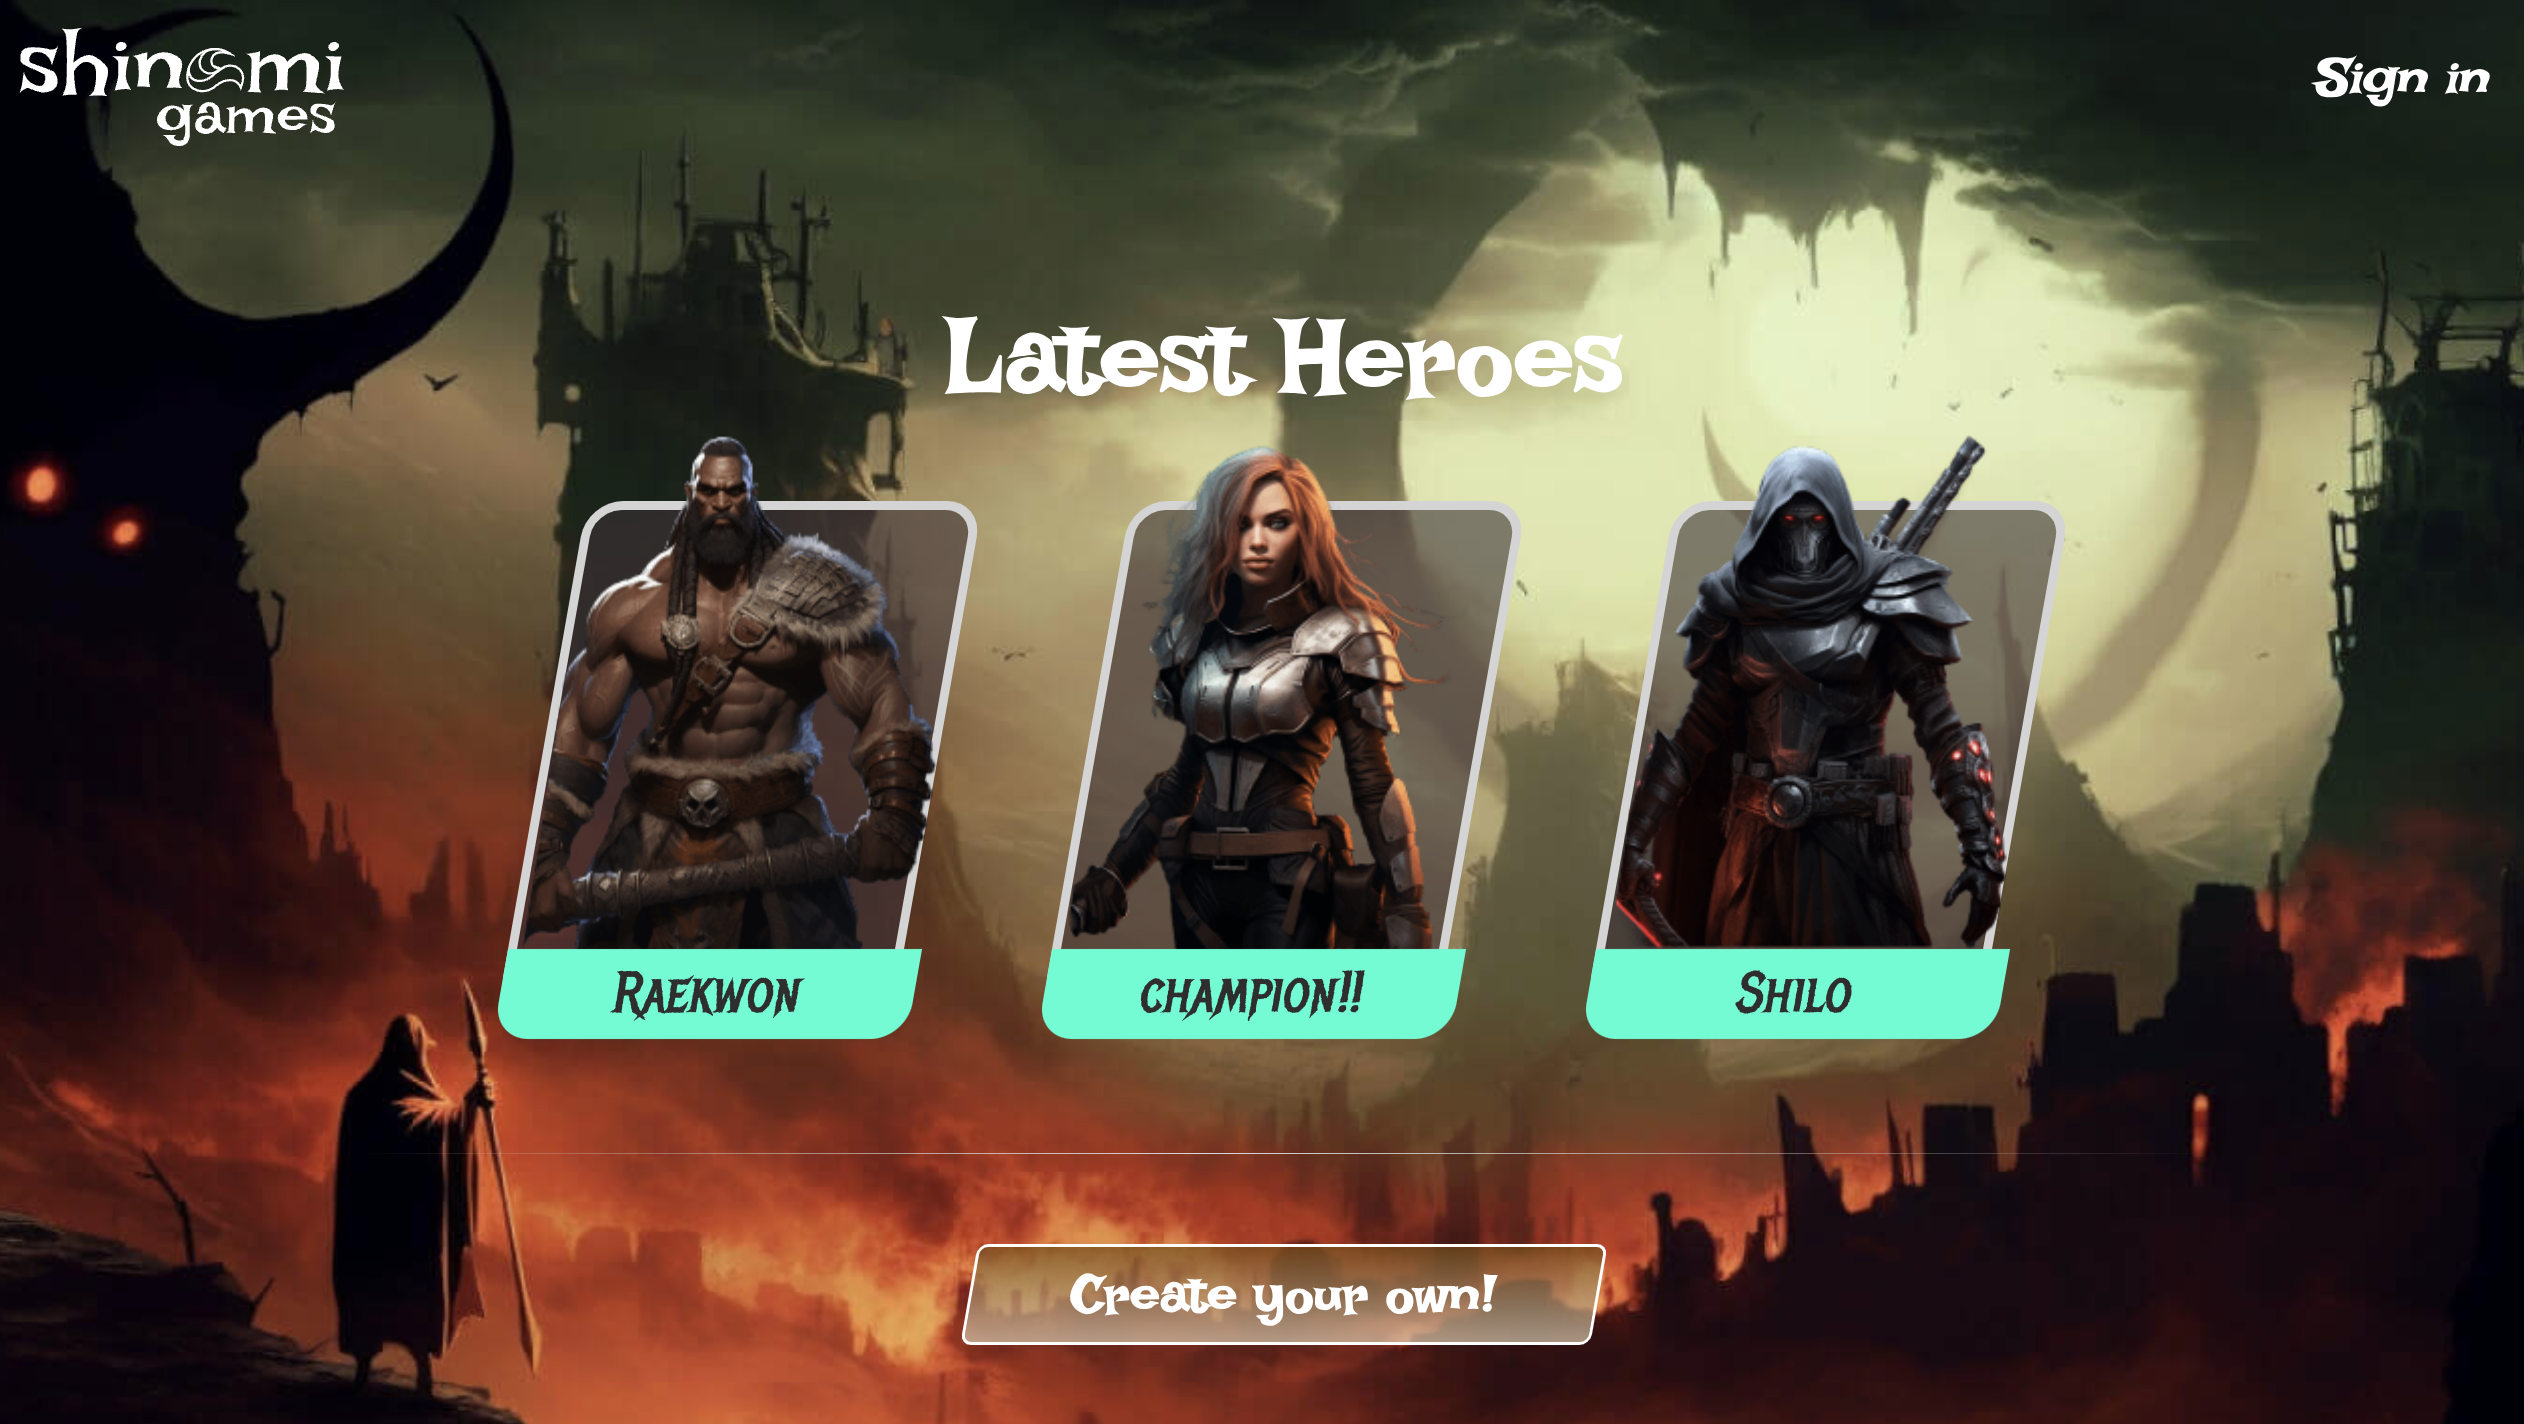
This tutorial shows you how to launch your own copy of our [game dashboard demo](https://demo.shinami.com/). Unlike the code behind our [zkLogin Next.js app tutorial](/developer-guides/sui/tutorials/zklogin-nextjs-app-template), this [codebase](https://github.com/shinamicorp/shinami-demo-app/tree/main) is not designed to be a starter template for a production app. Instead, we're offering this tutorial as a way for developers to get practice integrating zkLogin into an app, as well as deploying and interacting with Move code that mints and updates NFTs owned by zkLogin wallet addresses. Explore it, launch it, tinker with it, and learn.
The demo is implemented as a Next.js app bootstrapped with a [nextjs-zklogin template](https://github.com/shinamicorp/shinami-typescript-sdk/tree/main/examples/nextjs-zklogin) we built. It uses the [Shinami Next.js zkLogin SDK](https://www.npmjs.com/package/@shinami/nextjs-zklogin) to authenticate end users and sign transactions, and the [Shinami Clients SDK](https://www.npmjs.com/package/@shinami/clients) to read from and write to the Sui blockchain. We’ve deployed a Move package to Testnet that implements the code needed to mint and upgrade in-game NFTs, as well as manage the permissions of the three roles involved: publisher, admin, and player (described in more detail in our [Move package readme](https://github.com/shinamicorp/shinami-demo-app/blob/39ddbef2968e554afca86a5cd6eb4778343c940a/move/README.md)).
The app also uses [Shinami Gas Station](/api-docs/sui/gas-station/api) to sponsor transactions when users create and edit their in-game heroes. The tutorial works on Testnet, and we explain how to get free Testnet SUI below. Sponsoring your users' transactions allows you to remove friction and create a smoother UX. Unless they are a Web3 native, downloading a wallet app and completing a KYC flow to purchase SUI. Sponsoring transactions is a great way to offer a Web2-like UX.
Finally, we're excited to point out that the demo doesn't require its own private database. The Sui blockchain is the database where the app creates, updates, and destroys each player's heroes. Wallet state is securely kept by Shinami's Wallet Services. OpenID providers manage authentication and return the identifiers used, along with salts from Shinami, to [identify each user's zkLogin wallet address](/api-docs/sui/wallet-services/zklogin-wallet-api#zklogin-addresses).
## Launching the game demo
**Notes:**
* This tutorial requires a Shinami account. If you do not have one, you can sign up [here](https://app.shinami.com/signup).
* We take you through the process step-by-step below, but if you get stuck you can [reach out to us](/help-center/overview#contacting-support).
### 1. Create a Shinami Gas Station Fund on Testnet
See the [Sui Gas Station page of our Help Center](/help-center/sui/gas-station-faq) for guidance on how to create a fund.
### 2. Create two Shinami API access keys
You'll need two Shinami API access keys that work on Testnet: a Node Service access key, and an access key with rights to all services. For security purposes, any access keys with Gas Station or Wallet Services rights should be [used only on your app backend](/developer-guides/core-integration-topics/authentication-and-api-keys#security-callout-when-to-send-from-your-backend) to prevent exposing them.
See our [Authentication and API Keys guide](/developer-guides/core-integration-topics/authentication-and-api-keys#/create-an-access-key) for guidance on how to make both keys:
1. a key with Node Service only rights
2. a key with rights to all services (that links to the Gas Station fund you created in step 1)
### 3. Set up a developer account with Twitch, Google, Facebook, and/or Apple
You'll need to set up an OpenID Connect client app with Twitch, Google, Facebook, and/or Apple. See Step 3 of our tutorial on [how to build your first zkLogin app](/developer-guides/sui/tutorials/zklogin-nextjs-app-template#3-create-an-oauth-client-app-for-twitch-google-andor-facebook) for an overview, including the client ID values you'll need to set as environmental variables for this app.
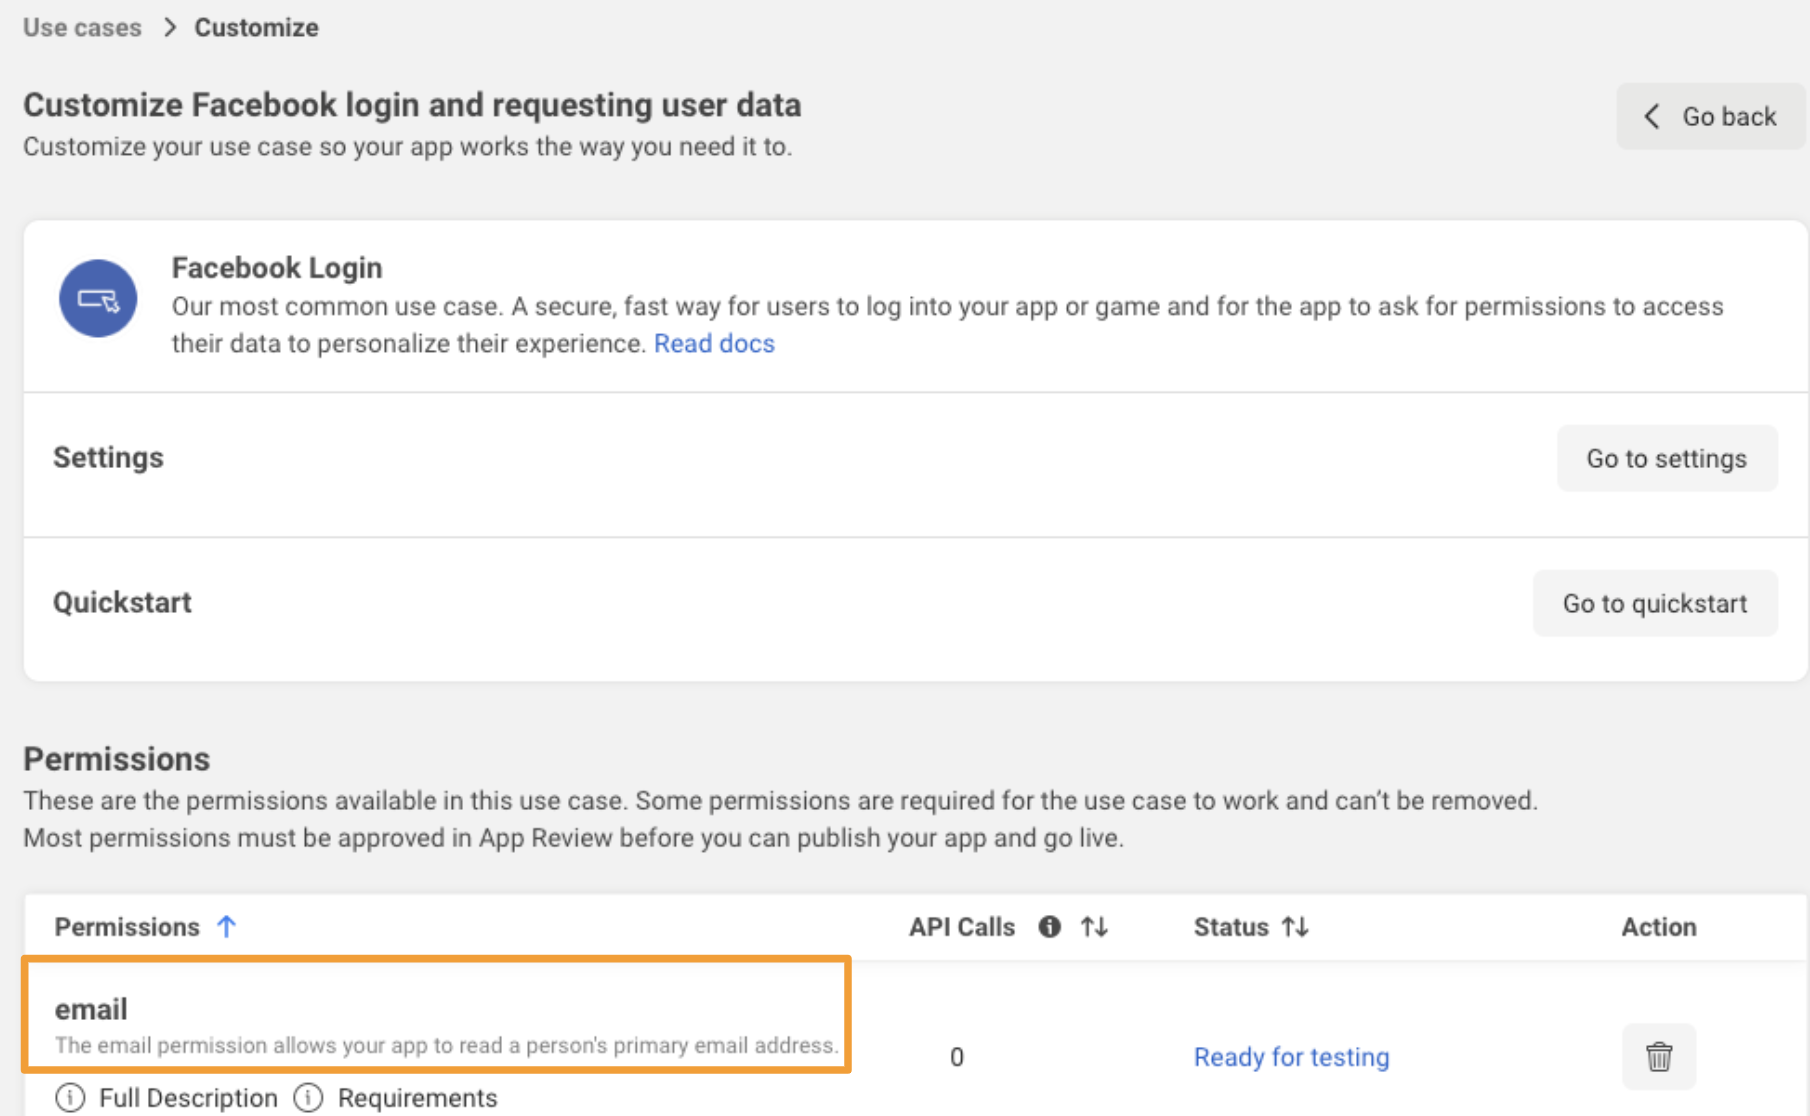
This demo makes OpenID connect requests with `scope=openid+email`, so make sure that your apps have permission to read the email address of the logged-in user. For example, this is what I see in my Facebook Developer portal after having added the `email` permission:
## Overview
This tutorial shows you how to launch your own copy of our [game dashboard demo](https://demo.shinami.com/). Unlike the code behind our [zkLogin Next.js app tutorial](/developer-guides/sui/tutorials/zklogin-nextjs-app-template), this [codebase](https://github.com/shinamicorp/shinami-demo-app/tree/main) is not designed to be a starter template for a production app. Instead, we're offering this tutorial as a way for developers to get practice integrating zkLogin into an app, as well as deploying and interacting with Move code that mints and updates NFTs owned by zkLogin wallet addresses. Explore it, launch it, tinker with it, and learn.
The demo is implemented as a Next.js app bootstrapped with a [nextjs-zklogin template](https://github.com/shinamicorp/shinami-typescript-sdk/tree/main/examples/nextjs-zklogin) we built. It uses the [Shinami Next.js zkLogin SDK](https://www.npmjs.com/package/@shinami/nextjs-zklogin) to authenticate end users and sign transactions, and the [Shinami Clients SDK](https://www.npmjs.com/package/@shinami/clients) to read from and write to the Sui blockchain. We’ve deployed a Move package to Testnet that implements the code needed to mint and upgrade in-game NFTs, as well as manage the permissions of the three roles involved: publisher, admin, and player (described in more detail in our [Move package readme](https://github.com/shinamicorp/shinami-demo-app/blob/39ddbef2968e554afca86a5cd6eb4778343c940a/move/README.md)).
The app also uses [Shinami Gas Station](/api-docs/sui/gas-station/api) to sponsor transactions when users create and edit their in-game heroes. The tutorial works on Testnet, and we explain how to get free Testnet SUI below. Sponsoring your users' transactions allows you to remove friction and create a smoother UX. Unless they are a Web3 native, downloading a wallet app and completing a KYC flow to purchase SUI. Sponsoring transactions is a great way to offer a Web2-like UX.
Finally, we're excited to point out that the demo doesn't require its own private database. The Sui blockchain is the database where the app creates, updates, and destroys each player's heroes. Wallet state is securely kept by Shinami's Wallet Services. OpenID providers manage authentication and return the identifiers used, along with salts from Shinami, to [identify each user's zkLogin wallet address](/api-docs/sui/wallet-services/zklogin-wallet-api#zklogin-addresses).
## Launching the game demo
**Notes:**
* This tutorial requires a Shinami account. If you do not have one, you can sign up [here](https://app.shinami.com/signup).
* We take you through the process step-by-step below, but if you get stuck you can [reach out to us](/help-center/overview#contacting-support).
### 1. Create a Shinami Gas Station Fund on Testnet
See the [Sui Gas Station page of our Help Center](/help-center/sui/gas-station-faq) for guidance on how to create a fund.
### 2. Create two Shinami API access keys
You'll need two Shinami API access keys that work on Testnet: a Node Service access key, and an access key with rights to all services. For security purposes, any access keys with Gas Station or Wallet Services rights should be [used only on your app backend](/developer-guides/core-integration-topics/authentication-and-api-keys#security-callout-when-to-send-from-your-backend) to prevent exposing them.
See our [Authentication and API Keys guide](/developer-guides/core-integration-topics/authentication-and-api-keys#/create-an-access-key) for guidance on how to make both keys:
1. a key with Node Service only rights
2. a key with rights to all services (that links to the Gas Station fund you created in step 1)
### 3. Set up a developer account with Twitch, Google, Facebook, and/or Apple
You'll need to set up an OpenID Connect client app with Twitch, Google, Facebook, and/or Apple. See Step 3 of our tutorial on [how to build your first zkLogin app](/developer-guides/sui/tutorials/zklogin-nextjs-app-template#3-create-an-oauth-client-app-for-twitch-google-andor-facebook) for an overview, including the client ID values you'll need to set as environmental variables for this app.
This demo makes OpenID connect requests with `scope=openid+email`, so make sure that your apps have permission to read the email address of the logged-in user. For example, this is what I see in my Facebook Developer portal after having added the `email` permission:
 ### 4. Download the sample project
The sample project is located on [github](https://github.com/shinamicorp/shinami-demo-app/tree/main). Clone it, run `cd shinami-demo-app` to enter the root directory, and then run `npm install` to get all the dependencies.
### 5. Publish the Move package
**5a. Create a new address**
Starting from scratch, we'll create a new publisher address. You can use the [Sui Client CLI](https://docs.sui.io/references/cli/client) to create a new address:
```bash terminal theme={null}
sui client new-address ed25519
```
Here is partial output from my running the above:
```bash terminal theme={null}
│ Created new keypair and saved it to keystore. │
├────────────────┬───────────────────────────────────────────────────────────────────────┤
│ alias │ abc │
│ address │ 0xfd8700b38d08e814d6cb17c1b786d42488e38751de2d37f393a9da38142bb6b2 │
```
Ensure you're using the address you created and that your environment is Testnet (since this is where you'll publish to). Here, I'm using the address I created:
```bash terminal theme={null}
> sui client switch --address 0xfd8700b38d08e814d6cb17c1b786d42488e38751de2d37f393a9da38142bb6b2
< Active address switched to 0xfd8700b38d08e814d6cb17c1b786d42488e38751de2d37f393a9da38142bb6b2
> sui client switch --env testnet
> Active environment switched to [testnet]
```
**5b. Send Testnet SUI to the publisher address**
Using the same method you used to fund your Testnet Gas Station fund, [get free Testnet SUI](/help-center/sui/gas-station-faq#faq) and add it to your address from step 5a above. You can confirm you got it by running
```bash terminal theme={null}
sui client gas
```
My output was
```bash terminal theme={null}
╭────────────────────────────────────────────────────────────────────┬────────────╮
│ gasCoinId │ gasBalance │
├────────────────────────────────────────────────────────────────────┼────────────┤
│ 0x5cffe0ba968f99a3eb5bcb5f0e993f0afafd708c3135352085ae1edcb60f9438 │ 1000000000 │
╰────────────────────────────────────────────────────────────────────┴────────────╯
```
**5c. Publish the Move package**
Now, move to the root of the `shinami-demo-app/move` directory and run the publish command:
```bash terminal theme={null}
cd move
sui client publish --gas-budget 50000000
```
You'll get a lot of output. You'll need to record two things. First, the `ObjectID` of the Publisher object. Mine is the `ObjectID` in the output below (your value will be different). The `...` represents three other created objects which I've removed so it's easier to read:
```bash terminal theme={null}
│ Created Objects: │
...
│ ┌── │
│ │ ObjectID: 0xf5d82b00f1911f102a1e7e6809b540672e8ea1d9af951825f84c36a14e351358 │
│ │ Sender: 0xfd8700b38d08e814d6cb17c1b786d42488e38751de2d37f393a9da38142bb6b2 │
│ │ Owner: Account Address ( 0xfd8700b38d08e814d6cb17c1b786d42488e38751de2d37f393a9da38142bb6b2 ) │
│ │ ObjectType: 0x2::package::Publisher │
│ │ Version: 1031344 │
│ │ Digest: 44pZ1FLa7EM42Ur75daF7rzDQv6AiWAGppwYDqgGwscq │
│ └── │
```
Second, the `PackageID` of the package. Here's mine (your value will be different):
```bash terminal theme={null}
│ Published Objects: │
│ ┌── │
│ │ PackageID: 0x9c998d1728e3ed592261920e50f8a6c876ef94dd81fb806f04819e81129a0a77 │
│ │ Version: 1 │
│ │ Digest: G3dgLiHnW6uM1MQKTW6wFVRvxcnrsZ9BeDtMKrLbNGeq │
│ | Modules: hero │
│ └── │
```
### 6. Create and fill in the .env.local file values
Next, you need to set the values for key environmental variables for the project. These should be in a `.env.local` file which should not committed to git since it contains sensitive information like API access key values. In the root directory of the project, run `cp .env .env.local` on the command line. Below, we show how to fill in values for the new `.env.local` file.
You'll need to fill in these pieces of information:
1. Uncomment out the `NEXT_PUBLIC_*_CLIENT_ID` values for the OAuth providers you set up an app with. In the examples from our [how to build your first zkLogin app tutorial](/developer-guides/sui/tutorials/zklogin-nextjs-app-template#3-set-up-a-developer-account-with-twitch-google-andor-facebook) , the partial ID values are `2bc0920` for Twitch, `141521` for Facebook, and `766995` for Google. I've included a fake value for Apple as well. Use your own client id values, which will be longer. Again, you only need one for the demo to work.
2. Generate a session secret, e.g. with `openssl rand -hex 32` on the command line. Example output is `bdd51e3b307c7cdae48c3dd2ce83f5e7a0b6db10fdeea0b4d5990f857c156dd7` (but I didn't actually use this one - don't share your secrets!) Uncomment `IRON_SESSION_SECRET` and use this as the value.
3. The Shinami Invisible (walletSecret, walletID) pair for the admin wallet. These cannot change and represent a unique wallet. For more info on these pairs, see [WalletId and Secret Pairing](/api-docs/sui/wallet-services/invisible-wallet-api#walletid-and-secret-pairing). Here, I've entered another run of `openssl rand -hex 32 `and `admin_wallet_1` as example values for `ADMIN_WALLET_SECRET` and `ADMIN_WALLET_ID`. Uncomment the variables, use your own values, and do not share or change them.
4. Uncomment the `USER_RPC_URL` variable and set it to `'ALLOW_ALL'` to allow all users who successfully complete the OpenID Connect flow to log into the app.
5. Uncomment the `SHINAMI_SUPER_ACCESS_KEY` variable and set it to the value of the Testnet all services access keys you created. Then, uncomment the `NEXT_PUBLIC_SHINAMI_NODE_ACCESS_KEY` variable and set it to the value of the Shinami Testnet Node service access key you made. Let's imagine they're `sui_testnet_123` and `sui_testnet_456`. These are too short for real keys. Also, do not expose your keys!
6. Set the `NEXT_PUBLIC_PACKAGE_ID` value to the `PackageID` value from 5c (overwriting the existing value if present). You must enter the value of the package you published because it will be the package the `ADMIN_CAP` you mint later in the tutorial has rights to use. I've entered the value from step 5c.
7. `ADMIN_CAP` - we'll fill this in on the next step so you can leave it commented for now.
Enter the values and save your changes to the file.
```bash Text expandable theme={null}
# OAuth application configs. Configure the ones you want to support. They'll serve as both the auth
# mechanism for this app and transaction signing mechanism (zkLogin). Note that if you have multiple
# providers configured, the same person will be considered a different user for each provider they
# log in with (with different zkLogin wallets), even if they may share the same email.
#
# Refer to this link for instructions on setting up these OAuth applications:
# https://docs.sui.io/concepts/cryptography/zklogin#configure-a-developer-account-with-openid-provider
#
NEXT_PUBLIC_GOOGLE_CLIENT_ID='766995'
NEXT_PUBLIC_FACEBOOK_CLIENT_ID='141521'
NEXT_PUBLIC_TWITCH_CLIENT_ID='2bc0920'
NEXT_PUBLIC_APPLE_CLIENT_ID='com.app'
# Example command to generate random secrets:
# openssl rand -hex 32
#
IRON_SESSION_SECRET='bdd51e3b307c7cdae48c3dd2ce83f5e7a0b6db10fdeea0b4d5990f857c156dd7'
ADMIN_WALLET_SECRET='8a7fec7a682b9b6d06394c35dba019a271411a39b11bbf81c0eabcfc0a9894e8'
ADMIN_WALLET_ID='admin_wallet_1'
# Used to determine whether a user is allowed to sign in.
# If left empty, no user is allowed.
# If set to the special value of ALLOW_ALL, all users with a verified email are allowed.
USER_RPC_URL='ALLOW_ALL'
# Obtain your Shinami access keys from https://app.shinami.com.
#
SHINAMI_SUPER_ACCESS_KEY='sui_testnet_456'
NEXT_PUBLIC_SHINAMI_NODE_ACCESS_KEY='sui_testnet_123'
# 'devnet', 'testnet', or 'mainnet'
NEXT_PUBLIC_SUI_NETWORK='testnet'
# Must match the network above
NEXT_PUBLIC_PACKAGE_ID='0x9c998d1728e3ed592261920e50f8a6c876ef94dd81fb806f04819e81129a0a77'
# ADMIN_CAP='Must be a unique instance on each backend server'
```
### 7. Run the server and mint an admin cap.
**7a. Run the server**
In one terminal window, run the game server with:
```bash terminal theme={null}
npm run dev
```
**7b. Ask for your admin wallet address**
In another terminal window, ask for the admin wallet address. The game will use the `ADMIN_WALLET_ID` and `ADMIN_WALLET_SECRET` values you entered to make a Shinami Invisible Wallet. This wallet will be the admin wallet for the game. Here is an example request and response:
```bash terminal theme={null}
> curl http://localhost:3000/api/admin/wallet
< {"address":"0xae30217ea8945e7fec43434fe039ad41f768ffb351eeb3eebef87b55f1ce8884"}
```
**7c. Mint an admin cap**
Now that you have the admin wallet address, you can make a call using the Sui CLI to mint and transfer an admin cap to the admin wallet. You'll copy in the `PackageId` and Publisher object `ObjectId` from step 5c above. You'll also copy in the admin wallet address we just asked for in step 7b.
Template:
```bash terminal theme={null}
sui client call \
--package "" \
--module hero \
--function new_admin_cap_to_recipient \
--args "" "" \
--gas-budget 10000000
```
Sample call using the values from this tutorial:
```bash terminal theme={null}
sui client call \
--package "0x9c998d1728e3ed592261920e50f8a6c876ef94dd81fb806f04819e81129a0a77" \
--module hero \
--function new_admin_cap_to_recipient \
--args "0xf5d82b00f1911f102a1e7e6809b540672e8ea1d9af951825f84c36a14e351358" "0xae30217ea8945e7fec43434fe039ad41f768ffb351eeb3eebef87b55f1ce8884" \
--gas-budget 10000000
```
From the output, you'll need to find and copy the `ObjectId` of the newly-created admin cap. Here's a section of the output from the above request that contains that value:
```
╭────────────────────────────────────────────────────────────────────────────────────────────────────╮
│ Object Changes │
├────────────────────────────────────────────────────────────────────────────────────────────────────┤
│ │
│ Created Objects: │
│ ┌── │
│ │ ObjectID: 0x63bf705d78d1f26de63db5f2cdc18ada5cb81ce06e4c27deab34f2b708338519 │
│ │ Sender: 0xfd8700b38d08e814d6cb17c1b786d42488e38751de2d37f393a9da38142bb6b2 │
│ │ Owner: Account Address ( 0xae30217ea8945e7fec43434fe039ad41f768ffb351eeb3eebef87b55f1ce8884 ) │
│ │ ObjectType: 0x9c998d1728e3ed592261920e50f8a6c876ef94dd81fb806f04819e81129a0a77::hero::AdminCap │
│ │ Version: 1031345 │
│ │ Digest: H6io6dSwFHgKp5LZtMbC9xKTXCUzLA1V7jmvXWkprArr │
│ └── │
```
**7d. Copy the Admin Cap ObjectID in to the .evn.local file**
Finally, we can enter the last value needed for our `.env.local` file. Here are the final few lines of the .env file with the above ObjectId entered as the value for the `ADMIN_CAP` variable (make sure to un-comment the variable).
```
...
# 'devnet', 'testnet', or 'mainnet'
NEXT_PUBLIC_SUI_NETWORK='testnet'
# Must match the network above
NEXT_PUBLIC_PACKAGE_ID='0x9c998d1728e3ed592261920e50f8a6c876ef94dd81fb806f04819e81129a0a77'
ADMIN_CAP='0x63bf705d78d1f26de63db5f2cdc18ada5cb81ce06e4c27deab34f2b708338519'
```
## Using the game demo
### Visit the demo frontend
Now you can interact with the demo by going to [http://localhost:3000](http://localhost:3000) in your browser!
### Log in
### 4. Download the sample project
The sample project is located on [github](https://github.com/shinamicorp/shinami-demo-app/tree/main). Clone it, run `cd shinami-demo-app` to enter the root directory, and then run `npm install` to get all the dependencies.
### 5. Publish the Move package
**5a. Create a new address**
Starting from scratch, we'll create a new publisher address. You can use the [Sui Client CLI](https://docs.sui.io/references/cli/client) to create a new address:
```bash terminal theme={null}
sui client new-address ed25519
```
Here is partial output from my running the above:
```bash terminal theme={null}
│ Created new keypair and saved it to keystore. │
├────────────────┬───────────────────────────────────────────────────────────────────────┤
│ alias │ abc │
│ address │ 0xfd8700b38d08e814d6cb17c1b786d42488e38751de2d37f393a9da38142bb6b2 │
```
Ensure you're using the address you created and that your environment is Testnet (since this is where you'll publish to). Here, I'm using the address I created:
```bash terminal theme={null}
> sui client switch --address 0xfd8700b38d08e814d6cb17c1b786d42488e38751de2d37f393a9da38142bb6b2
< Active address switched to 0xfd8700b38d08e814d6cb17c1b786d42488e38751de2d37f393a9da38142bb6b2
> sui client switch --env testnet
> Active environment switched to [testnet]
```
**5b. Send Testnet SUI to the publisher address**
Using the same method you used to fund your Testnet Gas Station fund, [get free Testnet SUI](/help-center/sui/gas-station-faq#faq) and add it to your address from step 5a above. You can confirm you got it by running
```bash terminal theme={null}
sui client gas
```
My output was
```bash terminal theme={null}
╭────────────────────────────────────────────────────────────────────┬────────────╮
│ gasCoinId │ gasBalance │
├────────────────────────────────────────────────────────────────────┼────────────┤
│ 0x5cffe0ba968f99a3eb5bcb5f0e993f0afafd708c3135352085ae1edcb60f9438 │ 1000000000 │
╰────────────────────────────────────────────────────────────────────┴────────────╯
```
**5c. Publish the Move package**
Now, move to the root of the `shinami-demo-app/move` directory and run the publish command:
```bash terminal theme={null}
cd move
sui client publish --gas-budget 50000000
```
You'll get a lot of output. You'll need to record two things. First, the `ObjectID` of the Publisher object. Mine is the `ObjectID` in the output below (your value will be different). The `...` represents three other created objects which I've removed so it's easier to read:
```bash terminal theme={null}
│ Created Objects: │
...
│ ┌── │
│ │ ObjectID: 0xf5d82b00f1911f102a1e7e6809b540672e8ea1d9af951825f84c36a14e351358 │
│ │ Sender: 0xfd8700b38d08e814d6cb17c1b786d42488e38751de2d37f393a9da38142bb6b2 │
│ │ Owner: Account Address ( 0xfd8700b38d08e814d6cb17c1b786d42488e38751de2d37f393a9da38142bb6b2 ) │
│ │ ObjectType: 0x2::package::Publisher │
│ │ Version: 1031344 │
│ │ Digest: 44pZ1FLa7EM42Ur75daF7rzDQv6AiWAGppwYDqgGwscq │
│ └── │
```
Second, the `PackageID` of the package. Here's mine (your value will be different):
```bash terminal theme={null}
│ Published Objects: │
│ ┌── │
│ │ PackageID: 0x9c998d1728e3ed592261920e50f8a6c876ef94dd81fb806f04819e81129a0a77 │
│ │ Version: 1 │
│ │ Digest: G3dgLiHnW6uM1MQKTW6wFVRvxcnrsZ9BeDtMKrLbNGeq │
│ | Modules: hero │
│ └── │
```
### 6. Create and fill in the .env.local file values
Next, you need to set the values for key environmental variables for the project. These should be in a `.env.local` file which should not committed to git since it contains sensitive information like API access key values. In the root directory of the project, run `cp .env .env.local` on the command line. Below, we show how to fill in values for the new `.env.local` file.
You'll need to fill in these pieces of information:
1. Uncomment out the `NEXT_PUBLIC_*_CLIENT_ID` values for the OAuth providers you set up an app with. In the examples from our [how to build your first zkLogin app tutorial](/developer-guides/sui/tutorials/zklogin-nextjs-app-template#3-set-up-a-developer-account-with-twitch-google-andor-facebook) , the partial ID values are `2bc0920` for Twitch, `141521` for Facebook, and `766995` for Google. I've included a fake value for Apple as well. Use your own client id values, which will be longer. Again, you only need one for the demo to work.
2. Generate a session secret, e.g. with `openssl rand -hex 32` on the command line. Example output is `bdd51e3b307c7cdae48c3dd2ce83f5e7a0b6db10fdeea0b4d5990f857c156dd7` (but I didn't actually use this one - don't share your secrets!) Uncomment `IRON_SESSION_SECRET` and use this as the value.
3. The Shinami Invisible (walletSecret, walletID) pair for the admin wallet. These cannot change and represent a unique wallet. For more info on these pairs, see [WalletId and Secret Pairing](/api-docs/sui/wallet-services/invisible-wallet-api#walletid-and-secret-pairing). Here, I've entered another run of `openssl rand -hex 32 `and `admin_wallet_1` as example values for `ADMIN_WALLET_SECRET` and `ADMIN_WALLET_ID`. Uncomment the variables, use your own values, and do not share or change them.
4. Uncomment the `USER_RPC_URL` variable and set it to `'ALLOW_ALL'` to allow all users who successfully complete the OpenID Connect flow to log into the app.
5. Uncomment the `SHINAMI_SUPER_ACCESS_KEY` variable and set it to the value of the Testnet all services access keys you created. Then, uncomment the `NEXT_PUBLIC_SHINAMI_NODE_ACCESS_KEY` variable and set it to the value of the Shinami Testnet Node service access key you made. Let's imagine they're `sui_testnet_123` and `sui_testnet_456`. These are too short for real keys. Also, do not expose your keys!
6. Set the `NEXT_PUBLIC_PACKAGE_ID` value to the `PackageID` value from 5c (overwriting the existing value if present). You must enter the value of the package you published because it will be the package the `ADMIN_CAP` you mint later in the tutorial has rights to use. I've entered the value from step 5c.
7. `ADMIN_CAP` - we'll fill this in on the next step so you can leave it commented for now.
Enter the values and save your changes to the file.
```bash Text expandable theme={null}
# OAuth application configs. Configure the ones you want to support. They'll serve as both the auth
# mechanism for this app and transaction signing mechanism (zkLogin). Note that if you have multiple
# providers configured, the same person will be considered a different user for each provider they
# log in with (with different zkLogin wallets), even if they may share the same email.
#
# Refer to this link for instructions on setting up these OAuth applications:
# https://docs.sui.io/concepts/cryptography/zklogin#configure-a-developer-account-with-openid-provider
#
NEXT_PUBLIC_GOOGLE_CLIENT_ID='766995'
NEXT_PUBLIC_FACEBOOK_CLIENT_ID='141521'
NEXT_PUBLIC_TWITCH_CLIENT_ID='2bc0920'
NEXT_PUBLIC_APPLE_CLIENT_ID='com.app'
# Example command to generate random secrets:
# openssl rand -hex 32
#
IRON_SESSION_SECRET='bdd51e3b307c7cdae48c3dd2ce83f5e7a0b6db10fdeea0b4d5990f857c156dd7'
ADMIN_WALLET_SECRET='8a7fec7a682b9b6d06394c35dba019a271411a39b11bbf81c0eabcfc0a9894e8'
ADMIN_WALLET_ID='admin_wallet_1'
# Used to determine whether a user is allowed to sign in.
# If left empty, no user is allowed.
# If set to the special value of ALLOW_ALL, all users with a verified email are allowed.
USER_RPC_URL='ALLOW_ALL'
# Obtain your Shinami access keys from https://app.shinami.com.
#
SHINAMI_SUPER_ACCESS_KEY='sui_testnet_456'
NEXT_PUBLIC_SHINAMI_NODE_ACCESS_KEY='sui_testnet_123'
# 'devnet', 'testnet', or 'mainnet'
NEXT_PUBLIC_SUI_NETWORK='testnet'
# Must match the network above
NEXT_PUBLIC_PACKAGE_ID='0x9c998d1728e3ed592261920e50f8a6c876ef94dd81fb806f04819e81129a0a77'
# ADMIN_CAP='Must be a unique instance on each backend server'
```
### 7. Run the server and mint an admin cap.
**7a. Run the server**
In one terminal window, run the game server with:
```bash terminal theme={null}
npm run dev
```
**7b. Ask for your admin wallet address**
In another terminal window, ask for the admin wallet address. The game will use the `ADMIN_WALLET_ID` and `ADMIN_WALLET_SECRET` values you entered to make a Shinami Invisible Wallet. This wallet will be the admin wallet for the game. Here is an example request and response:
```bash terminal theme={null}
> curl http://localhost:3000/api/admin/wallet
< {"address":"0xae30217ea8945e7fec43434fe039ad41f768ffb351eeb3eebef87b55f1ce8884"}
```
**7c. Mint an admin cap**
Now that you have the admin wallet address, you can make a call using the Sui CLI to mint and transfer an admin cap to the admin wallet. You'll copy in the `PackageId` and Publisher object `ObjectId` from step 5c above. You'll also copy in the admin wallet address we just asked for in step 7b.
Template:
```bash terminal theme={null}
sui client call \
--package "" \
--module hero \
--function new_admin_cap_to_recipient \
--args "" "" \
--gas-budget 10000000
```
Sample call using the values from this tutorial:
```bash terminal theme={null}
sui client call \
--package "0x9c998d1728e3ed592261920e50f8a6c876ef94dd81fb806f04819e81129a0a77" \
--module hero \
--function new_admin_cap_to_recipient \
--args "0xf5d82b00f1911f102a1e7e6809b540672e8ea1d9af951825f84c36a14e351358" "0xae30217ea8945e7fec43434fe039ad41f768ffb351eeb3eebef87b55f1ce8884" \
--gas-budget 10000000
```
From the output, you'll need to find and copy the `ObjectId` of the newly-created admin cap. Here's a section of the output from the above request that contains that value:
```
╭────────────────────────────────────────────────────────────────────────────────────────────────────╮
│ Object Changes │
├────────────────────────────────────────────────────────────────────────────────────────────────────┤
│ │
│ Created Objects: │
│ ┌── │
│ │ ObjectID: 0x63bf705d78d1f26de63db5f2cdc18ada5cb81ce06e4c27deab34f2b708338519 │
│ │ Sender: 0xfd8700b38d08e814d6cb17c1b786d42488e38751de2d37f393a9da38142bb6b2 │
│ │ Owner: Account Address ( 0xae30217ea8945e7fec43434fe039ad41f768ffb351eeb3eebef87b55f1ce8884 ) │
│ │ ObjectType: 0x9c998d1728e3ed592261920e50f8a6c876ef94dd81fb806f04819e81129a0a77::hero::AdminCap │
│ │ Version: 1031345 │
│ │ Digest: H6io6dSwFHgKp5LZtMbC9xKTXCUzLA1V7jmvXWkprArr │
│ └── │
```
**7d. Copy the Admin Cap ObjectID in to the .evn.local file**
Finally, we can enter the last value needed for our `.env.local` file. Here are the final few lines of the .env file with the above ObjectId entered as the value for the `ADMIN_CAP` variable (make sure to un-comment the variable).
```
...
# 'devnet', 'testnet', or 'mainnet'
NEXT_PUBLIC_SUI_NETWORK='testnet'
# Must match the network above
NEXT_PUBLIC_PACKAGE_ID='0x9c998d1728e3ed592261920e50f8a6c876ef94dd81fb806f04819e81129a0a77'
ADMIN_CAP='0x63bf705d78d1f26de63db5f2cdc18ada5cb81ce06e4c27deab34f2b708338519'
```
## Using the game demo
### Visit the demo frontend
Now you can interact with the demo by going to [http://localhost:3000](http://localhost:3000) in your browser!
### Log in
 Click "Create Your own!" to visit the login screen. You'll see a login button for each of the OpenID Connect providers you have a `*_CLIENT_ID` environmental variable for.
 ### A note on zkLogin addresses
You'll have the a unique zkLogin wallet address for each `(OpenIdProvider,username)` pair you log into the app with, for example `(Google,fake@gmail.com)`. Signing in with a different combination will create a different address (see more info on what makes up a zkLogin address in our [zkLogin wallet API doc](/api-docs/sui/wallet-services/zklogin-wallet-api#zklogin-addresses) ).
Now, go ahead and log in.
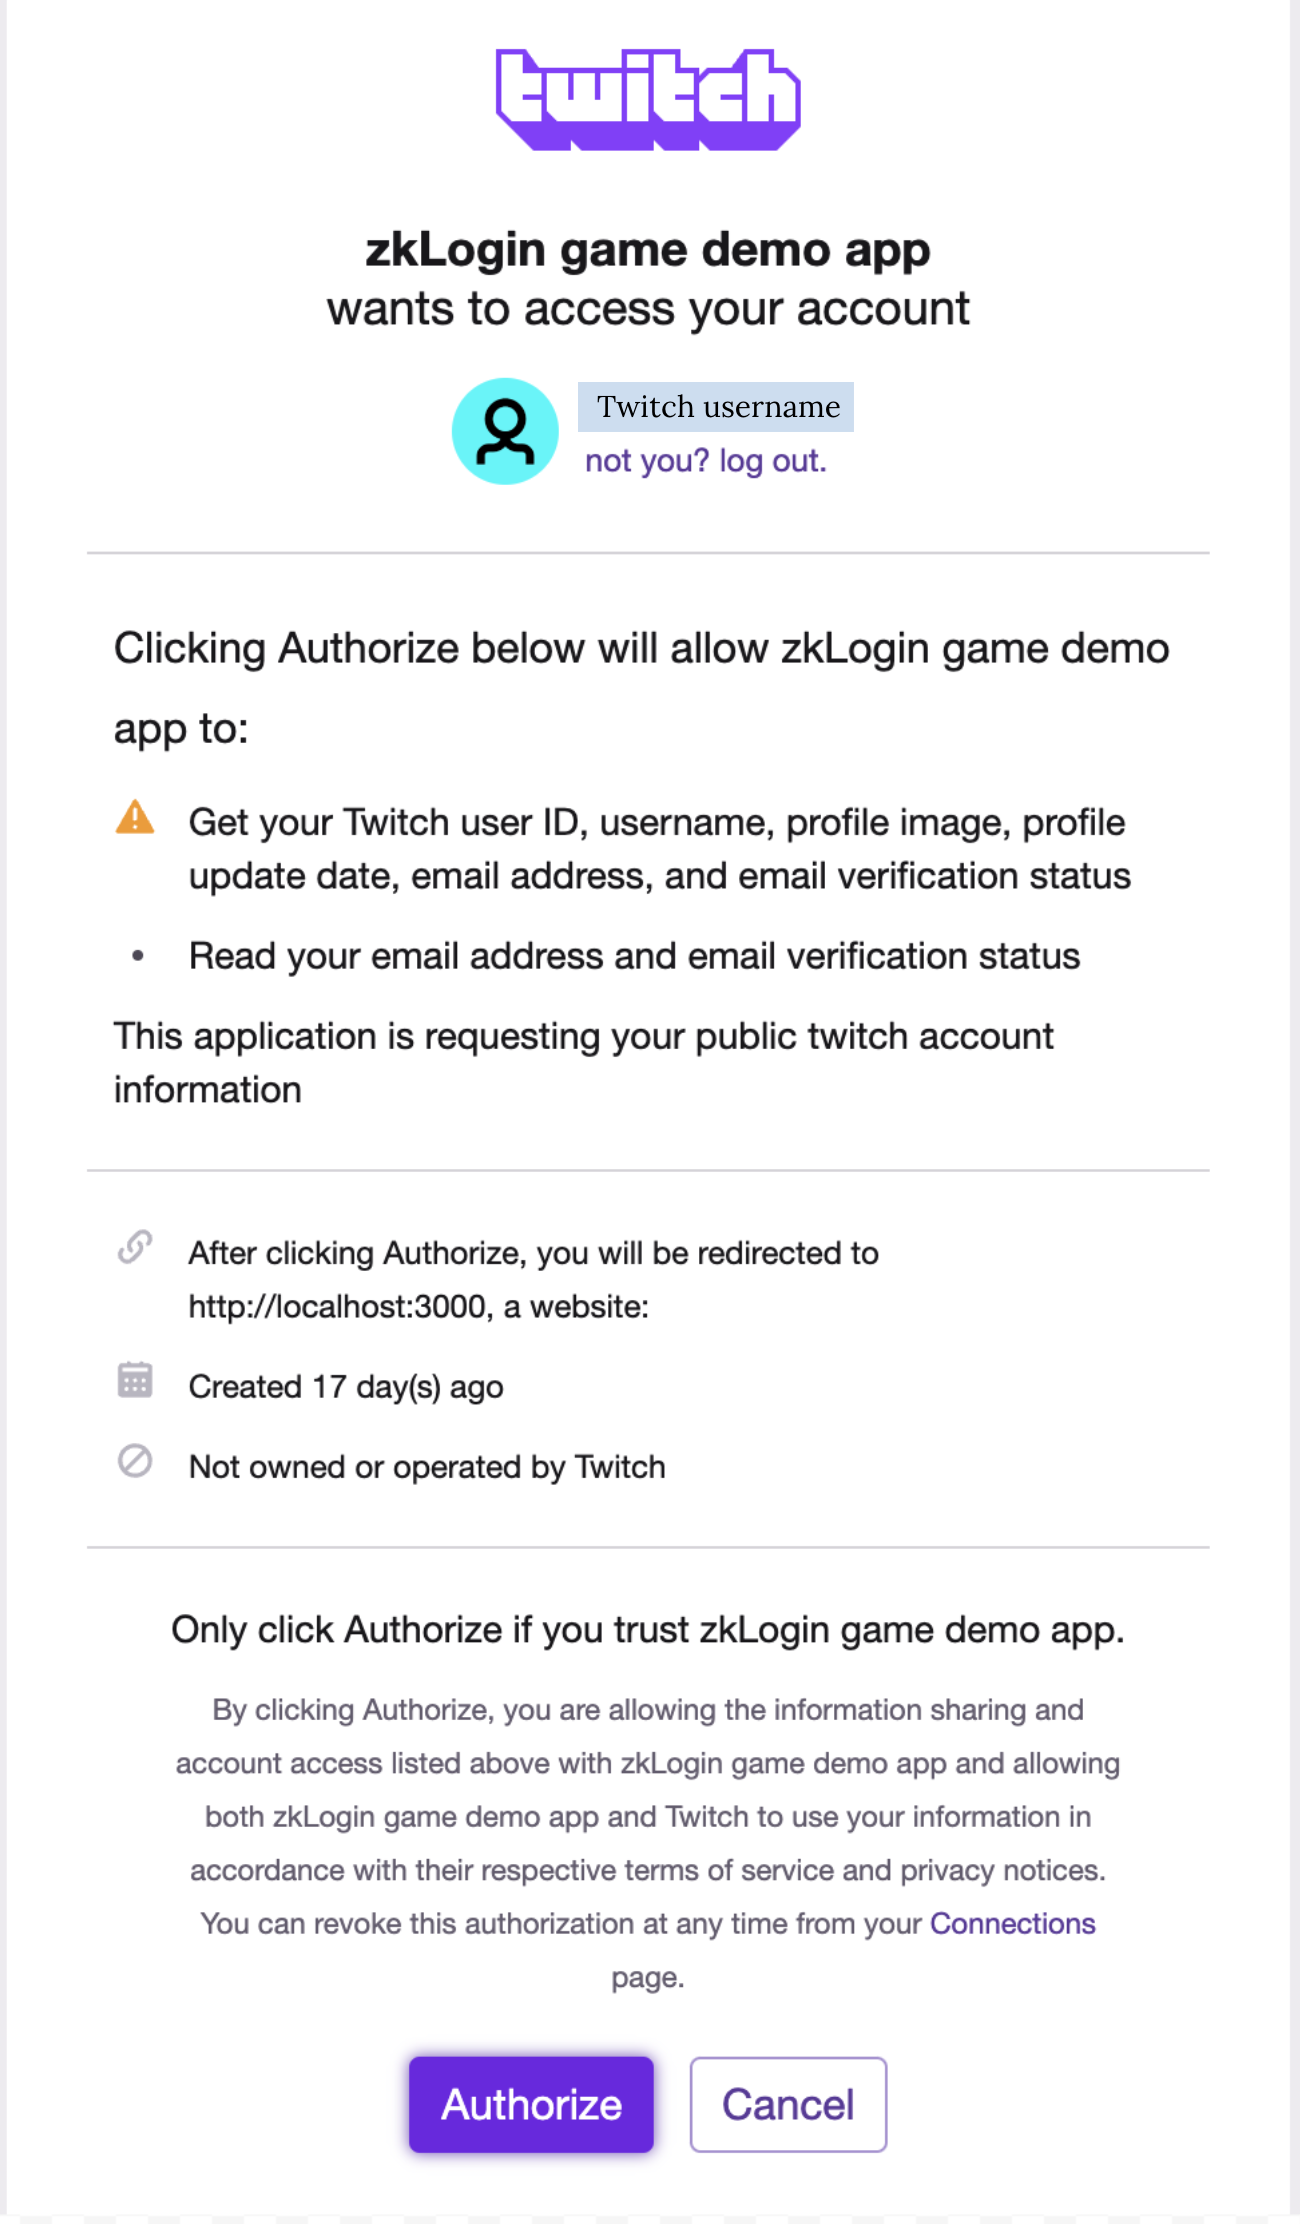
When you start the sign-in flow, the front end [generates a new ephemeral KeyPair for this OAuth session](https://github.com/shinamicorp/shinami-typescript-sdk/blob/951cdfeb9494f950506df2dff961583f542096c7/packages/nextjs-zklogin/src/client/hooks/login.ts#L29) . The KeyPair's public key will be used as part of generating the nonce sent to the OAuth provider, as explained in [the Sui Foundation's zkLogin doc](https://docs.sui.io/concepts/cryptography/zklogin#get-jwt-token). I chose "Sign in with Twitch", so on the next screen I see the following and will click "Authorize".
### A note on zkLogin addresses
You'll have the a unique zkLogin wallet address for each `(OpenIdProvider,username)` pair you log into the app with, for example `(Google,fake@gmail.com)`. Signing in with a different combination will create a different address (see more info on what makes up a zkLogin address in our [zkLogin wallet API doc](/api-docs/sui/wallet-services/zklogin-wallet-api#zklogin-addresses) ).
Now, go ahead and log in.
When you start the sign-in flow, the front end [generates a new ephemeral KeyPair for this OAuth session](https://github.com/shinamicorp/shinami-typescript-sdk/blob/951cdfeb9494f950506df2dff961583f542096c7/packages/nextjs-zklogin/src/client/hooks/login.ts#L29) . The KeyPair's public key will be used as part of generating the nonce sent to the OAuth provider, as explained in [the Sui Foundation's zkLogin doc](https://docs.sui.io/concepts/cryptography/zklogin#get-jwt-token). I chose "Sign in with Twitch", so on the next screen I see the following and will click "Authorize".
 Once you authorize, you'll see that the game is "chugging along":
 Here, the backend is [making a request](https://github.com/shinamicorp/shinami-typescript-sdk/blob/951cdfeb9494f950506df2dff961583f542096c7/packages/nextjs-zklogin/src/server/providers.ts#L52) to the [shinami\_zkw\_getOrCreateZkLoginWallet](/api-docs/sui/wallet-services/zklogin-wallet-api#zklogin-wallet-service-methods) method of our zkLogin wallet API. This will generate a new salt if this is a new wallet, or fetch the salt if this is a pre-existing wallet (i.e. if the same `(user,OpenIdProvider)` pair has logged in before. The salt is used in conjunction with elements from the OpenID Connect flow's JWT in order to uniquely identify a [zkLogin wallet's address](/api-docs/sui/wallet-services/zklogin-wallet-api#zklogin-addresses), and is also used to prevent the OpenID provider from generating the address on their own and acting on the user's behalf.
The backend also [makes a request](https://github.com/shinamicorp/shinami-typescript-sdk/blob/951cdfeb9494f950506df2dff961583f542096c7/packages/nextjs-zklogin/src/server/providers.ts#L81) to the [shinami\_zkp\_createZkLoginProof](/api-docs/sui/wallet-services/zklogin-wallet-api#zkprover-service-methods) method of our zkLogin wallet API in order to generate a zkProof proving that the ephemeral KeyPair has the right to sign transactions for the zkLogin wallet address. Proof generation is only required once per new ephemeral KeyPair. These KeyPairs expire after the current epoch passes the maxEpoch value you explicitly set and use in the nonce sent to the OpenID provider. Our implementation uses the default of our nextjs-zklogin template, which is current [epoch + 1](https://github.com/shinamicorp/shinami-typescript-sdk/blob/951cdfeb9494f950506df2dff961583f542096c7/packages/nextjs-zklogin/src/client/components/login.tsx#L58) . For more information on caching KeyPairs and zkProofs, [see the Sui Foundation's zkLogin doc](https://docs.sui.io/concepts/cryptography/zklogin#caching-the-ephemeral-private-key-and-zk-proof).
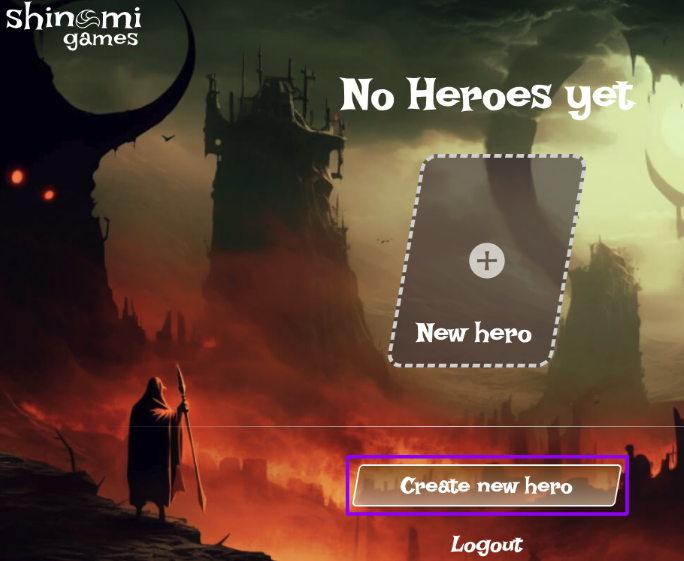
Now, you can create a hero! Go ahead and do that by clicking "Create new hero".
Here, the backend is [making a request](https://github.com/shinamicorp/shinami-typescript-sdk/blob/951cdfeb9494f950506df2dff961583f542096c7/packages/nextjs-zklogin/src/server/providers.ts#L52) to the [shinami\_zkw\_getOrCreateZkLoginWallet](/api-docs/sui/wallet-services/zklogin-wallet-api#zklogin-wallet-service-methods) method of our zkLogin wallet API. This will generate a new salt if this is a new wallet, or fetch the salt if this is a pre-existing wallet (i.e. if the same `(user,OpenIdProvider)` pair has logged in before. The salt is used in conjunction with elements from the OpenID Connect flow's JWT in order to uniquely identify a [zkLogin wallet's address](/api-docs/sui/wallet-services/zklogin-wallet-api#zklogin-addresses), and is also used to prevent the OpenID provider from generating the address on their own and acting on the user's behalf.
The backend also [makes a request](https://github.com/shinamicorp/shinami-typescript-sdk/blob/951cdfeb9494f950506df2dff961583f542096c7/packages/nextjs-zklogin/src/server/providers.ts#L81) to the [shinami\_zkp\_createZkLoginProof](/api-docs/sui/wallet-services/zklogin-wallet-api#zkprover-service-methods) method of our zkLogin wallet API in order to generate a zkProof proving that the ephemeral KeyPair has the right to sign transactions for the zkLogin wallet address. Proof generation is only required once per new ephemeral KeyPair. These KeyPairs expire after the current epoch passes the maxEpoch value you explicitly set and use in the nonce sent to the OpenID provider. Our implementation uses the default of our nextjs-zklogin template, which is current [epoch + 1](https://github.com/shinamicorp/shinami-typescript-sdk/blob/951cdfeb9494f950506df2dff961583f542096c7/packages/nextjs-zklogin/src/client/components/login.tsx#L58) . For more information on caching KeyPairs and zkProofs, [see the Sui Foundation's zkLogin doc](https://docs.sui.io/concepts/cryptography/zklogin#caching-the-ephemeral-private-key-and-zk-proof).
Now, you can create a hero! Go ahead and do that by clicking "Create new hero".
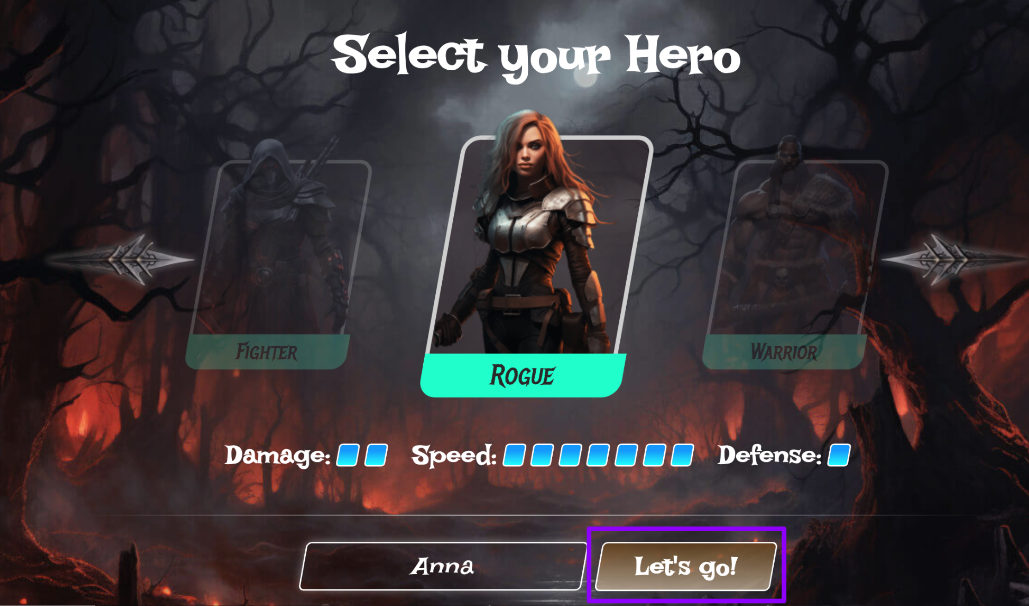
 Next, select a hero type, enter a name, and click "Let's go!".
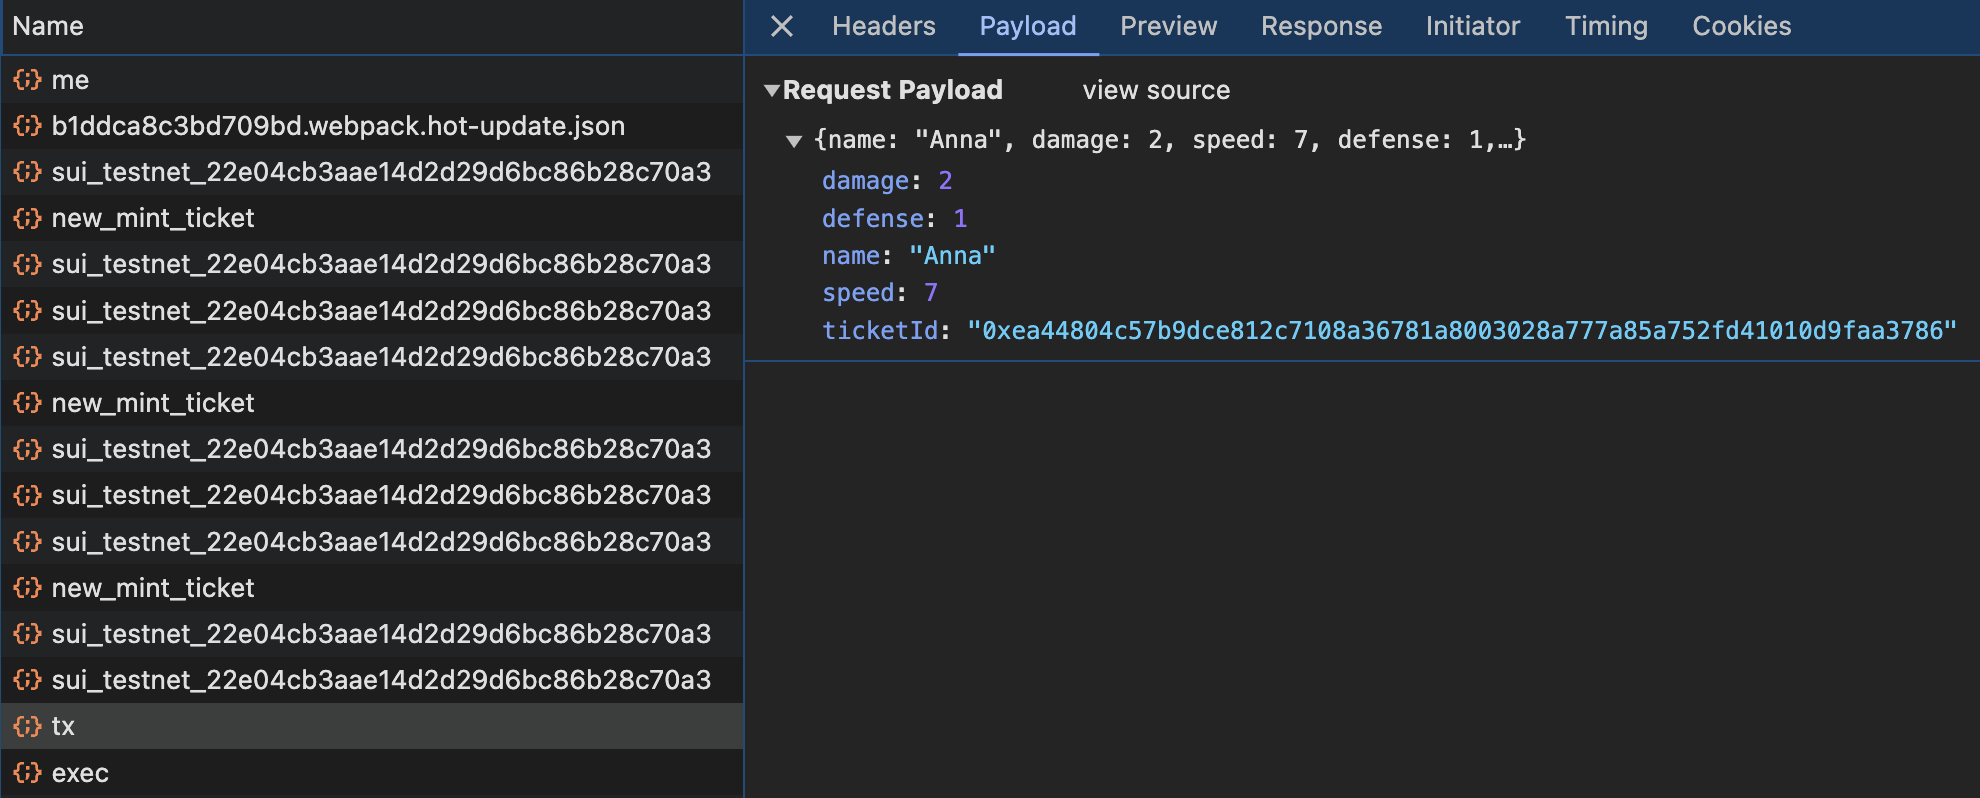
 When you create a hero, a few steps happen behind the scenes. In order for a user to be allowed to mint a specific hero, the admin wallet, implemented as a backend [Shinami Invisible Wallet](/api-docs/sui/wallet-services/invisible-wallet-api), executes a transaction that calls a [Move function](https://github.com/shinamicorp/shinami-demo-app/blob/39ddbef2968e554afca86a5cd6eb4778343c940a/move/sources/hero.move#L162) that creates a `hero::MintTicket` and transfers it to the player’s zkLogin wallet. When minting is initiated, the frontend [makes a request](https://github.com/shinamicorp/shinami-demo-app/blob/main/pages/heroes/new.tsx#L130) to the [`/api/heroes/mint/tx` endpoint](https://github.com/shinamicorp/shinami-demo-app/blob/main/lib/hooks/api.ts#L86) with the attributes of the hero that will be used in the Move function call.
*
When you create a hero, a few steps happen behind the scenes. In order for a user to be allowed to mint a specific hero, the admin wallet, implemented as a backend [Shinami Invisible Wallet](/api-docs/sui/wallet-services/invisible-wallet-api), executes a transaction that calls a [Move function](https://github.com/shinamicorp/shinami-demo-app/blob/39ddbef2968e554afca86a5cd6eb4778343c940a/move/sources/hero.move#L162) that creates a `hero::MintTicket` and transfers it to the player’s zkLogin wallet. When minting is initiated, the frontend [makes a request](https://github.com/shinamicorp/shinami-demo-app/blob/main/pages/heroes/new.tsx#L130) to the [`/api/heroes/mint/tx` endpoint](https://github.com/shinamicorp/shinami-demo-app/blob/main/lib/hooks/api.ts#L86) with the attributes of the hero that will be used in the Move function call.
*
 Then, the app backend [builds the gasless transaction bytes](https://github.com/shinamicorp/shinami-demo-app/blob/main/pages/api/heroes/mint/%5B...api%5D.ts#L23) and [sponsors it using your Gas Station fund](https://github.com/shinamicorp/shinami-typescript-sdk/blob/951cdfeb9494f950506df2dff961583f542096c7/packages/nextjs-zklogin/src/server/pages/tx.ts#L63) , drawing from the Testnet fund linked to your access key with Gas Station rights.
The frontend then [signs](https://github.com/shinamicorp/shinami-typescript-sdk/blob/951cdfeb9494f950506df2dff961583f542096c7/packages/nextjs-zklogin/src/client/hooks/tx.ts#L45) the sponsored transaction using the user’s ephemeral KeyPair (for security purposes, the ephemeral KeyPair should remain on the frontend). Finally, the backend [assembles the zkLogin signature](https://github.com/shinamicorp/shinami-typescript-sdk/blob/951cdfeb9494f950506df2dff961583f542096c7/packages/nextjs-zklogin/src/server/pages/tx.ts#L101) using the zkProof and the ephemeral KeyPair signature and then submits the transaction to the chain for execution using Shinami’s Node Service. For a helpful image of the full zkLogin flow, see the [Sui Foundation's zkLogin doc](https://docs.sui.io/concepts/cryptography/zklogin#the-complete-zklogin-flow).
The Move package function called to mint a hero is [`mint_hero_to_recipient`](https://github.com/shinamicorp/shinami-demo-app/blob/39ddbef2968e554afca86a5cd6eb4778343c940a/move/sources/hero.move#L246). First, it calls the `mint_hero` function, which takes a `hero::MintTicket` and destroys it in exchange for a hero. Then, it transfers that hero to the sender's wallet (the zkLogin wallet of the player).
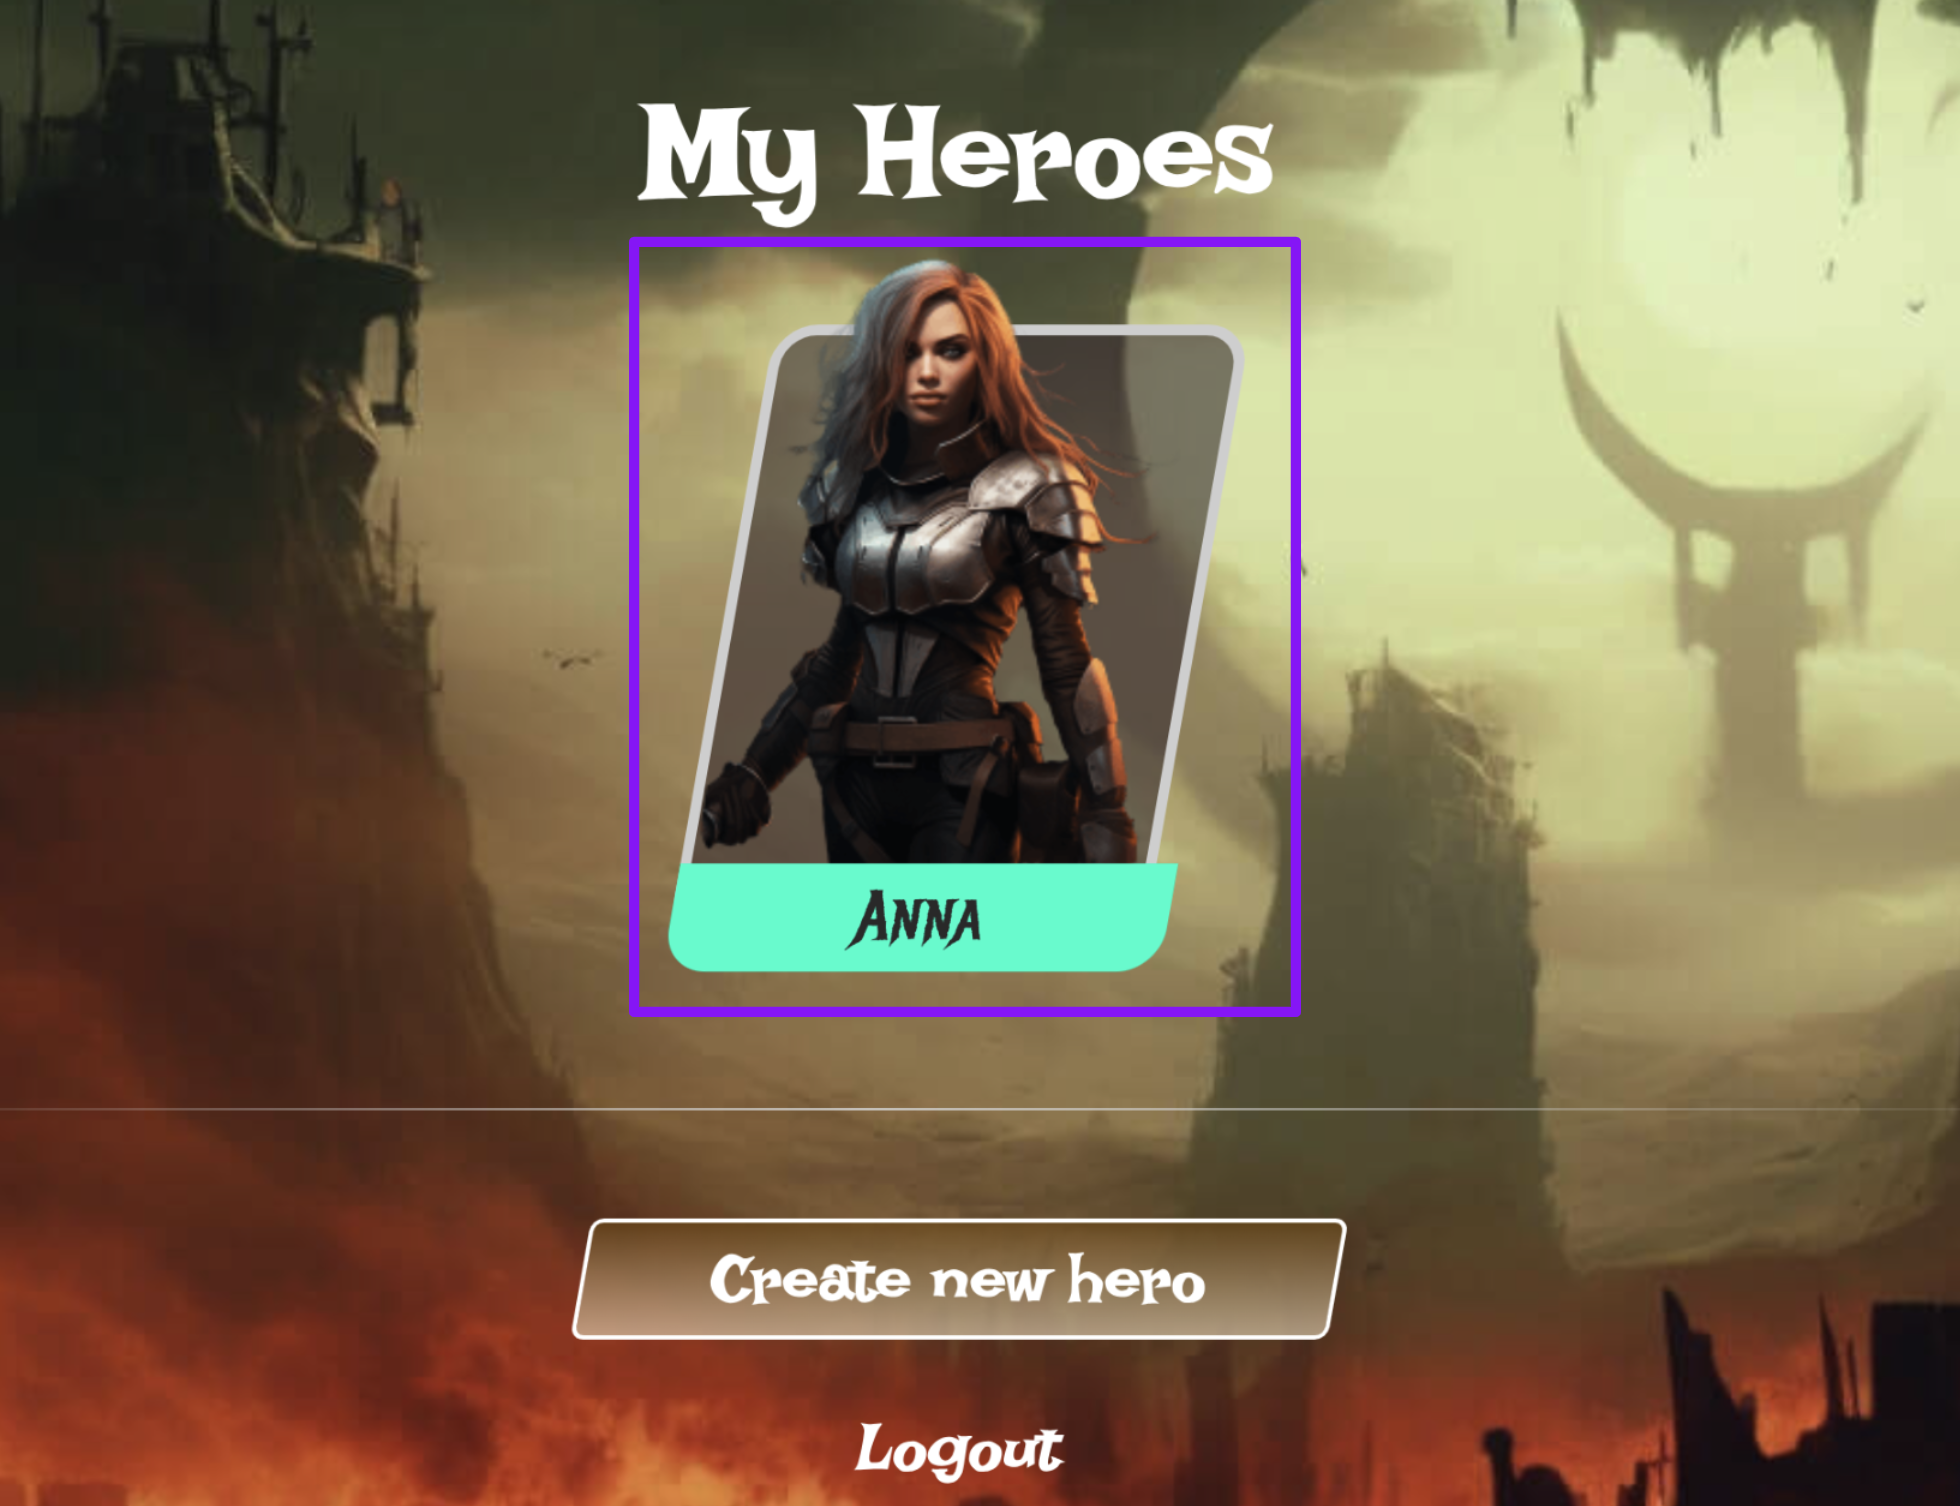
Once your hero has been created, click on the hero's image to visit their details page.
Then, the app backend [builds the gasless transaction bytes](https://github.com/shinamicorp/shinami-demo-app/blob/main/pages/api/heroes/mint/%5B...api%5D.ts#L23) and [sponsors it using your Gas Station fund](https://github.com/shinamicorp/shinami-typescript-sdk/blob/951cdfeb9494f950506df2dff961583f542096c7/packages/nextjs-zklogin/src/server/pages/tx.ts#L63) , drawing from the Testnet fund linked to your access key with Gas Station rights.
The frontend then [signs](https://github.com/shinamicorp/shinami-typescript-sdk/blob/951cdfeb9494f950506df2dff961583f542096c7/packages/nextjs-zklogin/src/client/hooks/tx.ts#L45) the sponsored transaction using the user’s ephemeral KeyPair (for security purposes, the ephemeral KeyPair should remain on the frontend). Finally, the backend [assembles the zkLogin signature](https://github.com/shinamicorp/shinami-typescript-sdk/blob/951cdfeb9494f950506df2dff961583f542096c7/packages/nextjs-zklogin/src/server/pages/tx.ts#L101) using the zkProof and the ephemeral KeyPair signature and then submits the transaction to the chain for execution using Shinami’s Node Service. For a helpful image of the full zkLogin flow, see the [Sui Foundation's zkLogin doc](https://docs.sui.io/concepts/cryptography/zklogin#the-complete-zklogin-flow).
The Move package function called to mint a hero is [`mint_hero_to_recipient`](https://github.com/shinamicorp/shinami-demo-app/blob/39ddbef2968e554afca86a5cd6eb4778343c940a/move/sources/hero.move#L246). First, it calls the `mint_hero` function, which takes a `hero::MintTicket` and destroys it in exchange for a hero. Then, it transfers that hero to the sender's wallet (the zkLogin wallet of the player).
Once your hero has been created, click on the hero's image to visit their details page.
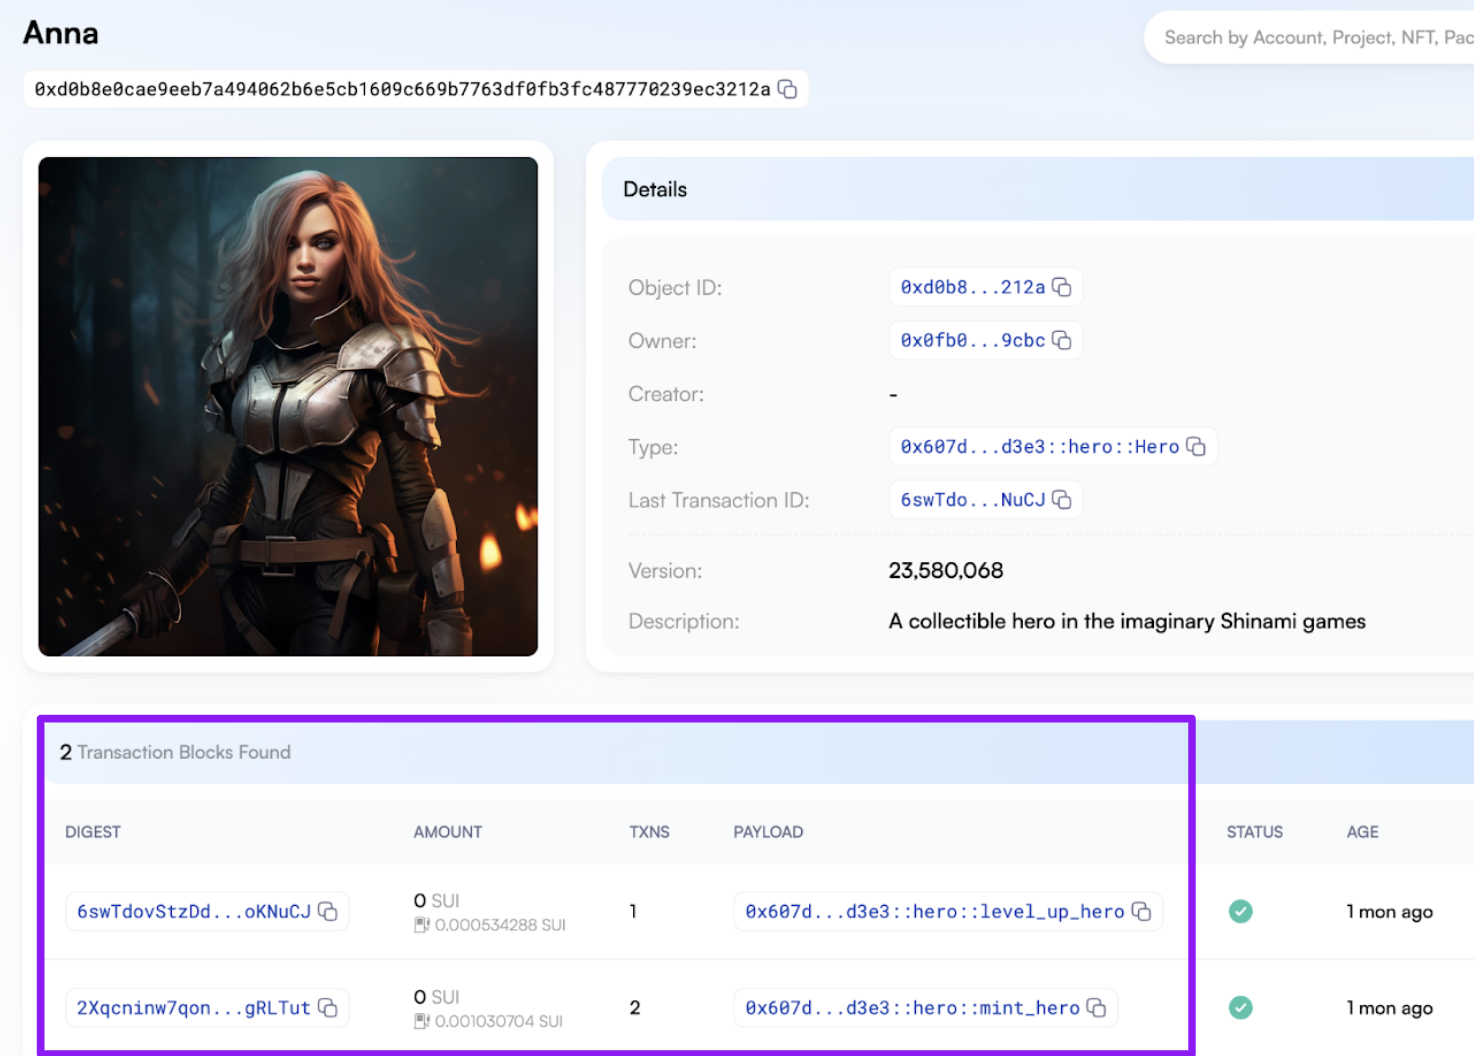
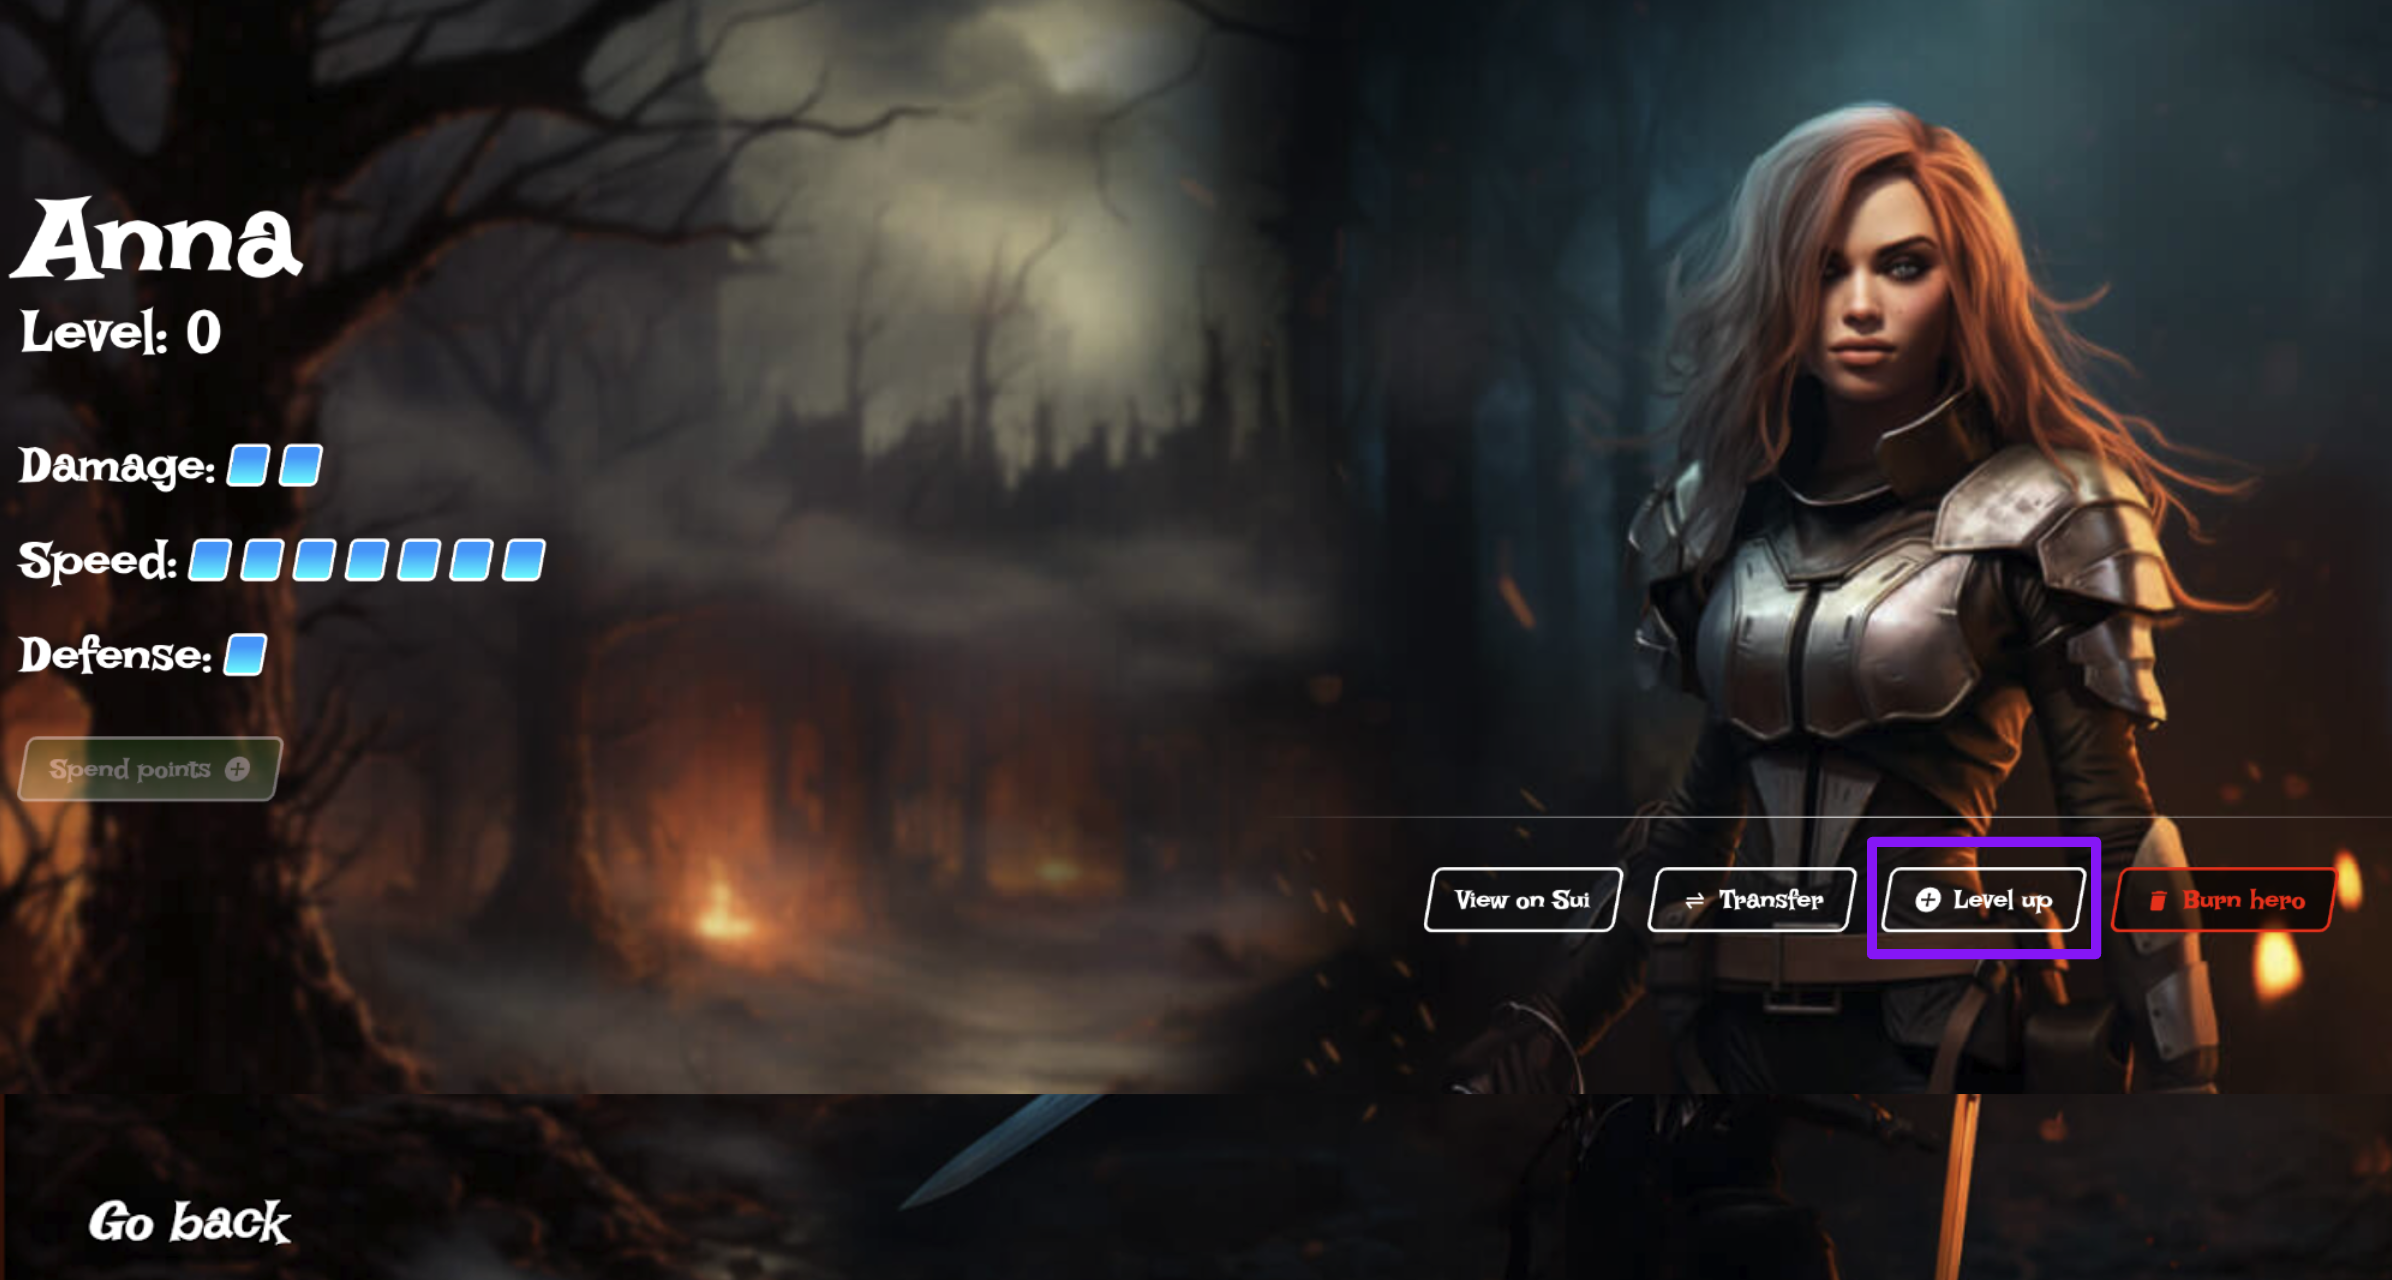
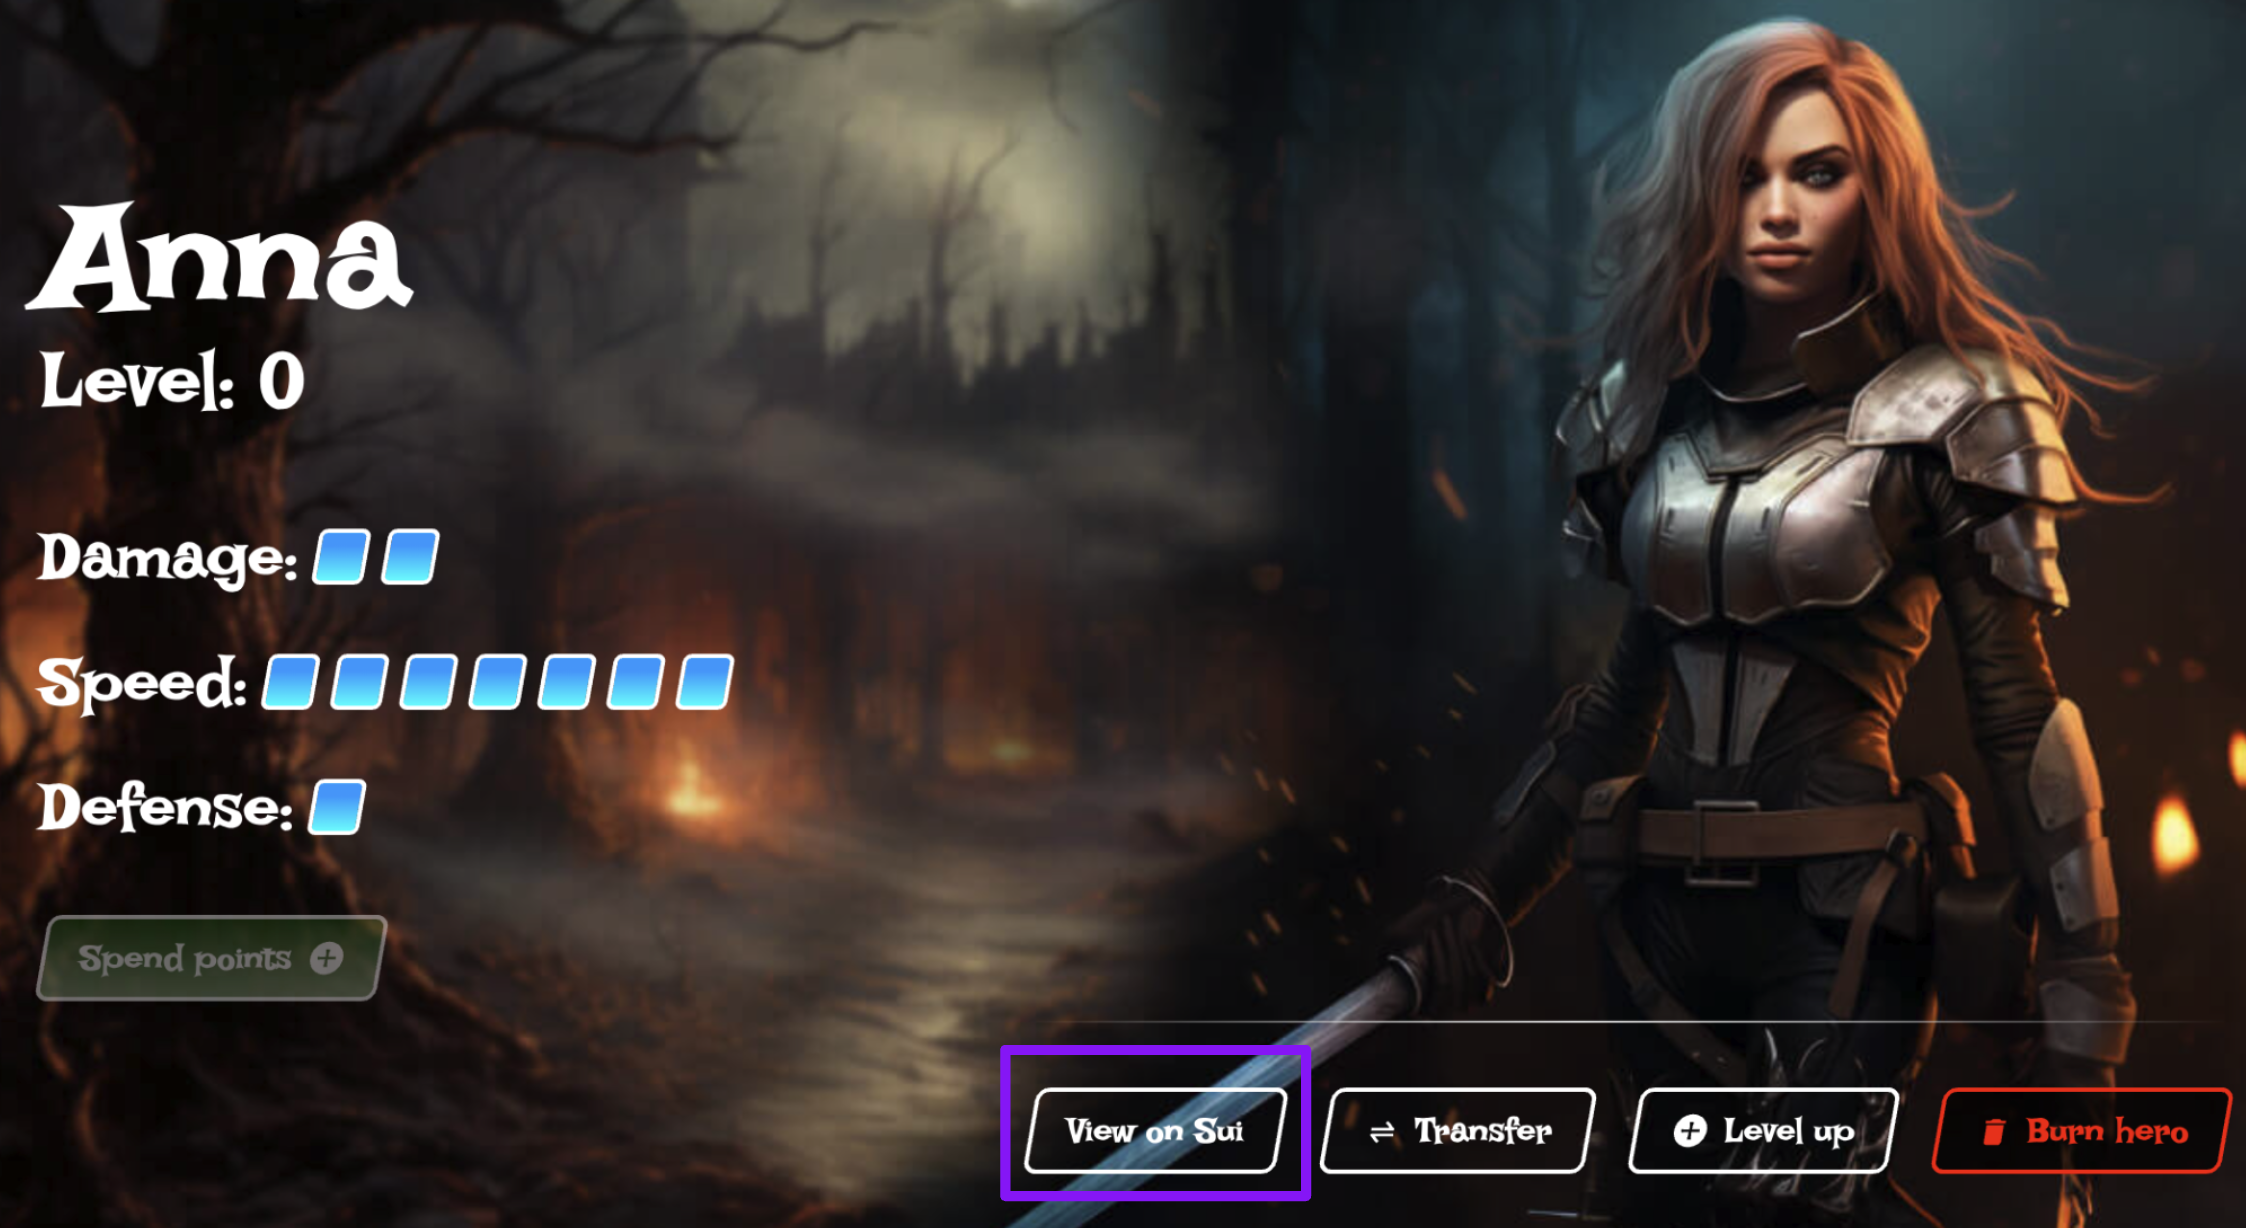 As you can see in the lower right, we have multiple operations like transfer the NFT to another wallet, level up the character's skills, or burn the NFT. Go ahead and click on "View on Sui". It takes you to the SuiVision explorer so you can see [how the hero is represented on chain](https://testnet.suivision.xyz/nft/object/0xd0b8e0cae9eeb7a494062b6e5cb1609c669b7763df0fb3fc487770239ec3212a), including the transactions that minted and updated the hero NFT:
 Click around and investigate!
## Explore further
Now that we've walked through minting, we encourage you to further explore the Next.js code, the Move code, and the way that creating, updating, and deleting heroes is represented on chain. One good place to start is by going back to your hero and leveling up their skills. First, take a look at the [Move code that creates and transfers a `hero::LevelUpTicket`](https://github.com/shinamicorp/shinami-demo-app/blob/39ddbef2968e554afca86a5cd6eb4778343c940a/move/sources/hero.move#L193). Then, take a look at the [`level_up_hero` function](https://github.com/shinamicorp/shinami-demo-app/blob/39ddbef2968e554afca86a5cd6eb4778343c940a/move/sources/hero.move#L262) that takes that ticket, destroys it, and levels up a hero. Now, level up your hero's stats, view the hero on chain, and look at the latest transaction!
Click "Level up" (and get issued a `hero::LevelUpTicket` from the admin wallet).
Click around and investigate!
## Explore further
Now that we've walked through minting, we encourage you to further explore the Next.js code, the Move code, and the way that creating, updating, and deleting heroes is represented on chain. One good place to start is by going back to your hero and leveling up their skills. First, take a look at the [Move code that creates and transfers a `hero::LevelUpTicket`](https://github.com/shinamicorp/shinami-demo-app/blob/39ddbef2968e554afca86a5cd6eb4778343c940a/move/sources/hero.move#L193). Then, take a look at the [`level_up_hero` function](https://github.com/shinamicorp/shinami-demo-app/blob/39ddbef2968e554afca86a5cd6eb4778343c940a/move/sources/hero.move#L262) that takes that ticket, destroys it, and levels up a hero. Now, level up your hero's stats, view the hero on chain, and look at the latest transaction!
Click "Level up" (and get issued a `hero::LevelUpTicket` from the admin wallet).
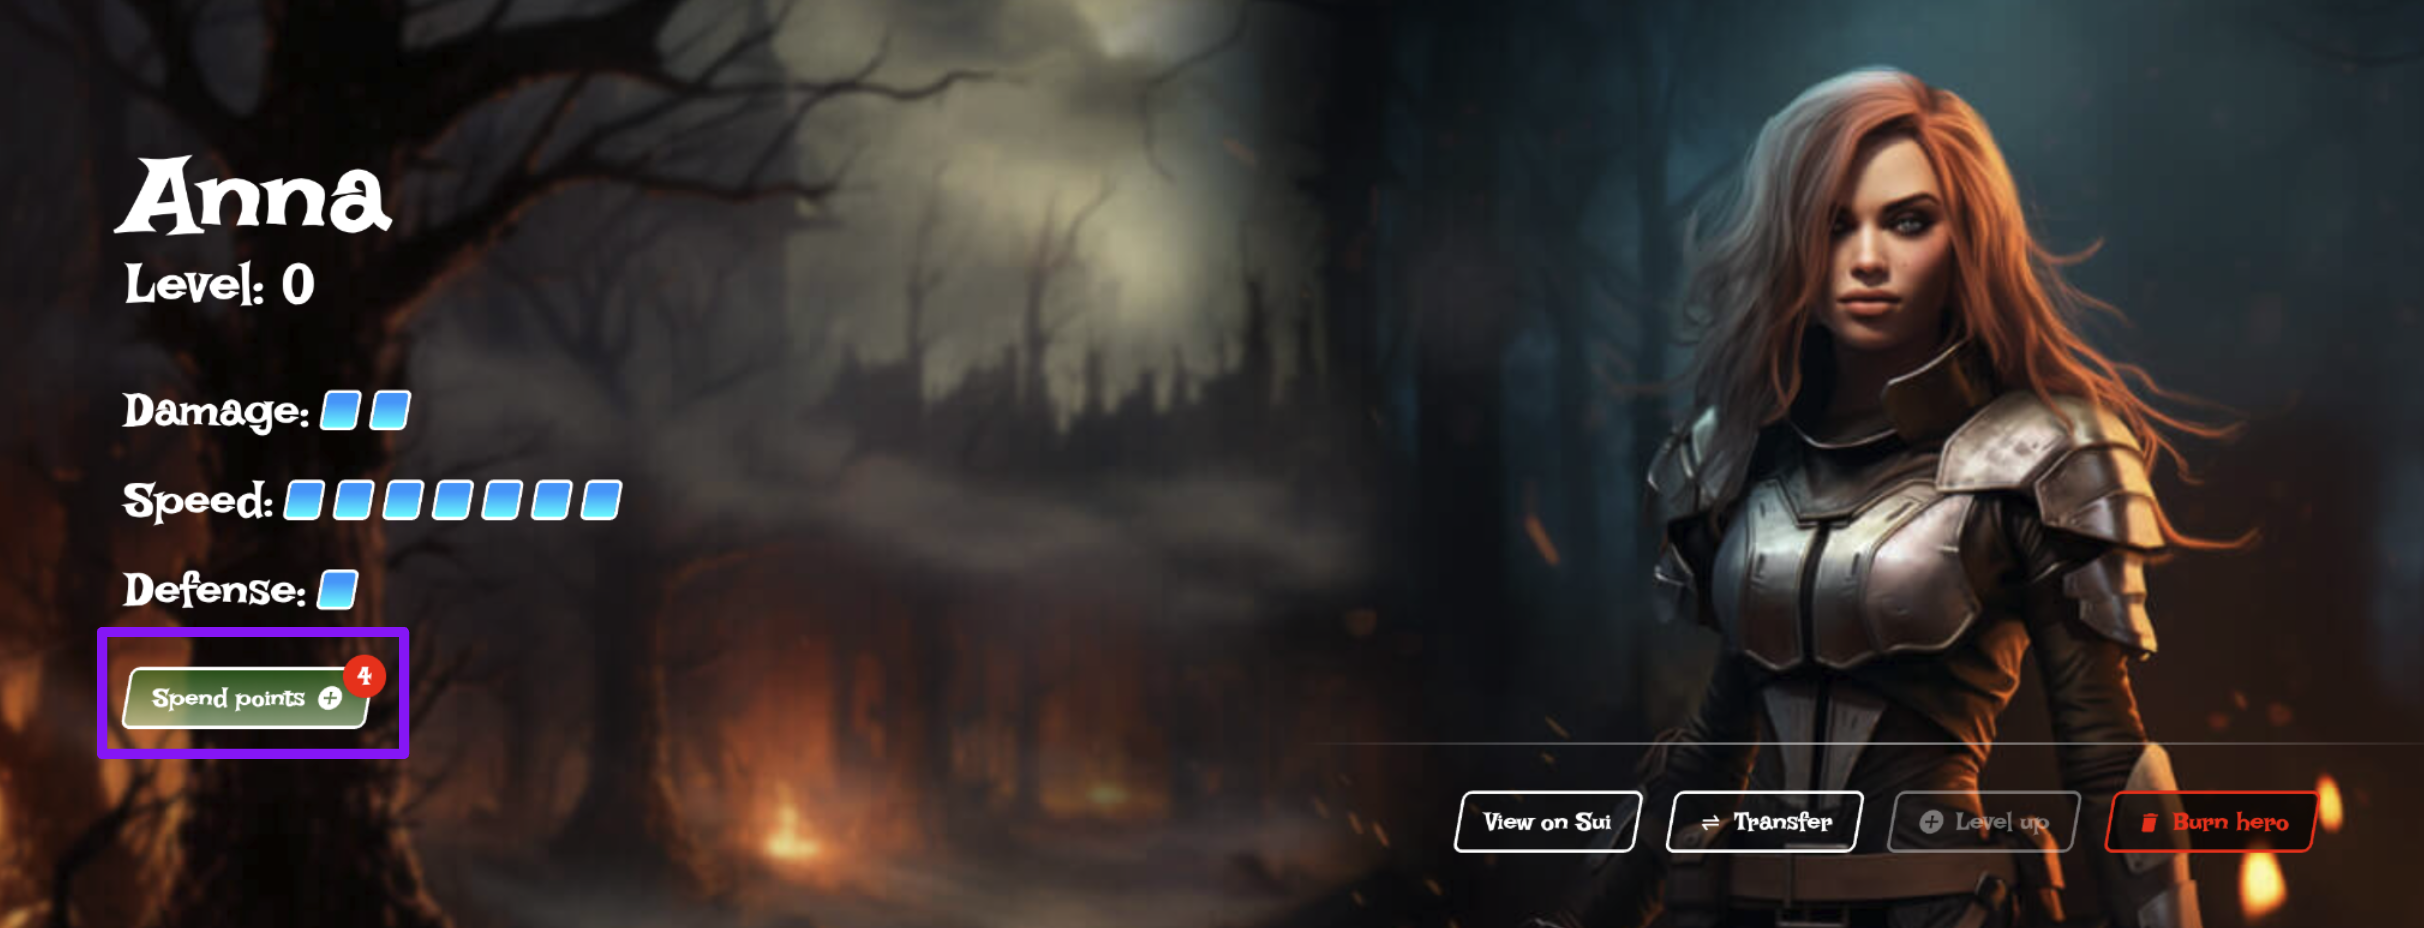
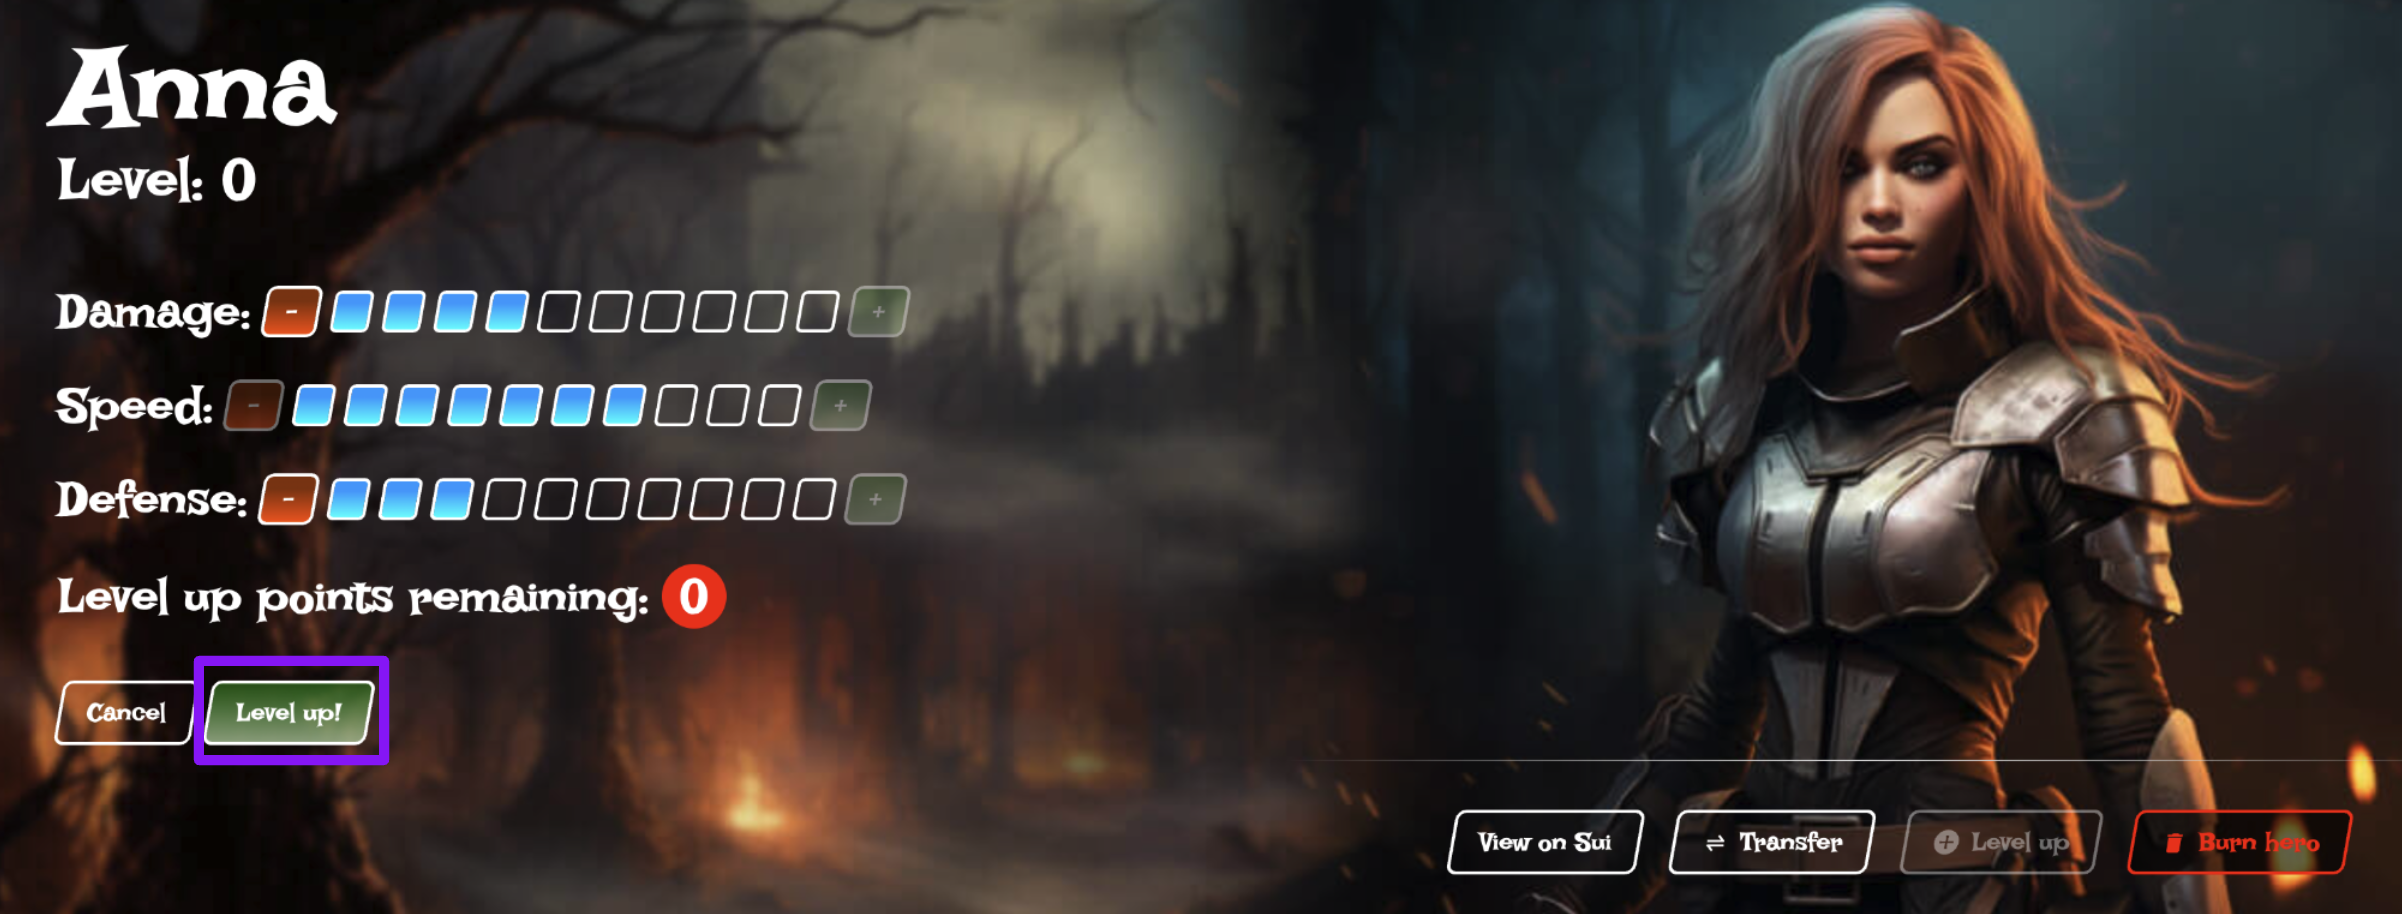
 Then click "Spend points" to open the skill editor:
 Spend all 4 level-up points by click on the `+`icons:
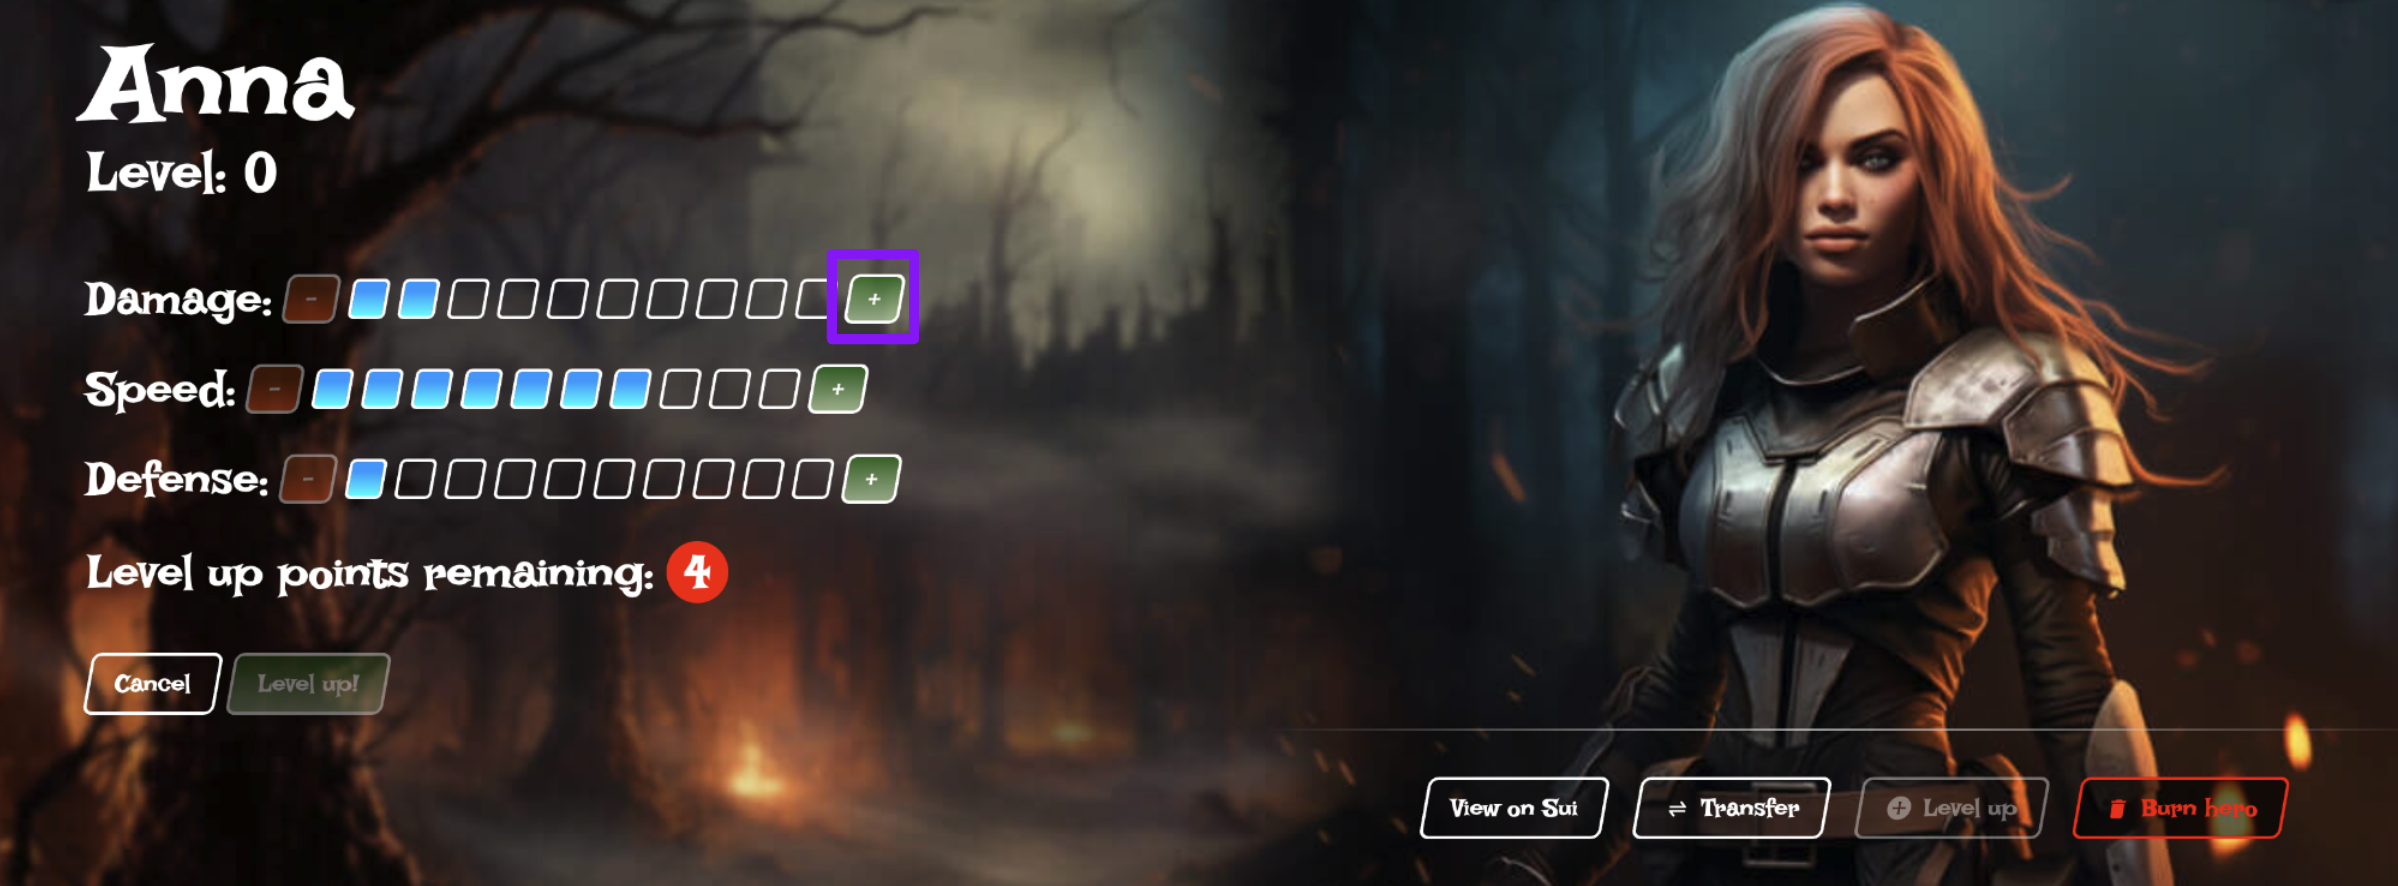 Next, click "Level up!" (here, the [`level_up_hero` Move function](https://github.com/shinamicorp/shinami-demo-app/blob/39ddbef2968e554afca86a5cd6eb4778343c940a/move/sources/hero.move#L262) is called).
 Finally, go view the hero's upgraded stats and the transaction that upgraded the hero in the SuiVision explorer just like we did when creating the hero.
## Conclusion and next steps
Now that you've had practice using zkLogin and sponsored transactions in an app, and deploying Move code that mints NFTs owned by zkLogin wallet addresses, we're excited to see what you build next!
If you want to integrate zkLogin wallets into your app, or get more practice, see:
* our [zkLogin wallet API](/api-docs/sui/wallet-services/zklogin-wallet-api)
* our [zkLogin wallet Next.js Tutorial](/developer-guides/sui/tutorials/zklogin-nextjs-app-template) to get some more production-ready zkLogin code running that you can use as a template to start an app.
If you want to integrate Shinami Invisible Wallets into your app, or get more practice, see:
* our [Invisible Wallet API](/api-docs/sui/wallet-services/invisible-wallet-api)
* our [Invisible Wallet TypeScript Tutorial](/developer-guides/sui/tutorials/invisible-wallets) for end-to-end examples
If you want to integrate sponsored transactions into your app, or get more practice, see:
* our [Gas Station API](/api-docs/sui/gas-station/api)
* our [Sponsored Transaction TypeScript Tutorial](/developer-guides/sui/tutorials/gas-station-backend-only) for end-to-end examples
Finally, go view the hero's upgraded stats and the transaction that upgraded the hero in the SuiVision explorer just like we did when creating the hero.
## Conclusion and next steps
Now that you've had practice using zkLogin and sponsored transactions in an app, and deploying Move code that mints NFTs owned by zkLogin wallet addresses, we're excited to see what you build next!
If you want to integrate zkLogin wallets into your app, or get more practice, see:
* our [zkLogin wallet API](/api-docs/sui/wallet-services/zklogin-wallet-api)
* our [zkLogin wallet Next.js Tutorial](/developer-guides/sui/tutorials/zklogin-nextjs-app-template) to get some more production-ready zkLogin code running that you can use as a template to start an app.
If you want to integrate Shinami Invisible Wallets into your app, or get more practice, see:
* our [Invisible Wallet API](/api-docs/sui/wallet-services/invisible-wallet-api)
* our [Invisible Wallet TypeScript Tutorial](/developer-guides/sui/tutorials/invisible-wallets) for end-to-end examples
If you want to integrate sponsored transactions into your app, or get more practice, see:
* our [Gas Station API](/api-docs/sui/gas-station/api)
* our [Sponsored Transaction TypeScript Tutorial](/developer-guides/sui/tutorials/gas-station-backend-only) for end-to-end examples